
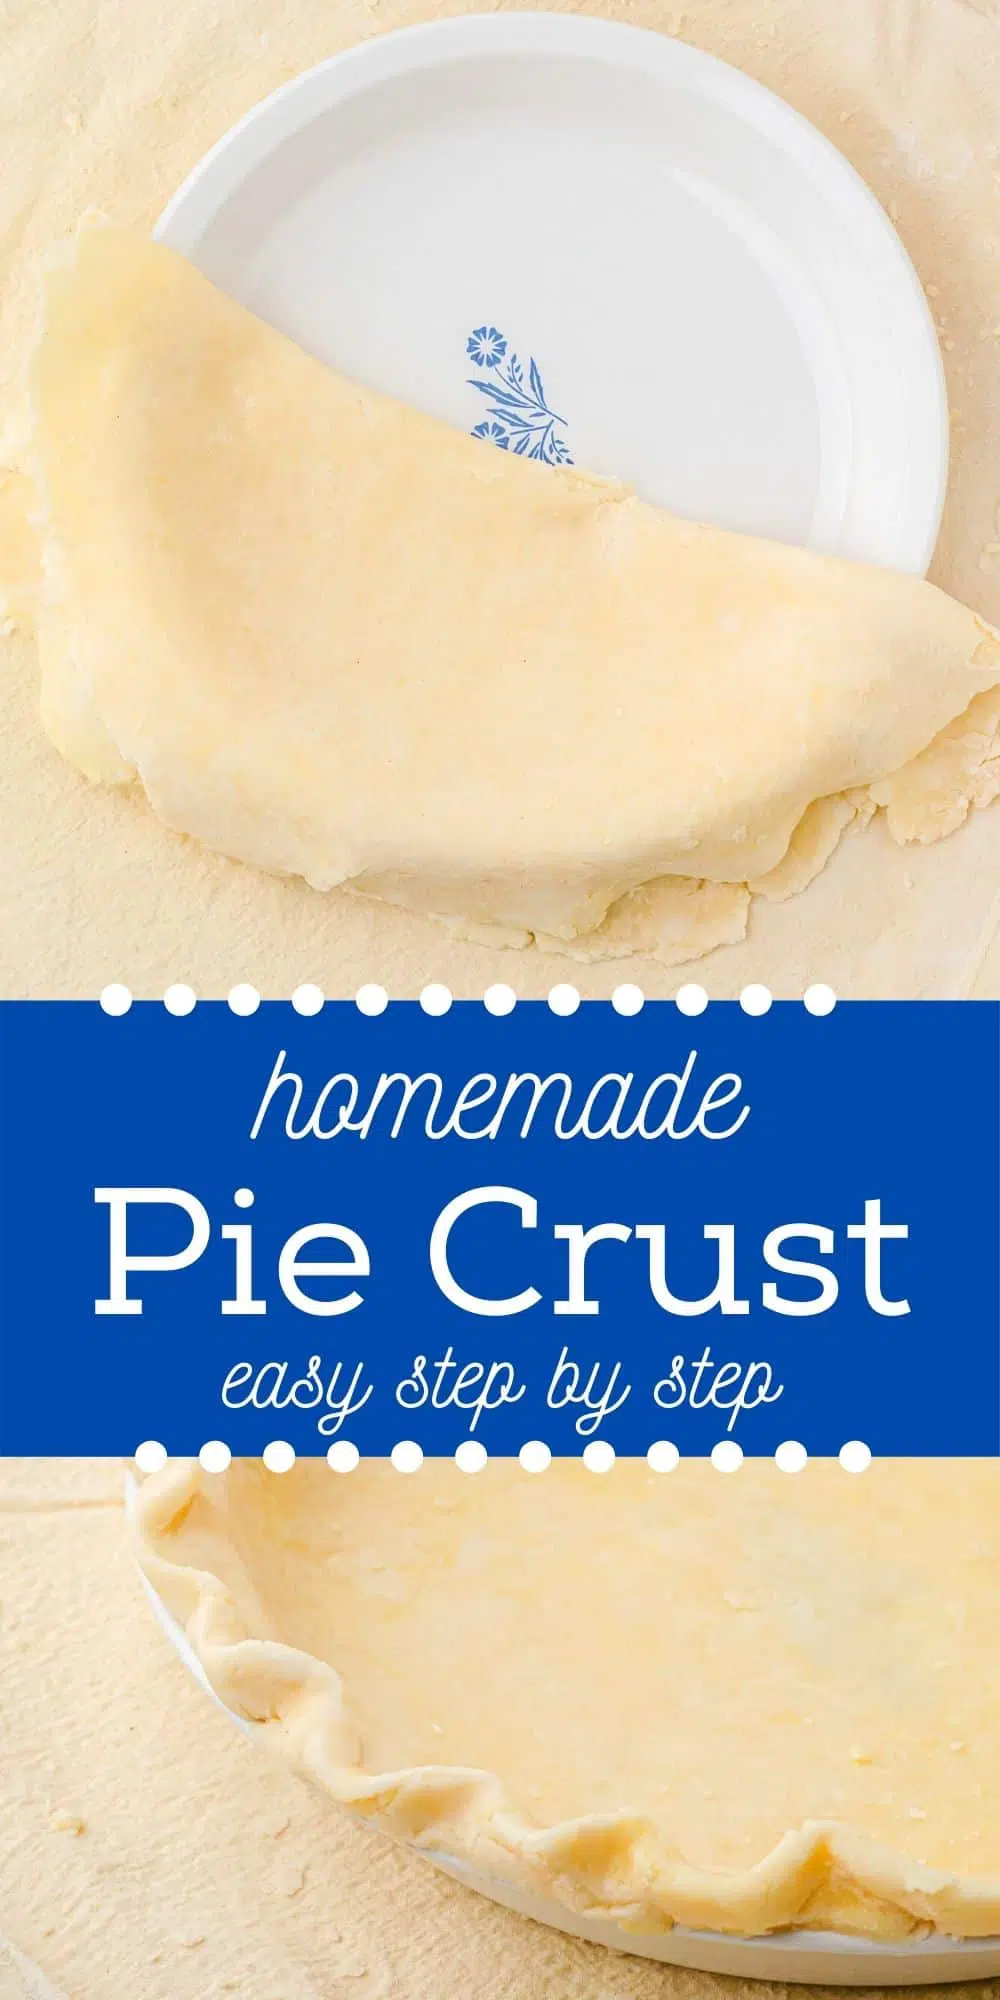
How to Make Pie Crust from Scratch
Learn the simple steps to make a tenderflake pie crust from scratch using the recipe on the side of the box of Tenderflake lard!
There’s nothing quite like a homemade pie crust made from scratch. Although there’s always the quick and easy store-bought option, sometimes it’s special to make a pie crust the old-fashioned way!
My mom loved to bake pies, and always started hers with a pie crust recipe from scratch. Since I want to start a series with her old-fashioned pie recipes, I thought it only fitting to start it with the perfect base – a tender flake pie crust!
Homemade Pie Crust Recipe Easy Enough for Beginners
Disclosure: This post contains affiliate links for your shopping convenience.
Ingredients you’ll need for this recipe that makes 6 pie crusts:
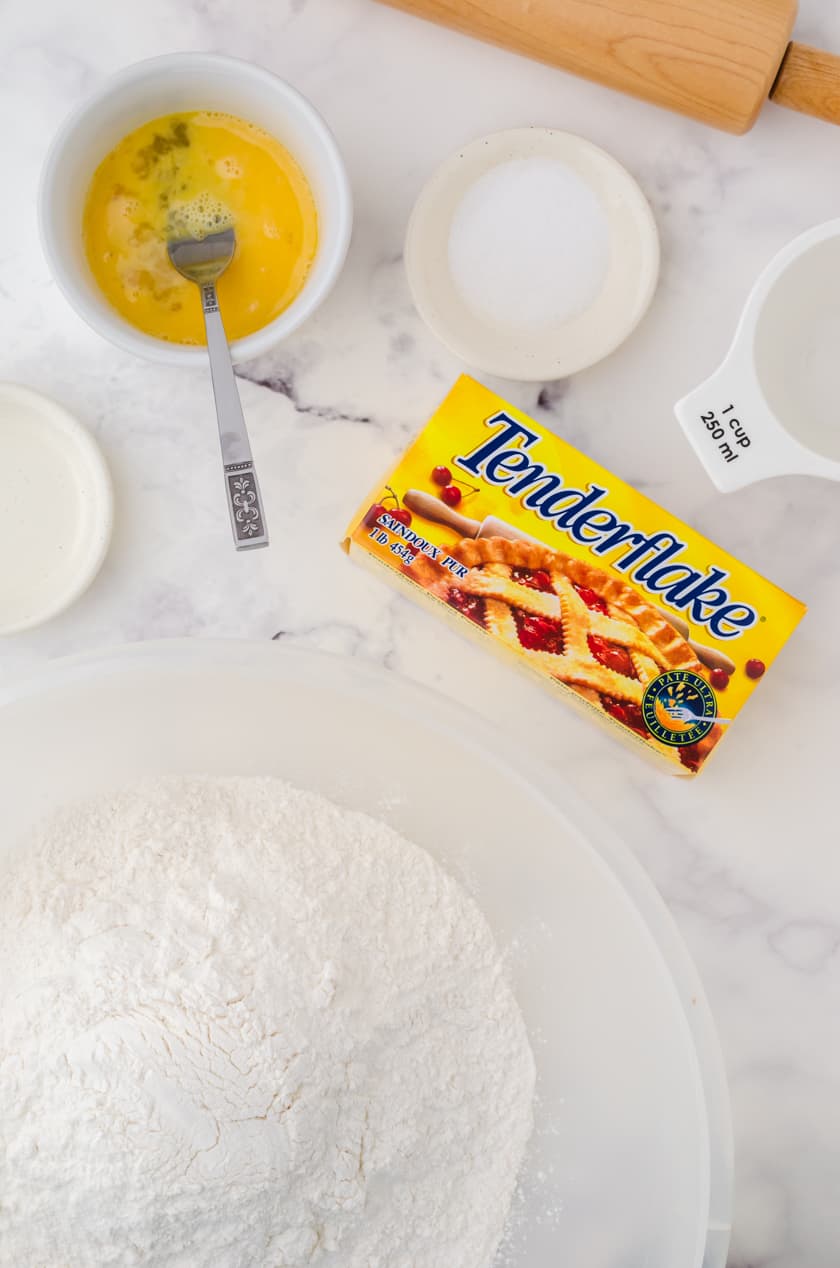
- 5 1/2 cups all purpose flour
- 2 tsp. salt
- 1 pound Tenderflake lard (or lard of your choice)
- 1 Tablespoon vinegar
- 1 egg, lightly beaten
- very cold water
Step 1: Stir together flour and salt in a large mixing bowl.
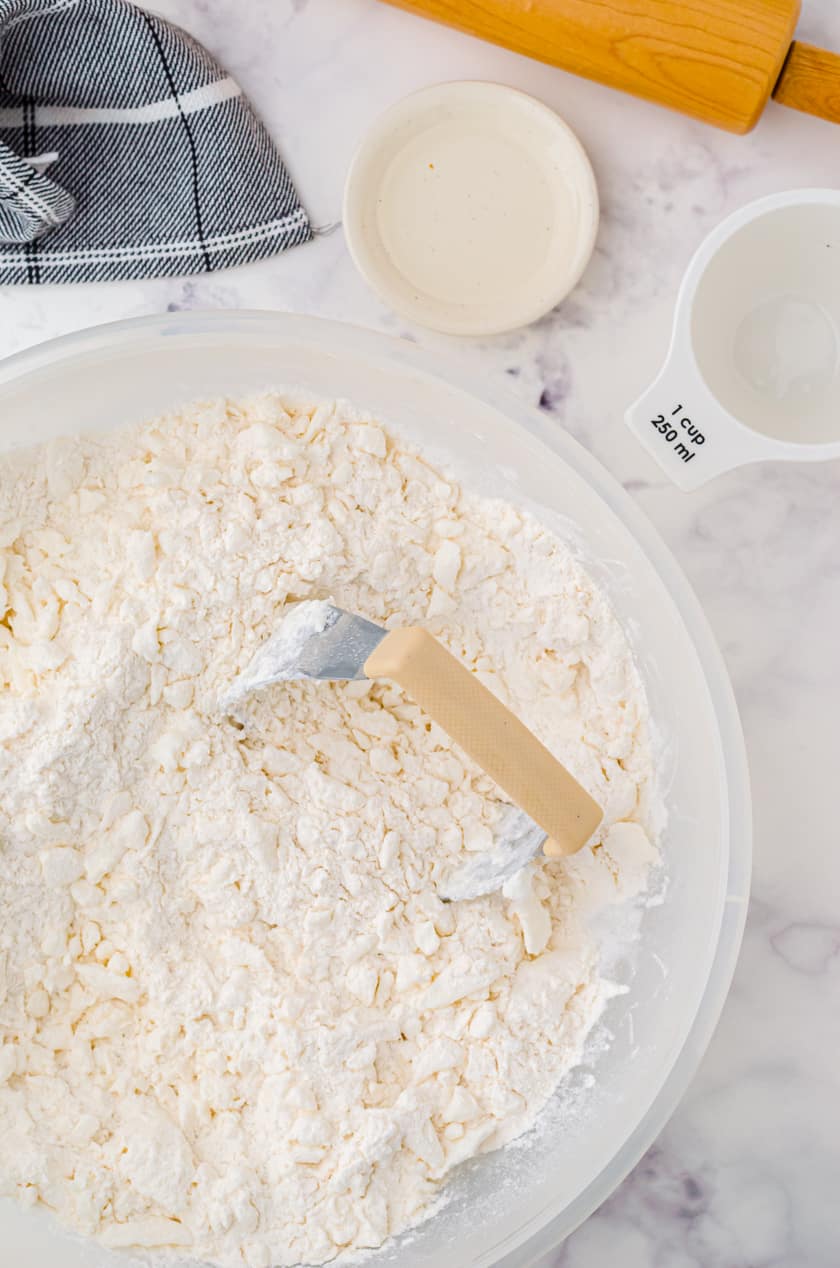
Step 2: Cut in the Tenderflake lard with a pastry blender or 2 knives until the mixture resembles course oatmeal.
Be careful not to mix the lard in too much. It’s ok to have some larger chunks of lard in the mixture.
Step 3: In a 1 cup measure, mix the vinegar and lightly beaten egg together. Add enough cold water to equal 1 cup.
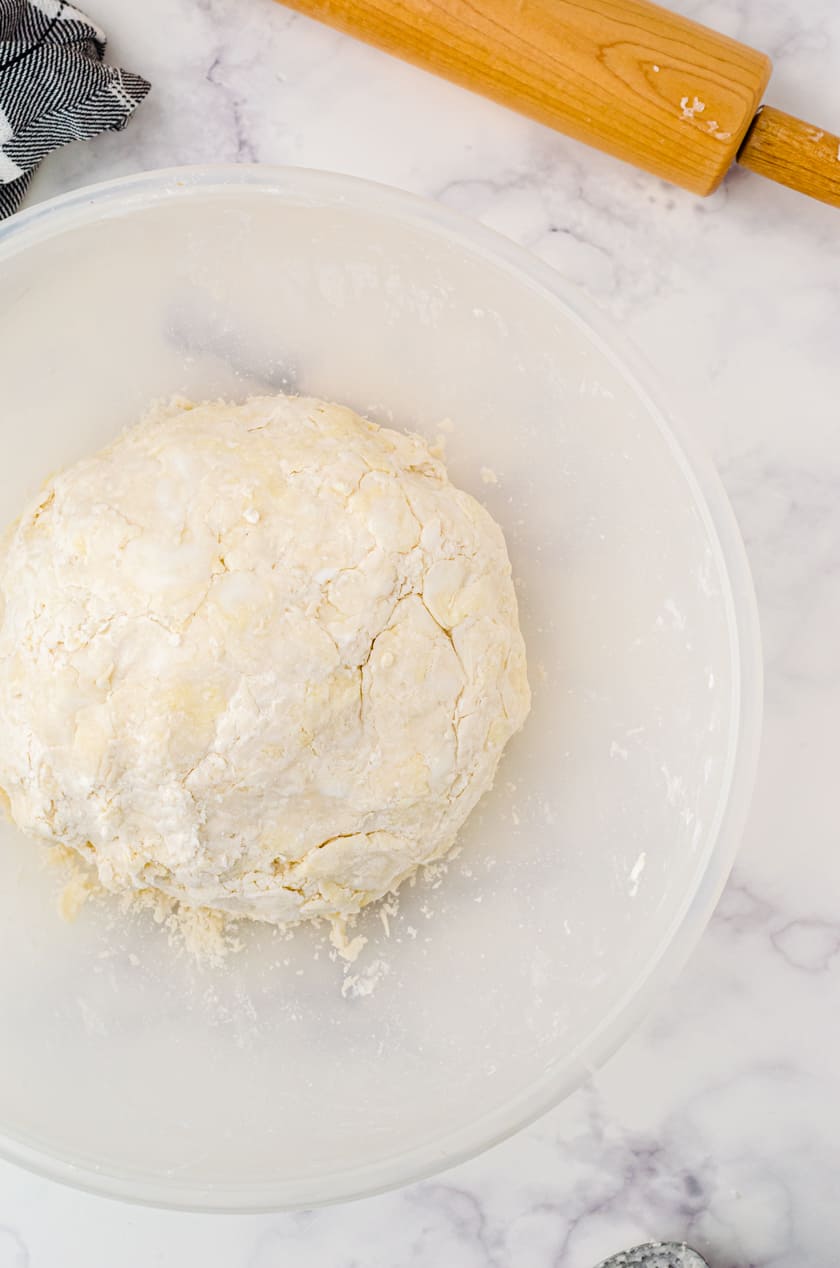
Step 4: Slowly add the water mixture to the flour while fluffing it gently with a fork until it can be formed into a ball.
Be careful not to overmix the dough at this point. Add just enough water to make the dough come together into a ball.
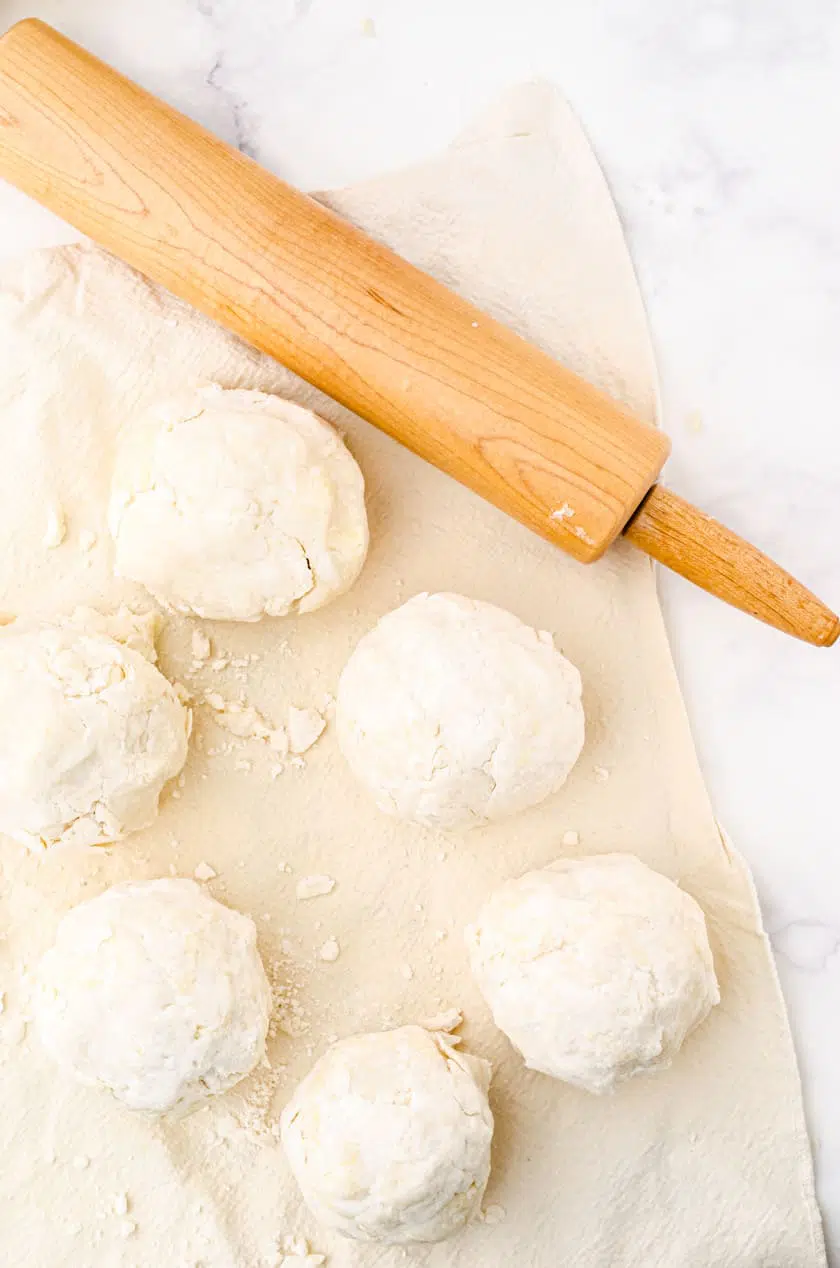
Step 5: Divide dough into 6 balls.
Wrap up the pie crust dough balls in plastic wrap if you are not going to use them right away. They can be stored in the fridge for up to 3 days, or frozen for up to 6 months. When you are going to use previously stored pie crust dough, be sure to let it come to room temperature before trying to roll out.
How to roll out pie crust:

Step 1: On a lightly floured surface (I like to use a baker’s pastry cloth and rolling pin cover set.), press the dough down gently in the center to form a disc. Using a rolling pin roll the dough gently but firmly from the center out. Rotate your rolling pin and the dough as you go.
Don’t stress if the dough starts to pull apart around the edges. Gently press it back together and keep rolling until the circle is large enough to fit into a pie pan with about 1 1/2 inch overhang.
(Here are some more rolling dough tips.)
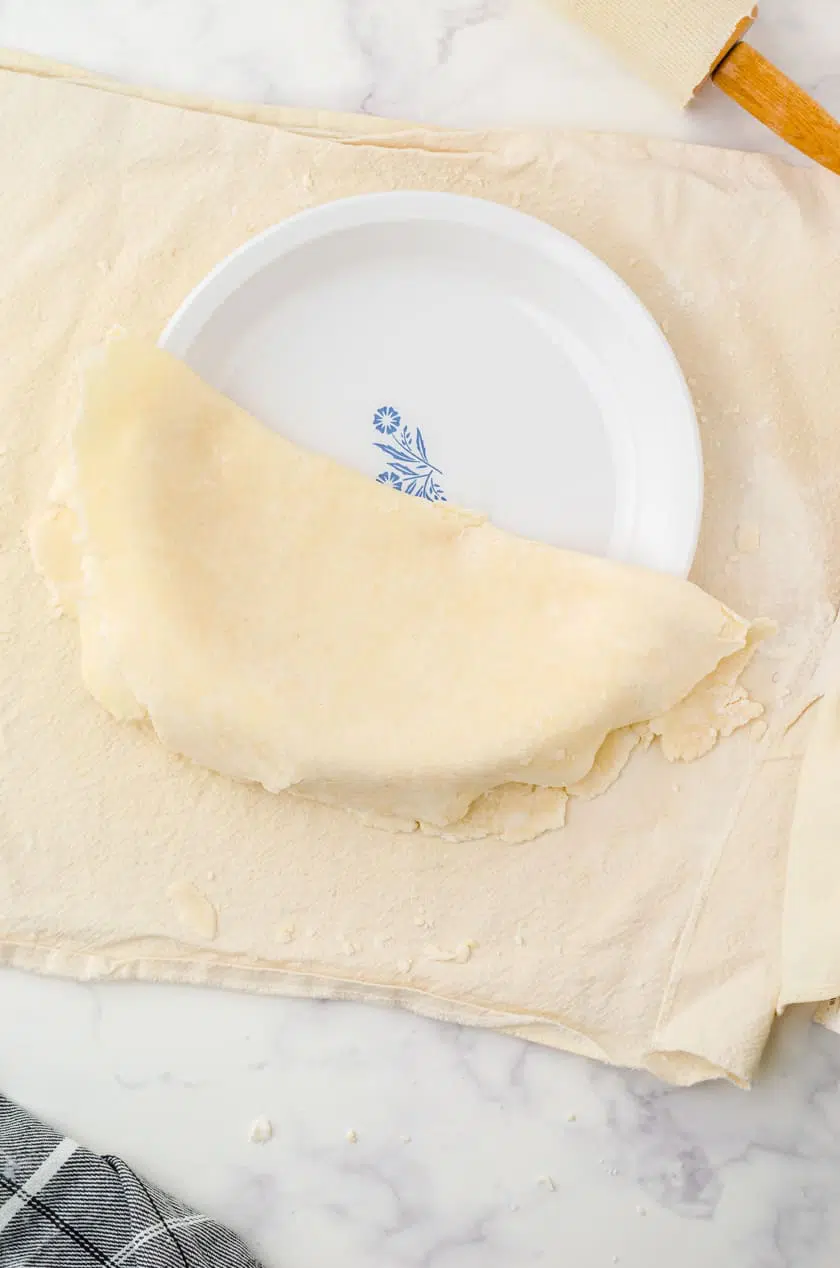
How to make pie crust edge designs:
Once you have your pie crust rolled out, gently fold it in half and place it in the pie pan, and open it up fully.
There should be overhang around the edge of the pan – and in my case, it will overhang more in some areas than others!
I first begin finishing off the edge by building up a crust that is equal thickness all the way around.
Roll up the crust gently and push it against the edge of the pan. Trim off the excess.
If you have spots that are thinner, press some of the trimmings on to those parts so it is basically the same thickness all the way around.
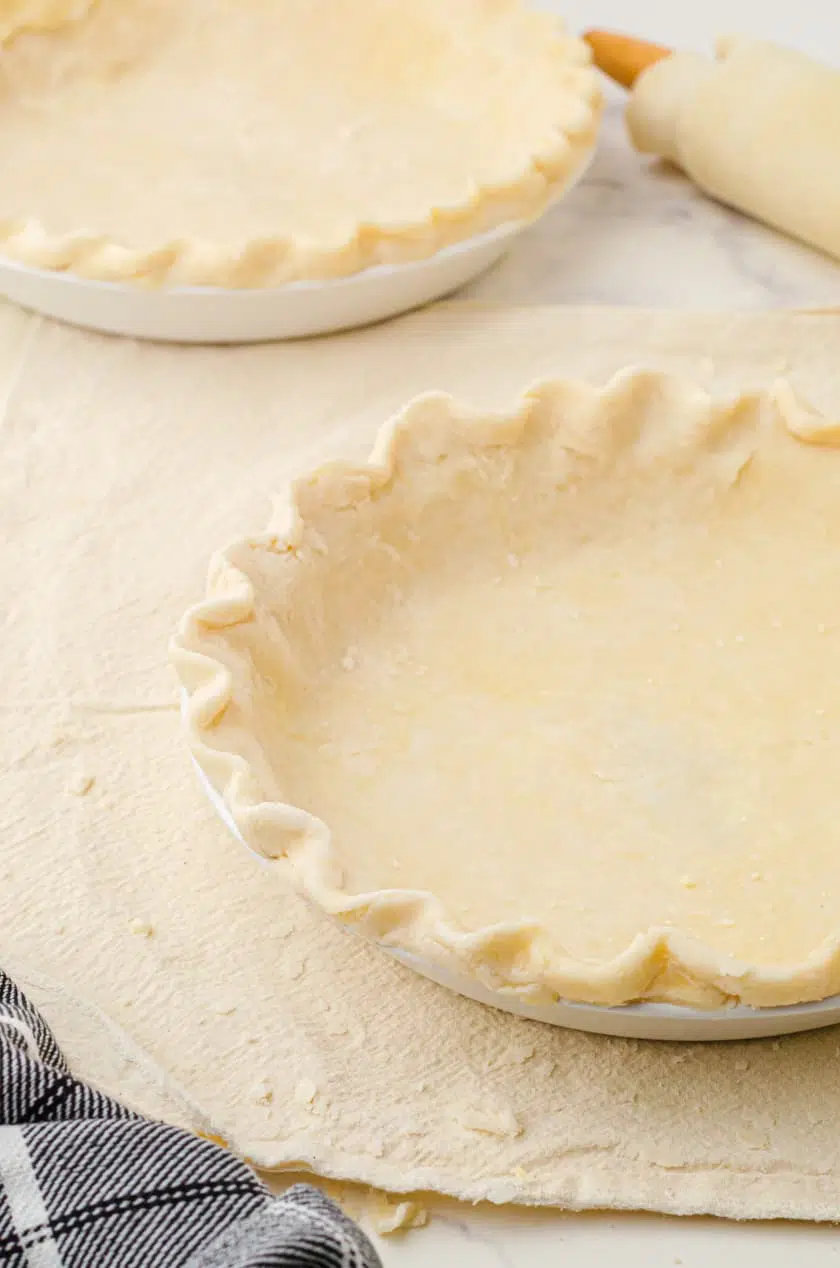
Then, crimping the rim of the pie crust is where your creativity can shine. Have fun with it! I tend to like to have the traditional wavy edge. Here are 9 ways to crimp pie edges.
How to blind bake a homemade pie crust:
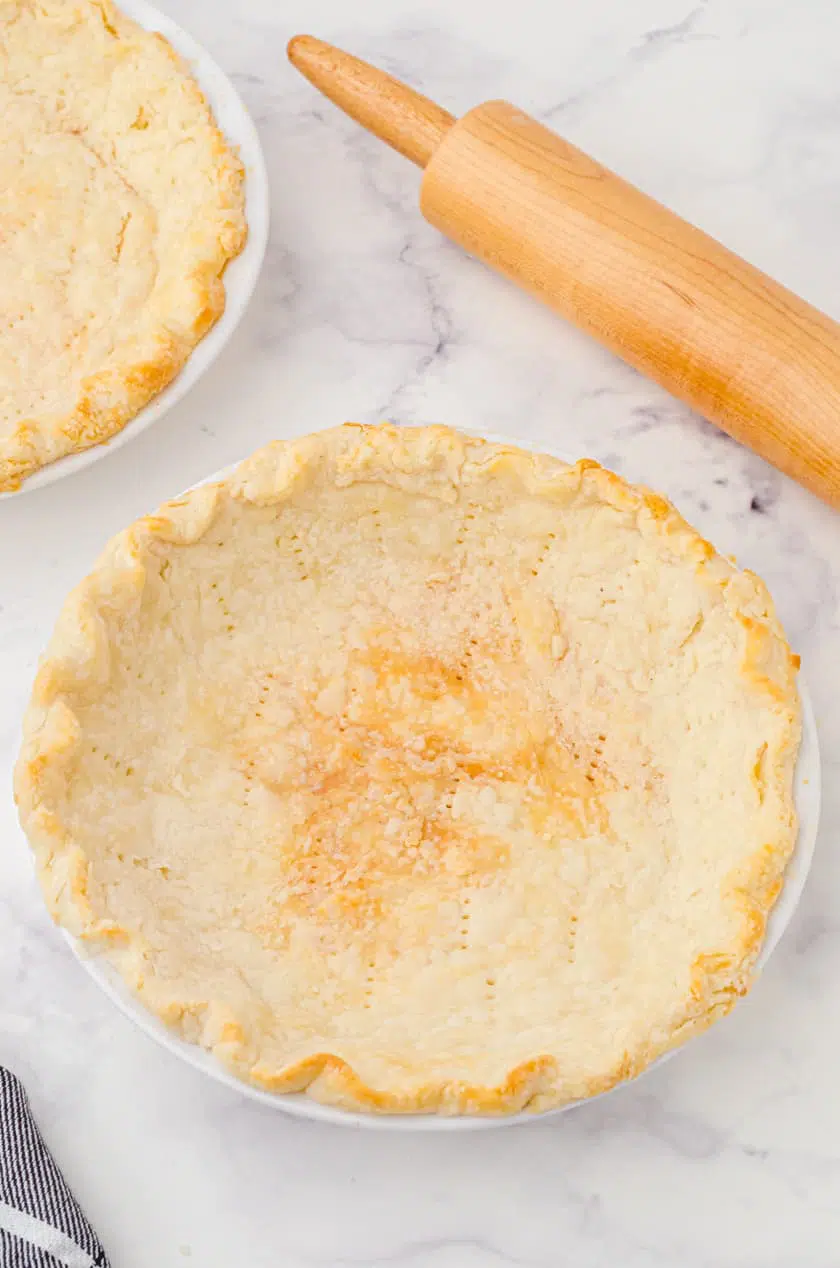
Some recipes (like lemon meringue pie, no bake pie, and banana cream pie) call for a baked pie shell before the filling is put in it. That’s called a “blind bake” or par-baked (pre-baked) crust.
There are 2 different ways to blind bake pie shells. Because of the lard in the pie crust dough, it will naturally want to rise – which we want to prevent it from doing! There are 2 ways to do that.
1. Prick holes with a fork on the bottom and sides of the shell. Bake at 375 degrees for 20-30 minutes or until golden brown.
Watch the crust as it’s nearing the end of its baking time. If the crust is starting to get too brown, cover it with a pie pan shield or strip of aluminum foil.
2. Use parchment paper and pie weights or dried beans to keep the pie crust from rising.
I’ve never personally used this method, but have seen it on cooking shows. I don’t think pie weights were around when my mom was baking her old fashioned pies!
To use pie weights, gently crinkle the parchment paper so it will easily line the crust and place on top of the crust. Add the pie weights or dried beans and make sure they are evenly distributed.
Half-way through cooking time, gently remove the pie crust from the oven and remove the parchment and weights. Prick the bottom of the pie pan and return to the oven until the bottom of the pie turns slightly golden brown.
For more old fashioned recipes, you may want to check out:
- Cherry Pie with canned cherries recipe
- Old Fashioned Banana Cream Pie
- Classic Lemon Meringue Pie
- Grandma Bernice’s No Bake Strawberry Pie
- Grandma Jennie’s Luscious Lemon Bars
- These Texas Brownies are perfect for potlucks and big family dinners.
- My sister’s Peanut Butter Fudge Bars are a personal favorite.
For more recipes and ideas for your home:
Be sure to join the VIP newsletter list! As a valued VIP member, you will get exclusive access to the entire library of free printables – including wall art, cards, organization lists, menu planning set, and more.
Click here or the button below to join today.

And if you want to see more real life behind the scenes action, be sure to come join me on my @harbourbreeze Instagram Channel!
Comfort Food Dinner Ideas Just for You!

I co-wrote a comfort food recipe e-book set with my friend Shirley from Intelligent Domestications. You’ll find 30 Comfort Food Dinner ideas plus a bonus 10 Sweet & Treats recipes.
Click here for all the details.

How to Make Pie Crust from Scratch
Make dessert special by starting with a flaky pie crust from scratch! Find step by step instructions for the old fashioned way. Made with Tenderflake lard, this easy pie crust recipe can be made without a food processor, and no refrigerating is necessary before you roll it out. Delicious and flaky every time.
Ingredients
- 5 1/2 cups all purpose flour
- 2 tsp. salt
- 1 pound Tenderflake lard, or lard of your choice
- 1 Tablespoon vinegar
- 1 egg, lightly beaten
- very cold water
Instructions
- Step 1: Stir together flour and salt in a large mixing bowl.Step 2: Cut in the Tenderflake lard with a pastry blender or 2 knives until the mixture resembles course oatmeal.Be careful not to mix the lard in too much. It’s ok to have some larger chunks of lard in the mixture.
- Step 3: In a 1 cup measure, mix the vinegar and lightly beaten egg together. Add enough cold water to equal 1 cup.Step 4: Slowly add the water mixture to the flour while fluffing it gently with a fork until it can be formed into a ball.Be careful not to overmix the dough at this point. Add just enough water to make the dough come together into a ball.
- Step 5: Divide dough into 6 balls.Wrap up the pie crust dough balls in plastic wrap if you are not going to use them right away. They can be stored in the fridge for up to 3 days, or frozen for up to 6 months. When you are going to use previously stored pie crust dough, be sure to let it come to room temperature before trying to roll out.
- How to roll out pie crust:Step 1: On a lightly floured surface (I like to use a baker’s pastry cloth and rolling pin cover set.), press the dough down gently in the center to form a disc. Using a rolling pin roll the dough gently but firmly from the center out. Rotate your rolling pin and the dough as you go. Don’t stress if the dough starts to pull apart around the edges. Gently press it back together and keep rolling until the circle is large enough to fit into a pie pan with about 1 1/2 inch overhang.
- How to make pie crust edge designs:Once you have your pie crust rolled out, gently fold it in half and place it in the pie pan, and open it up fully.
- There should be overhang around the edge of the pan – and in my case, it will overhang more in some areas than others!
- I first begin finishing off the edge by building up a crust that is equal thickness all the way around.
- Roll up the crust gently and push it against the edge of the pan. Trim off the excess.
- If you have spots that are thinner, press some of the trimmings on to those parts so it is basically the same thickness all the way around. Once it is the same thickness all the way around crimp it in the design you'd like.
How to blind bake a homemade pie crust:
- There are 2 different ways to blind bake pie shells. Because of the lard in the pie crust dough, it will naturally want to rise – which we want to prevent it from doing! There are 2 ways to do that.
- 1. Prick holes with a fork on the bottom and sides of the shell. Bake at 375 degrees for 20-30 minutes or until golden brown. Watch the crust as it’s nearing the end of its baking time. If the crust is starting to get too brown, cover it with a pie pan shield or aluminum foil.
- 2. Use parchment paper and pie weights or dried beans to keep the pie crust from rising.I’ve never personally used this method, but have seen it on cooking shows. I don’t think pie weights were around when my mom was baking her old fashioned pies!
- To use pie weights, gently crinkle the parchment paper so it will easily line the crust and place on top of the crust. Add the pie weights or dried beans and make sure they are evenly distributed.
- Half-way through cooking time, gently remove the pie crust from the oven and remove the parchment and weights. Prick the bottom of the pie pan and return to the oven until the bottom of the pie turns slightly golden brown.
Nutrition Information:
Yield: 6 Serving Size: 1 gramsAmount Per Serving: Calories: 1111Total Fat: 78gSaturated Fat: 30gUnsaturated Fat: 44gCholesterol: 103mgSodium: 791mgCarbohydrates: 88gFiber: 3gProtein: 13g


The yellow color of this cake is so beautiful. I want to take a bite right now.
I am so glad you are having this series! I don’t have a pastry cloth and rolling pin cover and it sounds like that will make rolling out the dough so much easier! Thank you!