
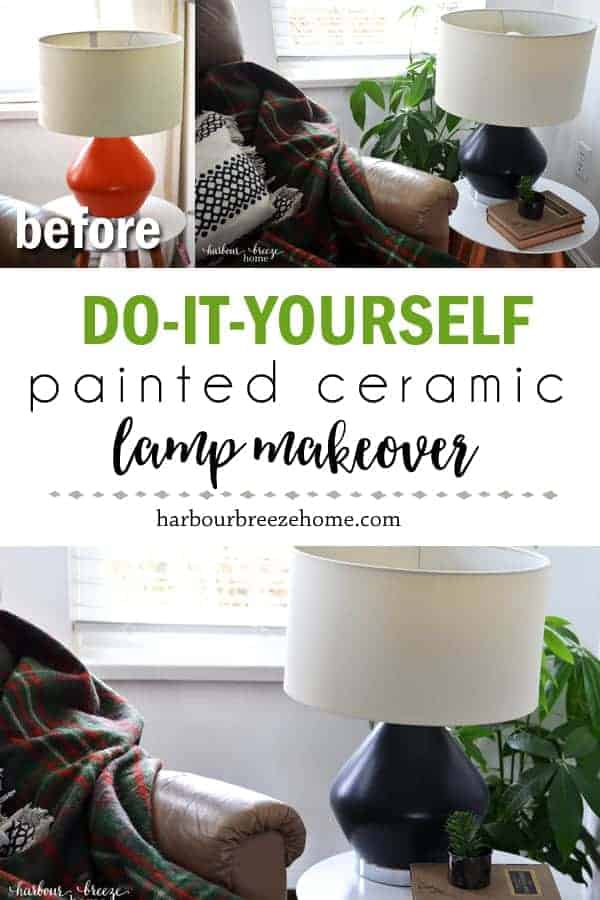
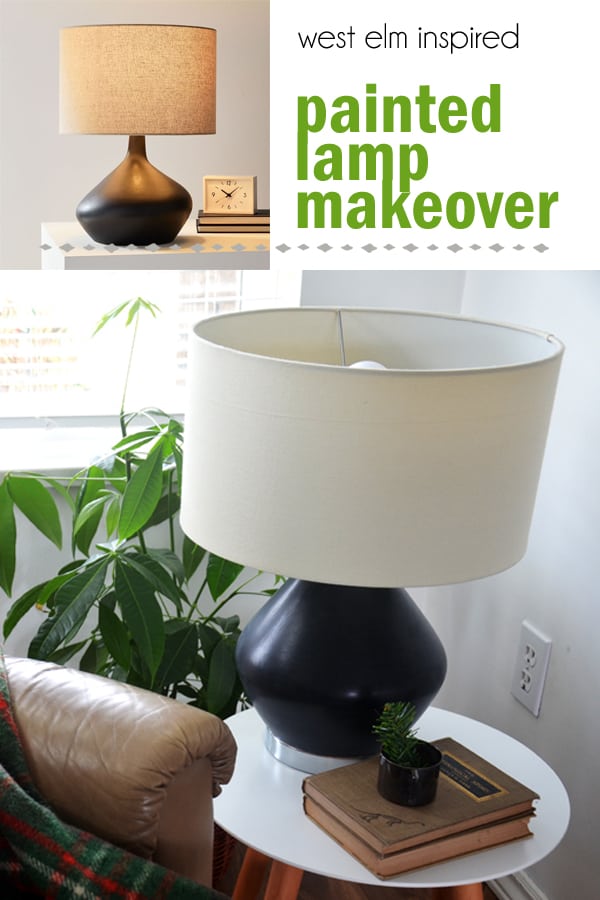
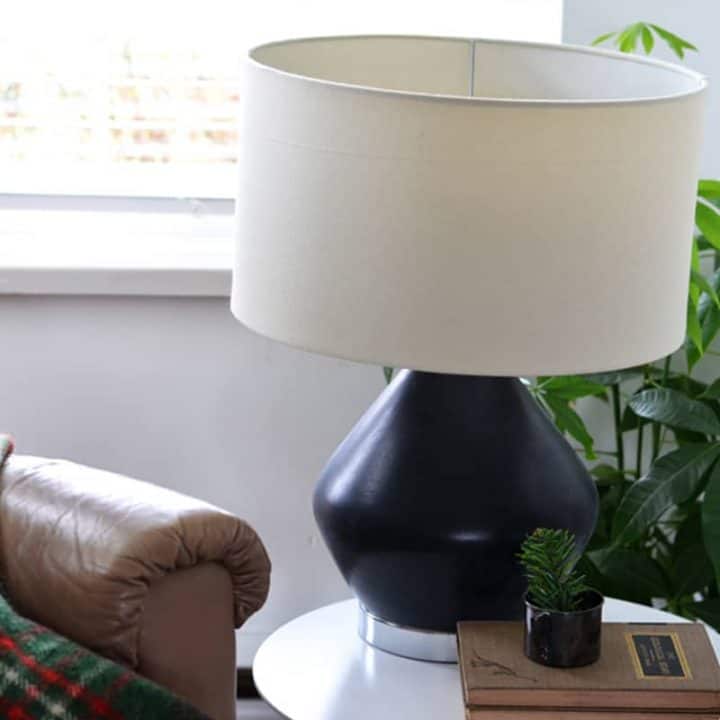
Painted Lamp Makeover
Turn an ugly table lamp into a stunning modern home decor piece for your living room with this easy diy decor project.
I’ve loved this lamp and its lovely light since I bought during a wild clearance sale years ago. The problem was, the orange color made absolutely no sense with the rest of the decor in our home.
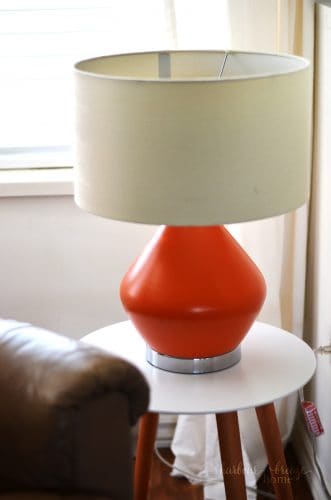
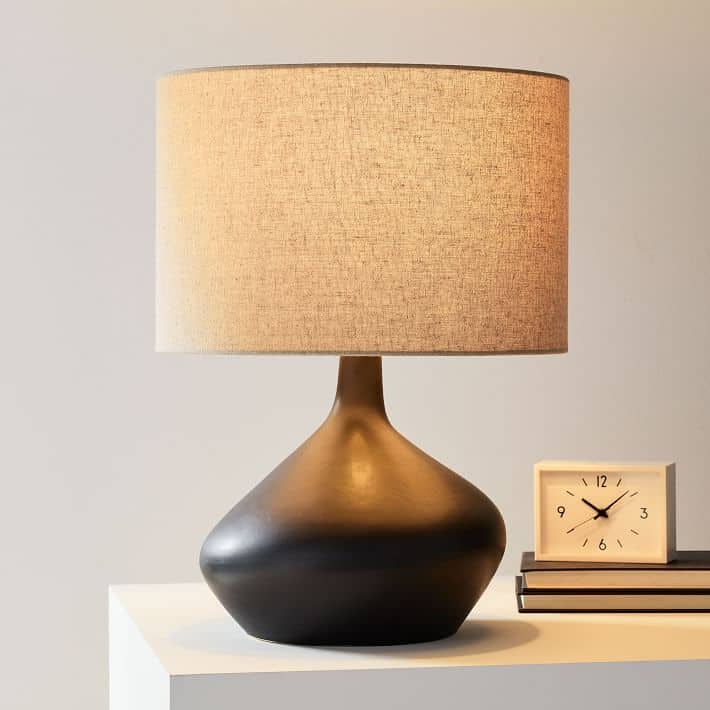
Inspired by the Asymmetry Ceramic Table Lamp by West Elm ($179), I decided to give Little Miss Orange a makeover.
It was a quick and easy project. If you are needing some new lighting in your home, too, I encourage you to look for a discount or thrift store ceramic lamp – even if it’s the wrong color!
This method only requires a few supplies and will turn it into something that looks totally new, fresh, and modern.
Simple Painted Ceramic Lamp Makeover
Disclosure: This post contains affiliate links for your shopping convenience.
The supplies you’ll need to paint a ceramic lamp base, and where to find them:
Of course, you’ll need to start with a lamp with a ceramic base. Look for one with the overall shape you like. You might already have one. If not, check out clearance sales, thrift stores, and garage sales.
I already had all these supplies in my stash. However, they can be found at most home improvement or hardware stores. For your shopping convenience, I’ve linked them all below with an online source:
- Paint Brush: This one is my favourite of all time!
- Chalkboard Paint
- Frogtape, or painter’s tape
- Chalk
How to Paint a Ceramic Lamp Base Video
I actually recorded this process in detail on my Instagram stories as I was doing it. (Click here to join me over on Instagram so you can see all the “behind the scenes” action.) However, I forgot to take still shots of all the steps! I assembled the Instagram footage into a quick video so you can have a quick visual of all the steps described below.
Here it is in 40 seconds:
Step 1: After removing the lampshade, tape off the areas of the ceramic lamp base that you don’t want painted with Frogtape (or painter’s tape).
I wanted to avoid the chrome base of the shade, as well as all the electrical housing unit at the top.
I tried to tuck the tape up and into the crevices a bit, so that a nice line would be formed at the end.
Step 2: Brush the first coat of chalkboard paint on to the clean ceramic lamp base surface.
Paint doesn’t like to stick to dust and dirt, so before you start painting, make sure the surface is nice and clean. Wiping it down with a wet cloth and drying it should work just fine. If the base has some grimy build up on it, make sure to clean that all off with soap if needed.
I used chalkboard paint for this project, but chalk paint in any color would also achieve the same mat finish.
To paint a lamp base with a brush, try to avoid heavy, thick brush strokes. I poured some paint into a larger container, dipped my brush in, and tried to paint in long up and down strokes. The goal is to make it as smooth as possible.
Step 3: Wait one hour after first coat is applied, and paint a second coat of chalkboard paint onto the ceramic lamp base.
The original paint color may still be peeking through after the first coat of paint. Don’t worry about that! The second coat of paint will cover it up nicely.
Step 4: Remove the painter’s tape.
There are 2 possible methods for doing this. Some people recommend removing the tape while the paint is still wet. You can definitely try that, but to be honest, I forgot to remove it when it was wet!
I, instead, waited 24 hours to ensure the paint was really dry, and lightly scored around the tape with a small knife. Then, I ripped it off. By scoring it where I wanted the line to be, it prevented the tape from pulling off the paint.
Step 5: Season the surface with chalk
“Seasoning” a chalk board just means to rub chalk over the entire surface and then rub the chalk off with a dry cloth.
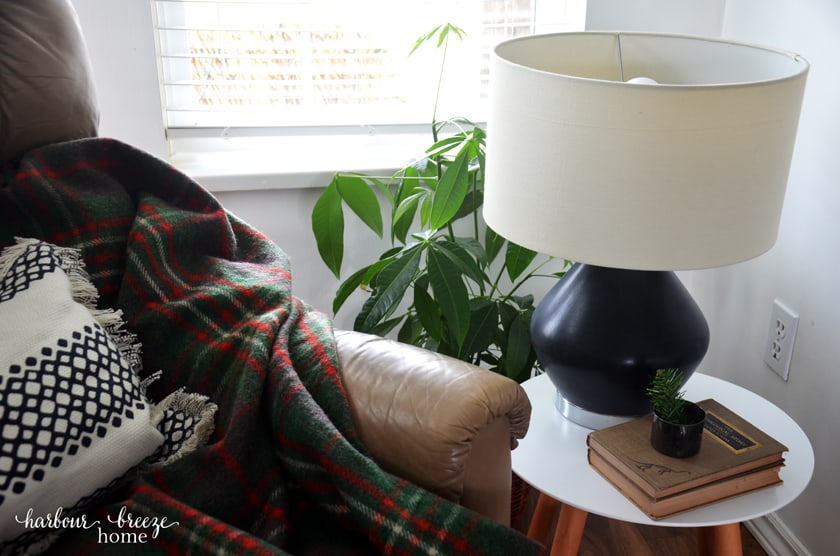
I wanted this lamp to have a mat finish, and the end result was exactly what I wanted!
Here’s what to be careful of when painting a lamp base with chalkboard paint:
Everything about this diy project went well until I got to the step of seasoning the surface. Although I had waited a full 24 hours for it to dry, I must have pressed a bit too hard with the chalk. A few pieces of paint came off in speckles, revealing some of the orange again!
It was an easy repair. I just painted over the peaking orange parts again, waited for it to dry and then seasoned again- by pressing LIGHTLY onto the surface.
Other DIY Home Decor Crafts with paint:
Let me know if you try any of these fun and easy diy home decor projects.
Happy painting!!:)
Painted Lamp Makeover
Turn an ugly table lamp into a stunning modern home decor piece for your living room with this easy diy home decor project using chalkboard paint.
Ingredients
- Ceramic Lamp Base
- Paint Brush
- Chalkboard Paint
- Frogtape, or painter’s tape
- Chalk
Instructions
- Step 1: After removing the lampshade, tape off the areas of the ceramic lamp base that you don’t want painted with Frogtape (or painter’s tape).
- Step 2: Following the manufacturers directions, brush the first coat of chalkboard paint on to the clean ceramic lamp base surface, trying to avoid heavy brush strokes. Let dry one hour and the paint the second coat.
- Step 3: Paint the second coat of chalkboard paint on and let dry for at least 24 hours.
- Step 4: Remove the painter’s tape.
- Step 5: Season the surface with chalk
Notes
"Seasoning" a chalk painted surface means to rub the chalk-painted surface with a piece of chalk that is on its side. Be careful to do this step lightly, as it may pull up some of the paint if pressed down too hard.
Nutrition Information:
Yield: 1 Serving Size: 1 gramsAmount Per Serving: Unsaturated Fat: 0g


Your lamp looks amazing, Rita! The chalkboard paint gives it the perfect matte finish.
You did a LOVELY job on this lamp, Rita! It totally looks like the Anthropologie lamp! Pinned!
Thanks, Julie!❤️