
DIY Floating Wood Shelf with Dowels


In this article: These diy floating wall shelves with dowels are a beautiful and practical solution for both decor and storage on a wall. Make your own following this step-by-step tutorial.

How to Make DIY Floating Shelves with a Board and Dowels
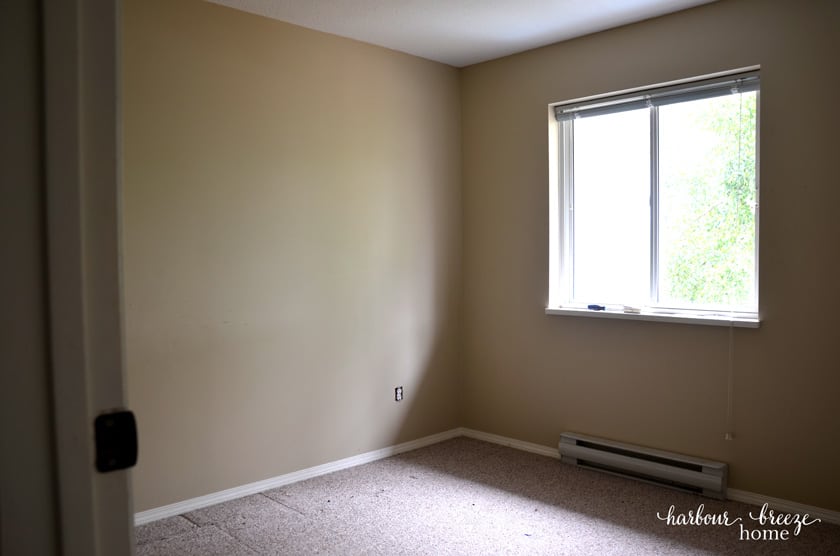
A few months ago, we turned one of our townhouse bedrooms into my husband’s office.
During the (super fast) renovation, we found ourselves staring at a big, blank wall wondering what to do with it.
The Inspiration
As with any decorating dilemma I’m faced with, I headed to Pinterest and created an “Office” board to pin my favorite ideas to. This picture became our inspiration for long floating wall shelves:
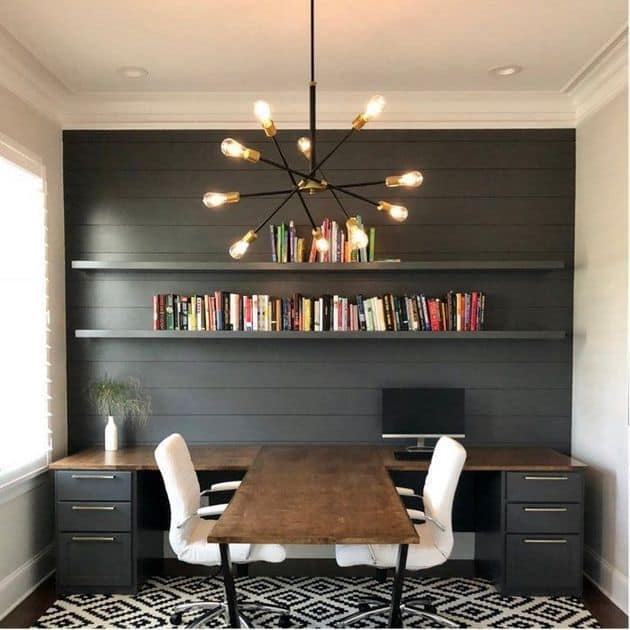
We loved how the shelves expanded almost the entire length of the wall, making the space appear wider. We also loved how they were floating – giving it a bit of a sleek and modern look.
The challenges
As we contemplated the long floating shelf option, we came up with 3 challenges to the idea:
- Cost – We needed it to be budget friendly.
- Time -We were looking for quick and easy.
- Lack of power tools/ workshop area – Although we do have some basic power tools, we no longer have access to a workshop with a planer and table saw. We needed to think about what can be done with the assistance of local lumber supply stores.
The plan
As my husband researched many “How to Make Floating Shelves” articles, he found one that was particularly appealing to him. As opposed to the traditional method of making an inner frame with an outer wood “box”, this method just required a board and dowels.
He thought it would be much simpler and quicker – and it turned out to work perfectly in our situation and space.
Supplies for floating wall shelves
(The following supply list is for 2- 10 foot long floating shelves.)
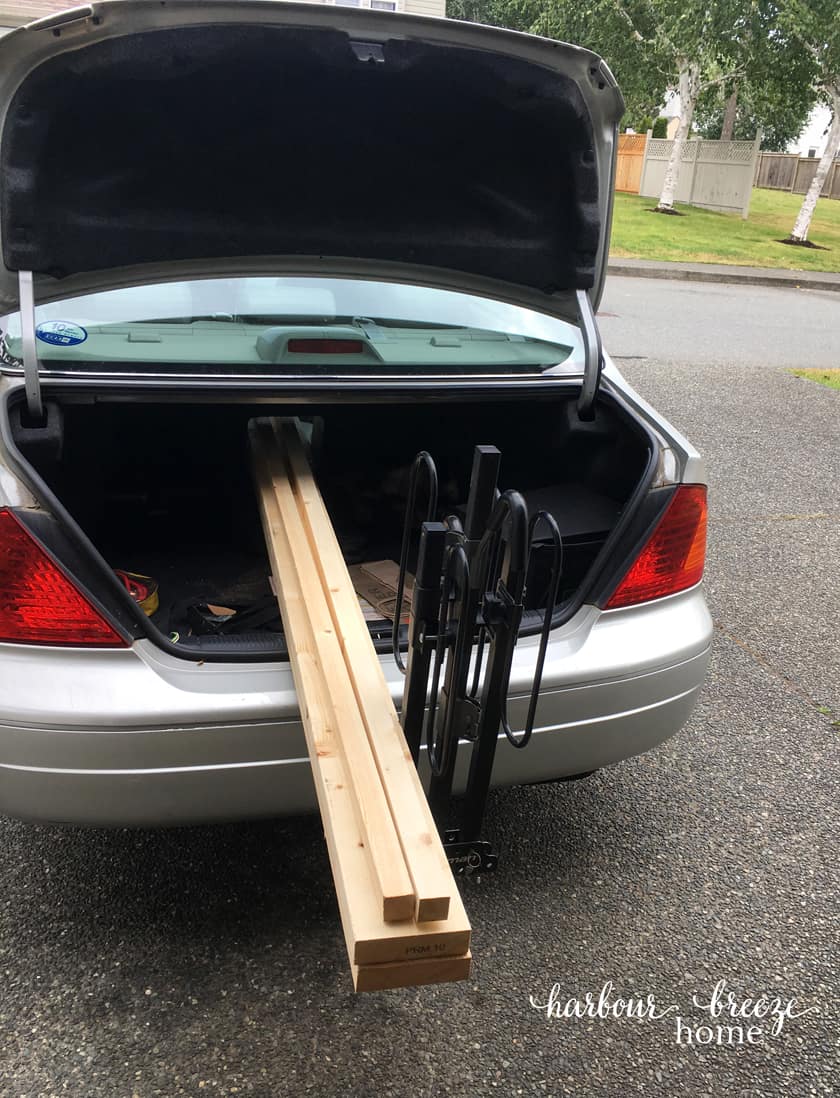
- 2- 2×8-10 foot long boards (Which is really 1- 1/2 inches thick by 7-1/4 inches deep) (Be careful where you buy them and what kind of wood they are made from. One place we priced out was $75 a board! The ones we purchased were $15 each.)
- 6 feet of 1/2 inch doweling
- wood glue
- drill
- 1/2 inch drill bit
- sandpaper
- paint color of choice
Steps to Making Floating Shelves with a Board and Dowels
Have the lumber store rip each board at 1 1/2 inches.

Make sure you take bungy cord to tie down your car trunk as you transport them home!
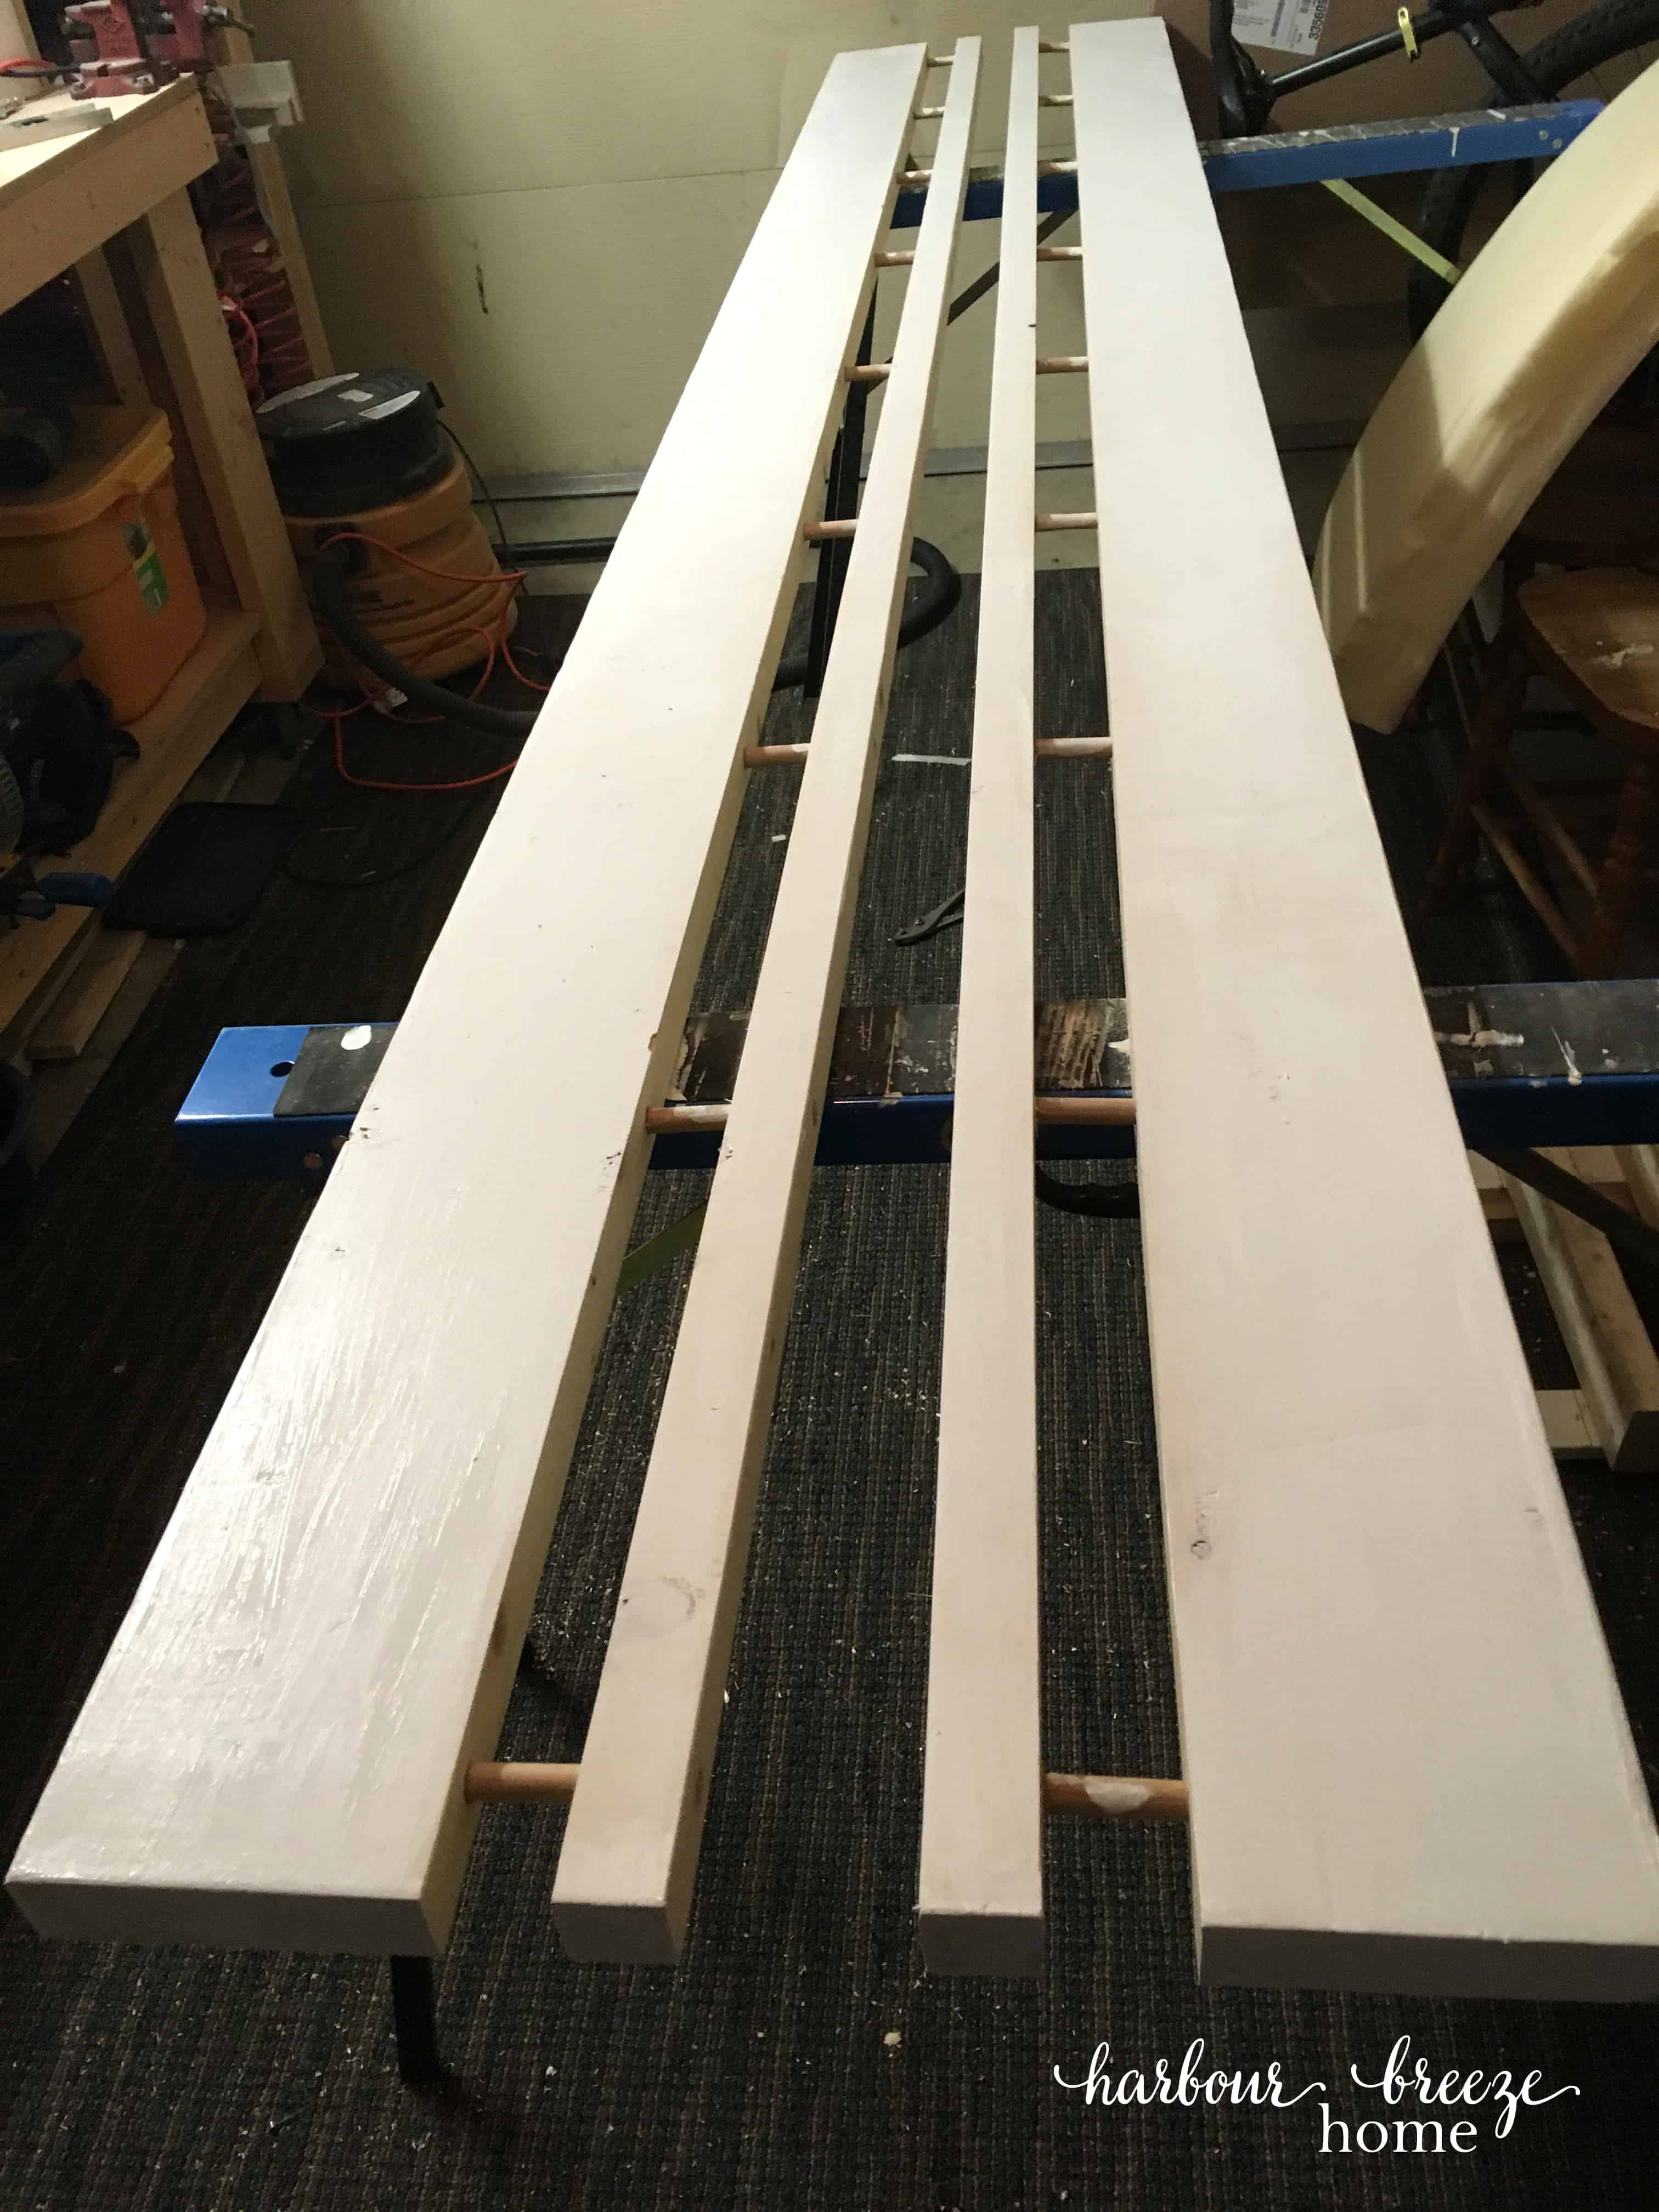
Clamp the ripped portion of the board to the larger portion of the board so they appear as one. Trim off each end so that they will be the exact length you need.
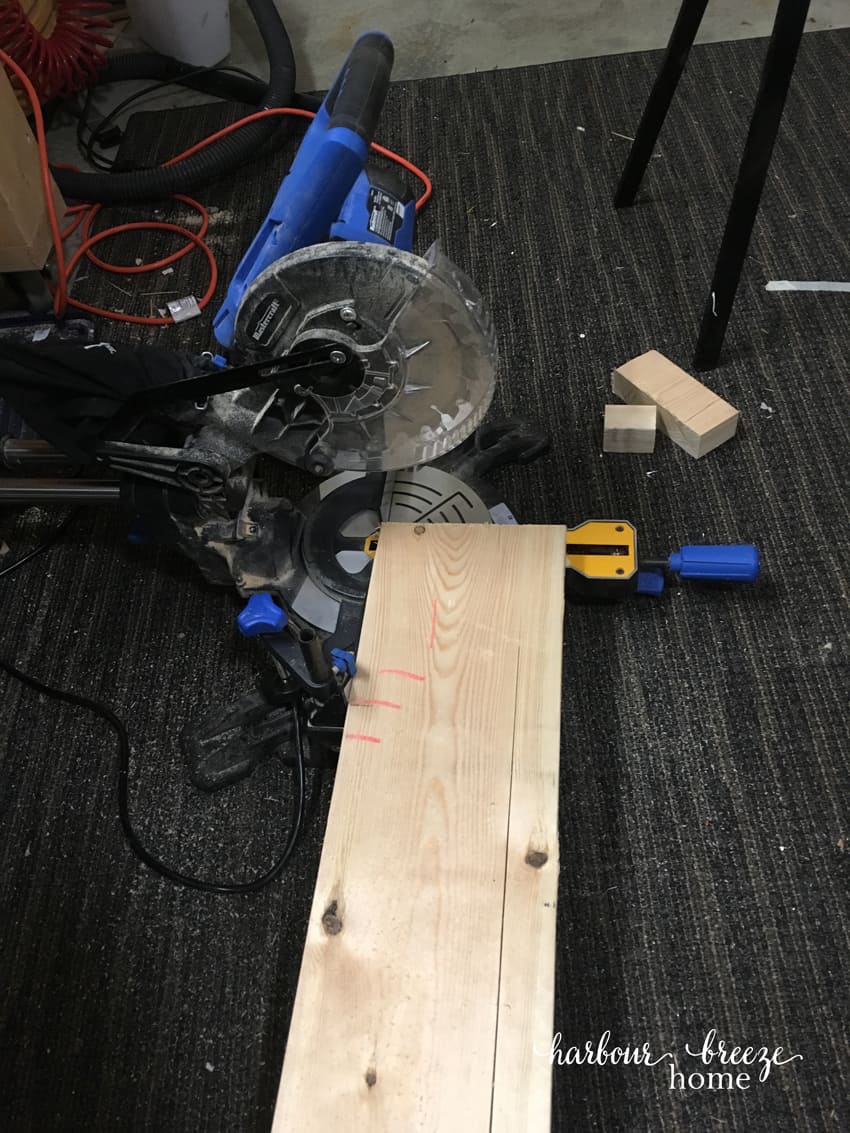
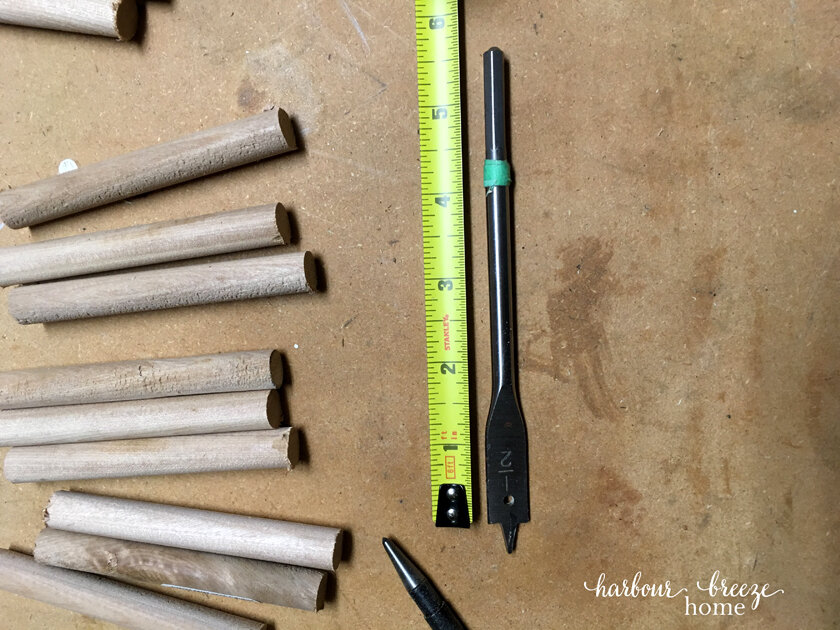
Cut the dowels into 4 inch lengths. We ended up with 18 in total.
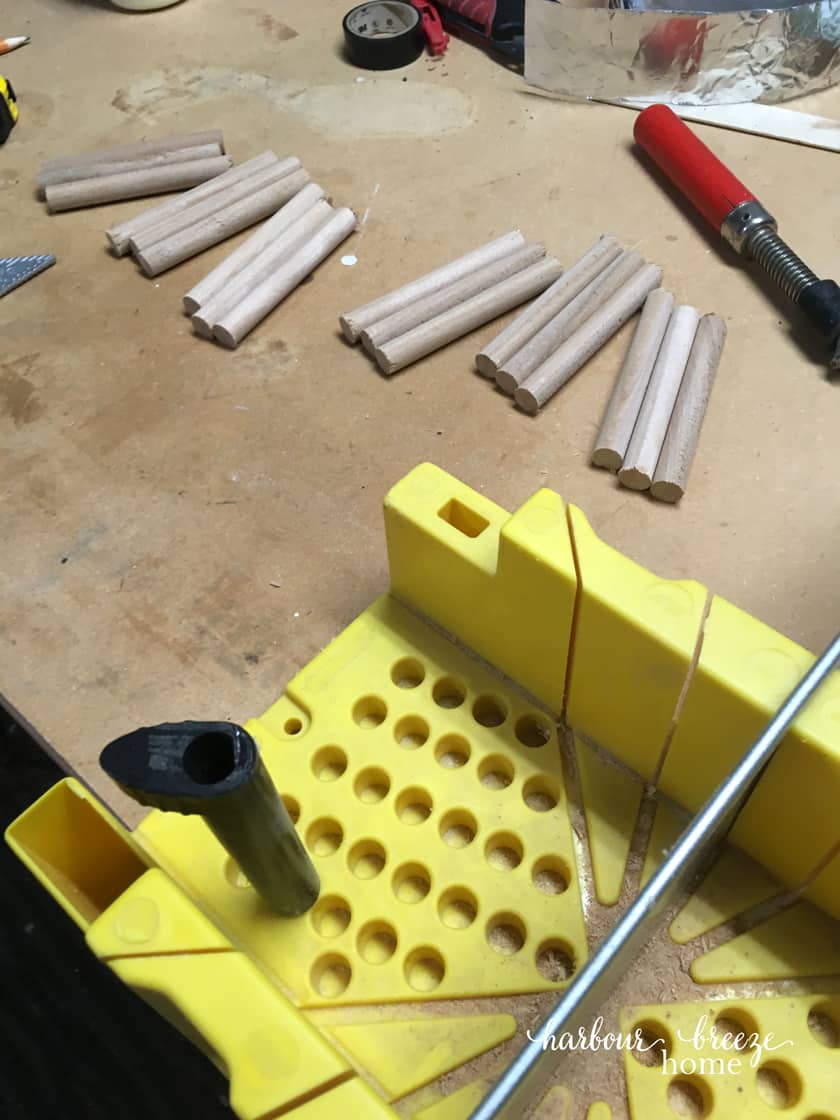
Attach each dowel piece into the end of your drill. Then, using a sanding sponge, squeeze tightly against each dowel and turn on the drill. As the dowel turns, it will be sanded down slightly. Do this for each dowel.

Mark off your drill bit at 4 inches, so you know exactly how far to drill down. Drill slightly deeper than the actual dowel length.
Tightly clamp the board with the ripped portion together so they are flush on each end. Drill holes for the dowels starting at each end and space out evenly across the length of the board.

Unclamp the pieces of board. Glue the dowel into the thin board by putting glue on the end of the thickest part of the dowel and tap it into the hole until it’s flush.
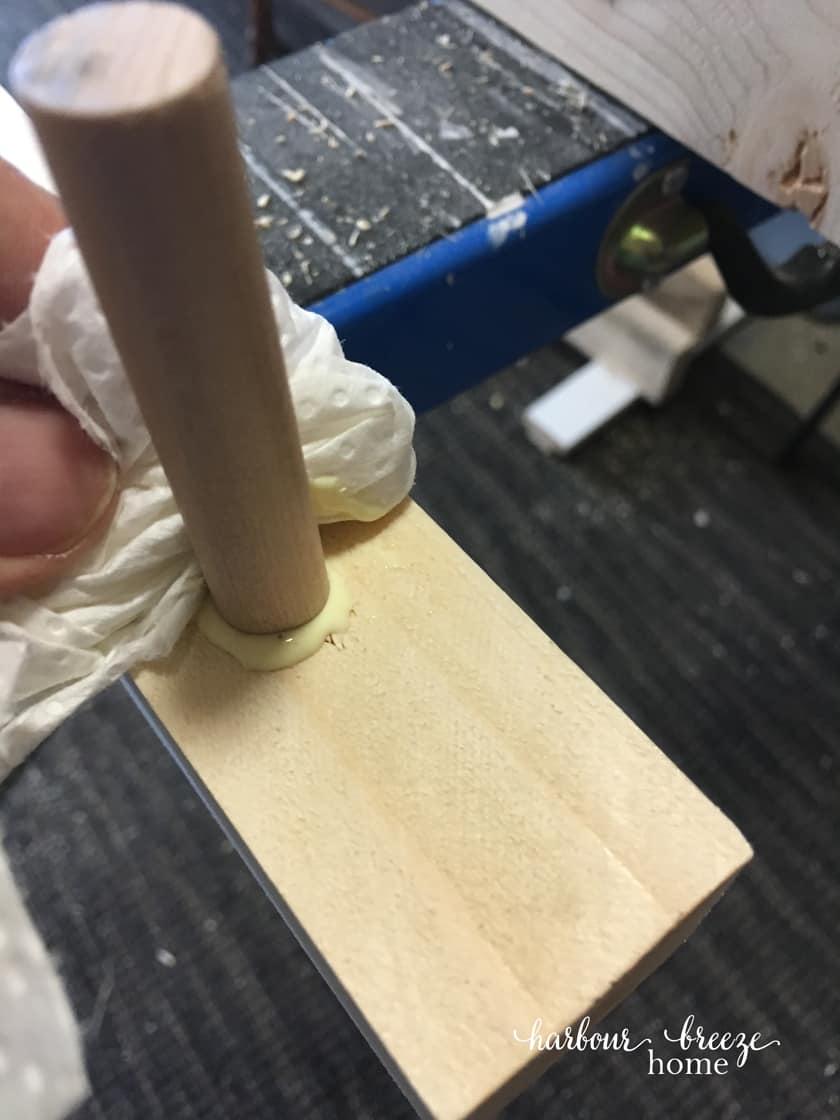
Let glue dry well.
How to hang the floating wall shelves
Using a stud finder, mark where the studs are on your wall. Drill pilot holes in the narrow piece of the board to match those marks.
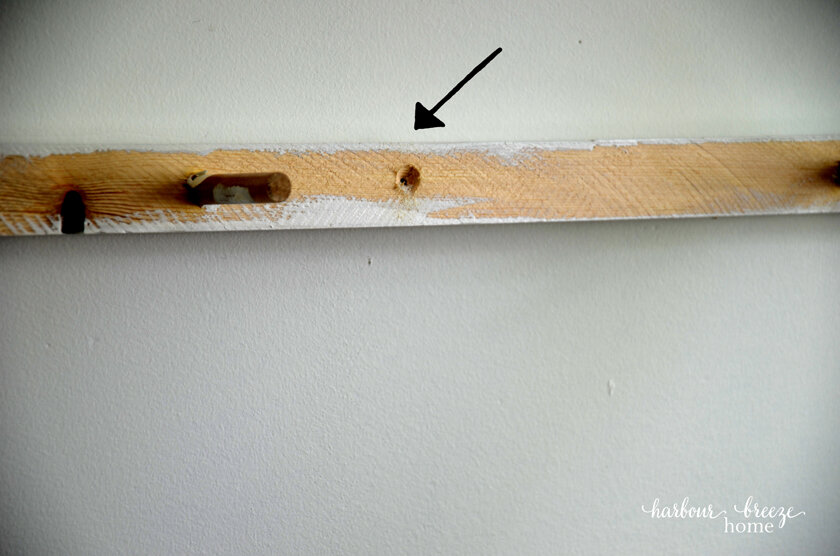
Screw the backing boards with dowels onto the wall using 3 inch wood screws.
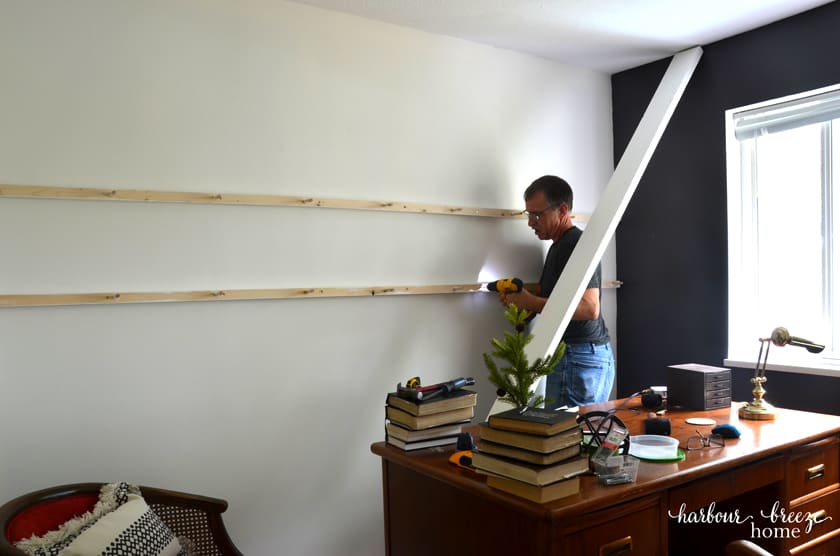
Once the narrow strips are securely fastened to the wall, slide the shelf on to the dowels, lining up all the holes. Use a rubber mallet to tap it onto the dowels if it needs some convincing (and it will!).
(This grainy picture is a screenshot of an Instagram story we did live time. It’s taken from the underside of the shelf.)
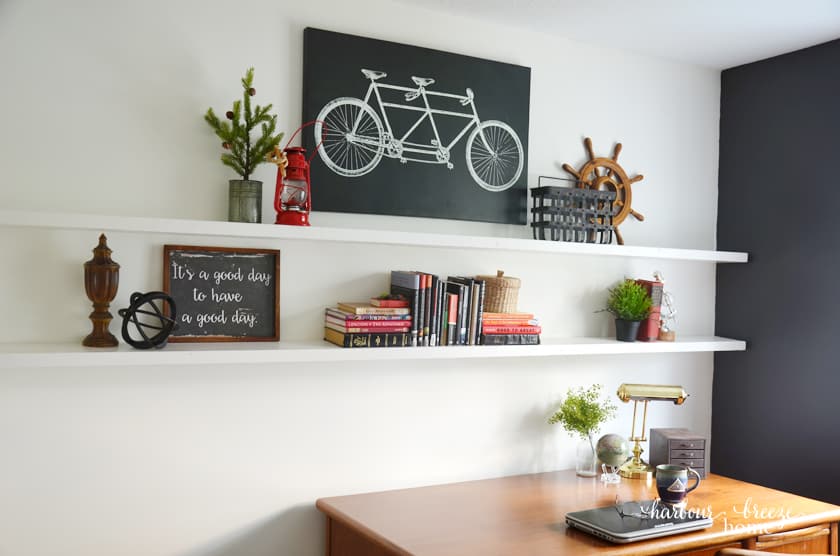
We painted the floating shelves the same color as the walls (Simply White by Benjamin Moore) in a semi-gloss sheen.

They make a perfect addition to my husband’s office space. Not only does it provide practical storage for his books, it is a great place for art and sentimental items as well.
For other farmhouse style shelves, you may want to refer to these posts:
- 8 different DIY shelves you can make in a few hours
- How to Make Fixer Upper Style Farmhouse Shelves
- How to Make Turnbuckle Shelves
- DIY Rustic Shelf with Hooks (perfect for small spaces)
I love these shelves, Rita! You and your hubby did an amazing job! Perfectly practical and affordable!
Any chance you know how much weight these can hold? I’m assuming they’re pretty sturdy, but I wonder how they hold up to the typical “framed” alternative. These look great and I have a feeling they’ll be populating a lot of space in my office. Thanks for sharing!
What an awesome project! I love the idea of floating shelves and you explained it so well!
Happy day!
karianne
I have the type of floating shelf you refer to that is the inner frame and outer box type that were handmade and gifted to me. The inner frame is allowing the box shelf to tip forward. Any ideas on how to hang the “Box shelf” in a manner other than the inner frame? Thank you!!
Rita , I love this idea . You & your husband did a great job !!!
Great job, I want them!!