
DIY Farmhouse Sign using Fabric & Free Printables

Create this quick and easy DIY farmhouse sign using fabric and free printables. It’s a great way to decorate your walls on a budget!
Oh, how I’d love to stroll down the aisles of Hobby Lobby and choose the perfect artwork for my Modern Farmhouse Boho Bedroom.
But, alas, here in my Canadian home there are no Hobby Lobbys…(Some of you are gasping out loud, I know!)
I am constantly inspired, though, from seeing their amazing selection of home decor and accessories.
As I was pondering what kind of artwork I could possibly DIY to use for my dark feature wall, I woke up one morning with the bright idea of trying to make Hobby Lobby inspired wall art.
It’s sort of a mix of their farmhouse wood signs and textile wall hangings.
It was a quick and easy craft that used supplies I already had on hand!

How to Make a DIY Farmhouse Sign with Fabric & Free Printables
Disclosure: This post contains affiliate links for your shopping convenience.
Supplies needed:

- Fabric (I used the remnants that I cut off when hemming my RITVA curtains !)
- Avery Iron On Transfers for Fabric (I used the type for dark fabric even though I was ironing it onto white!)
- Iron
- Scissors
- Free Printables
- 1 x 2 inch board
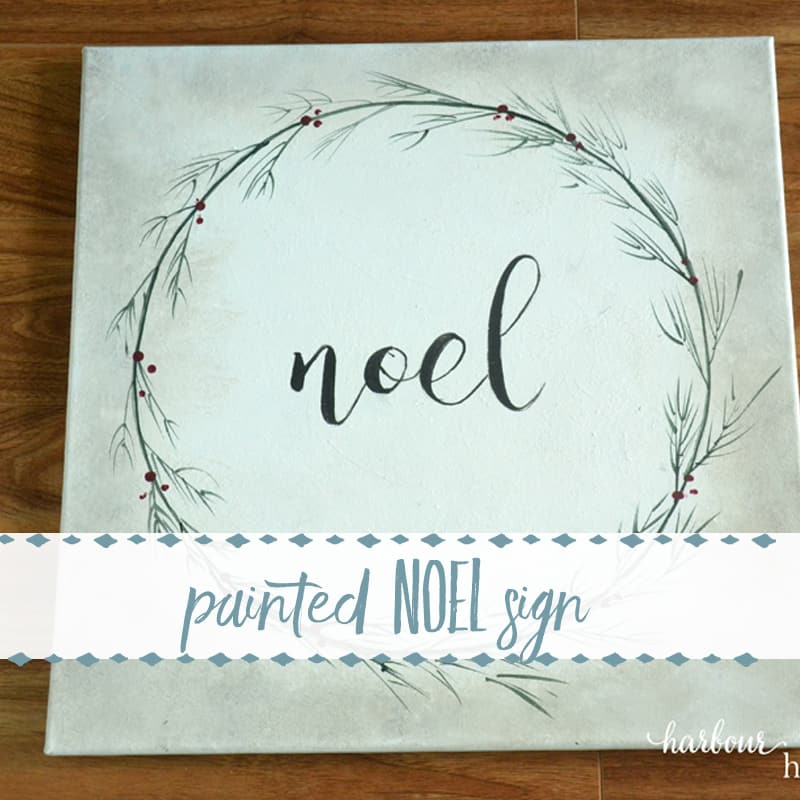
Step 1: Print off the free printables onto Avery Iron on Transfer paper (following instructions on the package)
I’ve provided the free printables for these signs in my VIP printables library. (To access them, click here and enter your secret password.)
If you aren’t yet a VIP member of Harbour Breeze Home, click the box below to sign up and get instant access to these printables plus a whole library of others!

**Note: If you’d rather not do this project on fabric, these printables can be printed on 8.5 x 11 inch cardstock and hung in frames.
Step 2: Hem fabric to be the finished size of 18.5 inches wide by 20 inches tall.
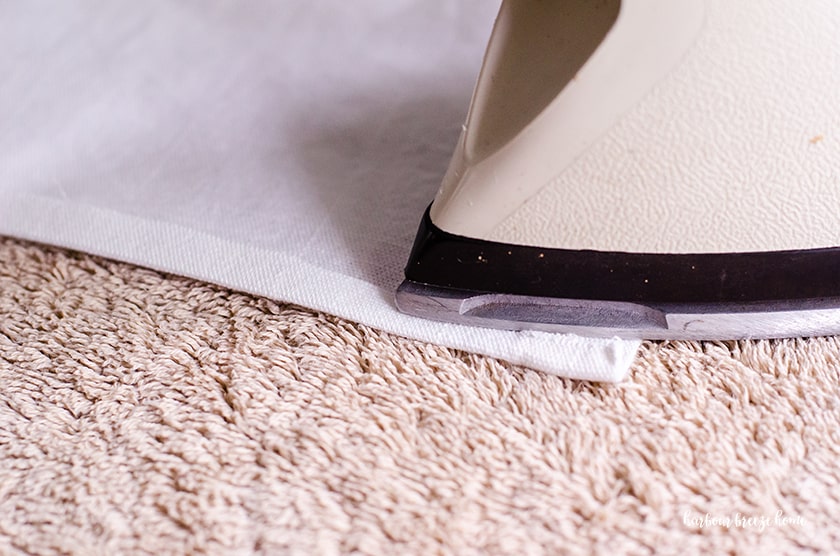
Iron on hem tape makes quick work out of that step!
Step 3: Trim closely around the edges of the letters and iron on the transfer to the front side of the fabric.

Position the words to be in the placement you desire. Since I wanted these signs to be on either side of the bed, I designed them each to sit on the inner edge of the fabric.
Follow the instructions on the transfer paper for the specifics of transferring the image.
Step 4: Measure 18.5 inches from the bottom of the wall hanging and lightly mark the measurement with a pencil.

Place the 1 x 3 inch piece of wood at that line and staple the over lapping fabric to the wood piece. Attach 2 sawtooth hangers on the back of the wall hanging and hang using this simple picture hanging trick.

These quick and easy signs are a perfect way to dress up some empty walls in your home.
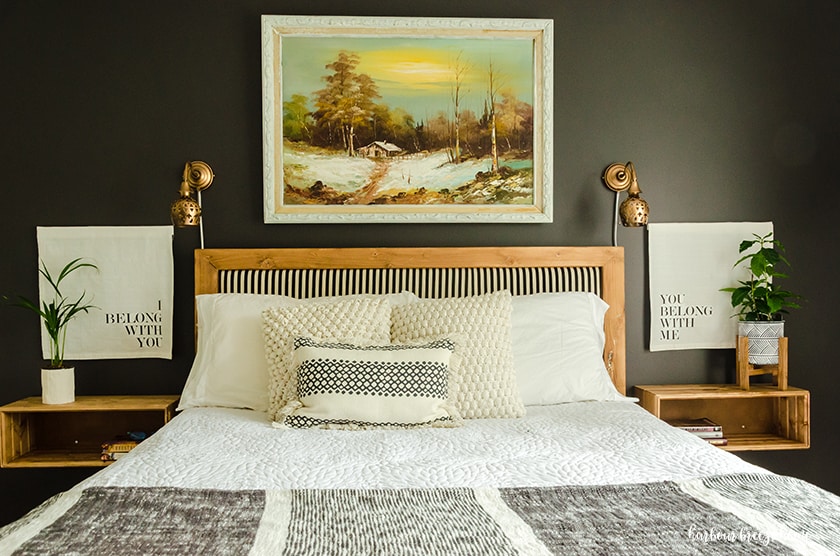
I just love them on above our floating bedside tables!
Another idea for these signs:
If you have access to some fun tassel, pom pom, or fringe trim, I think it would look amazing to attach a row of that to the bottom of these signs for an extra “boho” touch!
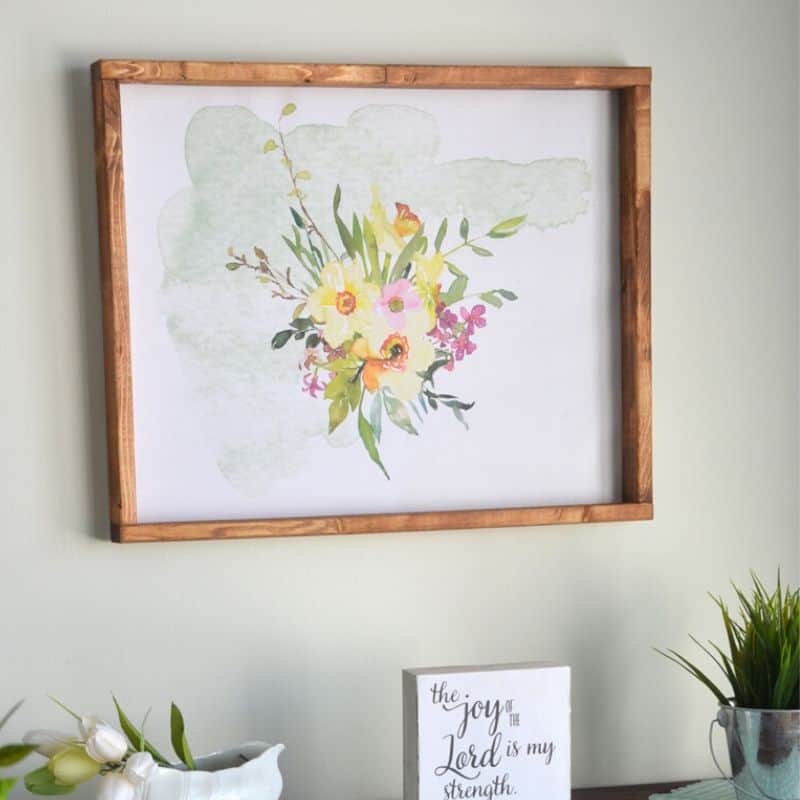
For more projects with free printables:
- How to make pillows with free printables
- Above couch gallery wall with printables
- Printable Farmhouse Sign Craft
And you won’t want to miss this whole amazing selection of free printable wall art!
Would you like to do a room makeover, but are too overwhelmed to start?
Then, I have something just for you! I put together a free series walking through the simple steps to start and finish a room makeover – even if your budget is tiny. Click the button below to access it (free!) now.

What a wonderful project, Rita! I have never thought to use transfer paper. You are so clever and creative! Pinned!