
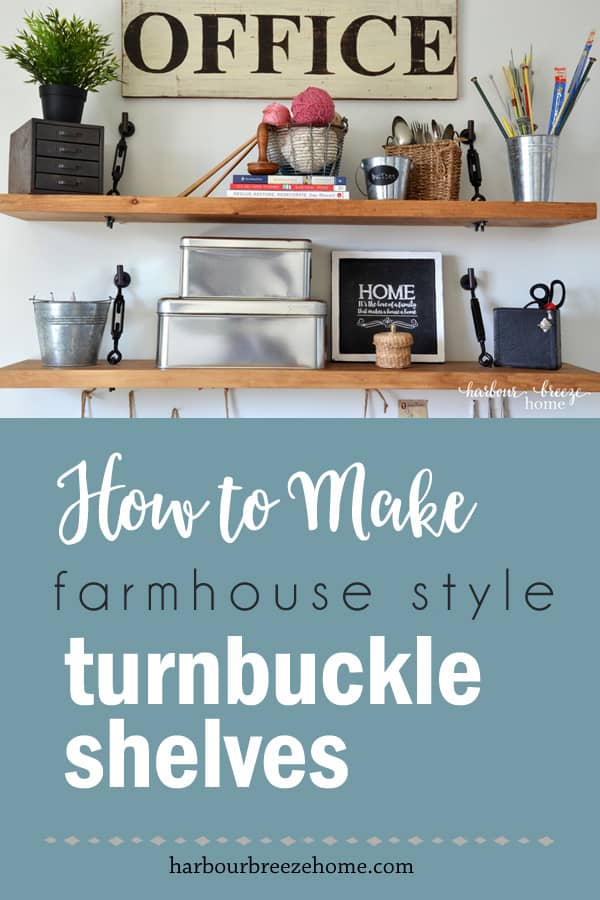
How to Make a Floating Shelf with Turnbuckle Hardware
I was recently standing in the aisle of Home Depot with my husband trying to choose which (boring) shelf bracket to buy.
While we debated over the advantages of white verses black, up walked some friends of ours.
In the course of conversation, we discovered they, too, were building shelves for their home.
The lady casually mentioned that they were making a floating shelf with turnbuckle hardware.
“What on earth is a ‘Turnbuckle Shelf?’,” I asked.
A quick search on the internet brought up a picture.
I. wanted. one. (Goodbye boring shelf brackets!)
We immediately started our search and started the Floating Shelves with Turnbuckle Hardware Project. I just love how they turned out! Here are all the details so you, too, can make your own.
How to Make Floating Shelves with Turnbuckle Hardware

*Disclosure: This post contains affiliate links for your shopping convenience.
Gather together these supplies for your Turnbuckle Shelf Project:
(*Note, supply list is for 2 shelves.)
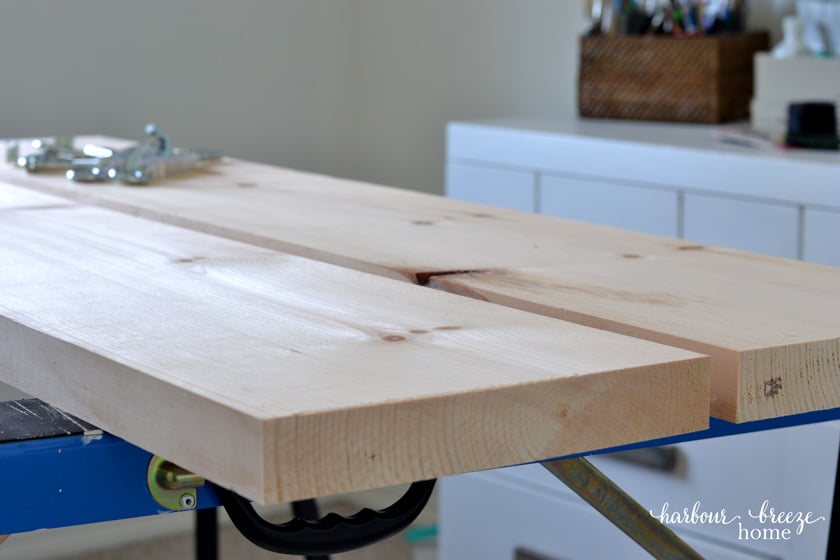
- A 2 x 10- Board cut to the length you need (Ours ended up being an 8 foot piece of Eastern Pine from Eastern Canada cut into 2 – 4 foot lengths ~ Not the most economical option, but it’s beautiful!;))
- U-bolts (4) (size 5/16 x 1 3/8 x 2 1/2)
- Turnbuckle eye/ hooks (4) (size 5/16 x 9 3/8)
- Wall Hooks (4) (This one is very similar to the hooks I found here in Canada at Canadian Tire. I didn’t end up using the ones pictured above.)
- (4) tiny L-brackets to stabilize the back of the shelf
- Spray Paint in Oil Rubbed Bronze Color
- Wood Stain in Early American Color
Other tools needed:
- Level
- Drill and drill bits
Where to find turnbuckle hardware:
It’s often a maze trying to locate specialty items like these. We ended up finding the turnbuckle hardware pieces in our local hardware stores in the section where cabinet handles and basic shelf brackets were. The big hooks were often in different places in the hardware stores depending on the style that they were. The decorative hooks are often in a different location than the “industrial looking” hooks.
The links in the supply list above are affiliate links that you can just click and order online if you’d rather get them that way.
Measure your space and find the wall studs first:
Before any drilling begins, first plan out where you want to hang your shelves. They must be anchored firmly on to the wall or they will fall off it! To prevent that disaster from happening, use a stud finder to locate the studs on the wall and mark where they are.
In our case, the studs were located in such a way that we needed to place our turnbuckle hardware 8 inches from the end of the board.
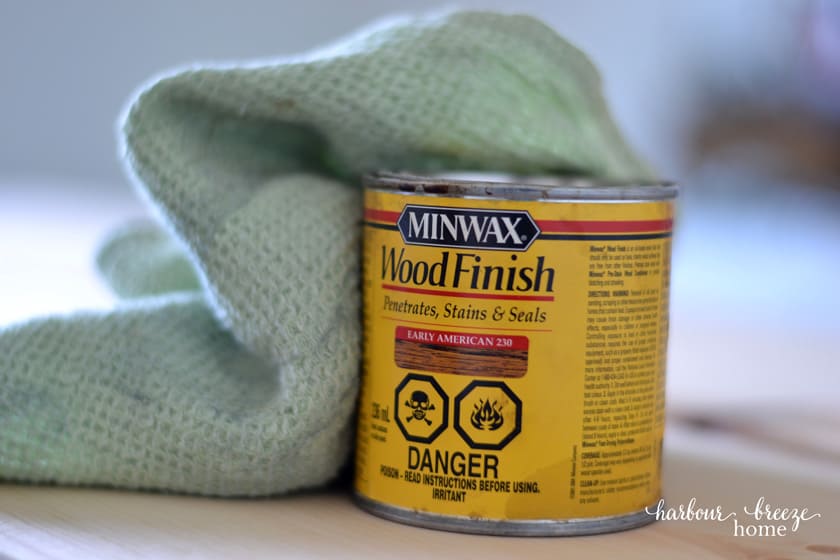
Stain the Turnbuckle Shelf Board
Once all the measuring and math is out of the way, you can get busy with the fun stuff! I first stained the board by wiping on Early American Wood Stain on with a cloth, rubbing it in well and wiping off any access.
Drill holes for the U-bolts

When the stain has cured well on the board, drill 2 holes where the u-bolts need to go. (In our case, they needed to be 8 inches from the edge, and directly in the center of the board.
Spray Paint Hardware (if desired)
Since I wanted the shelf hardware to look black, I spray painted it with Oil Rubbed Bronze spray paint and let it dry well before assembling.
How to Hang a Floating Turnbuckle Shelf on the Wall
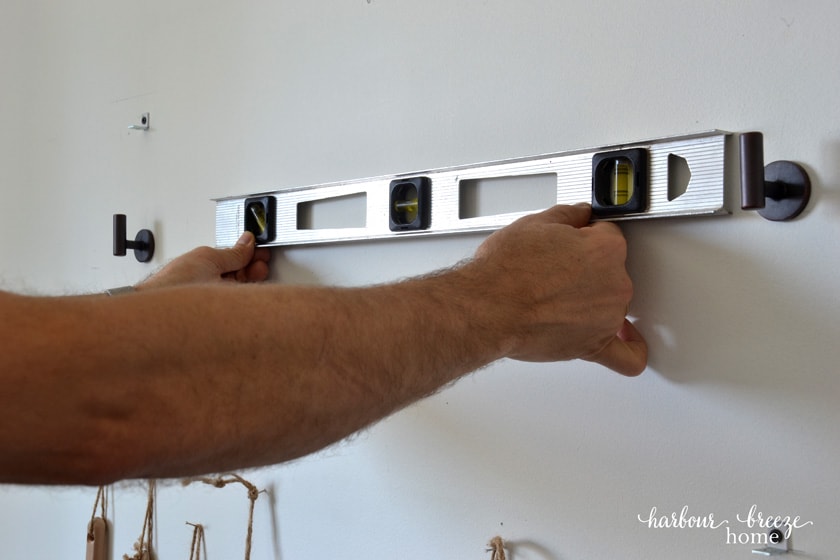
I found this to be the trickiest part of the whole project! My husband and I talked through each step and used a level and pencil a lot!:)
-
Determine how high and far apart you’d like your shelves to be. We determined that we wanted the bottom shelf to sit 17 1/4 inches above the dresser underneath. Then, we wanted the shelf above to sit 12 1/2 inches above that.
-
Hold the shelf up to the desired height, and using a level, make sure it is straight. Lightly draw a pencil line marking the top of the shelf placement as a guide.

3.Using the previous marking you made where the studs were, line up the turnbuckle to where it needs to attach to the hook on the wall. Mark where the hook placement should be. Using the level, mark where the second hook should go making sure it will be level.
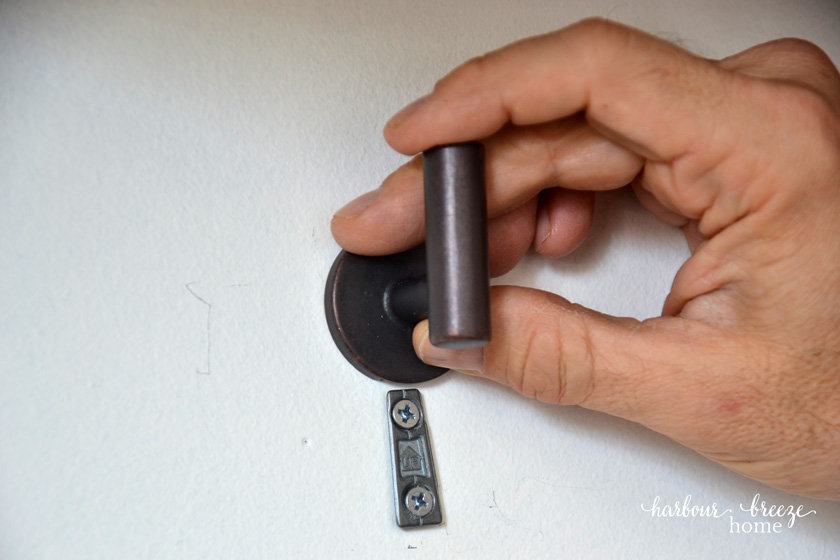
4. Attach the hooks to the wall and hang the turnbuckle on to it.
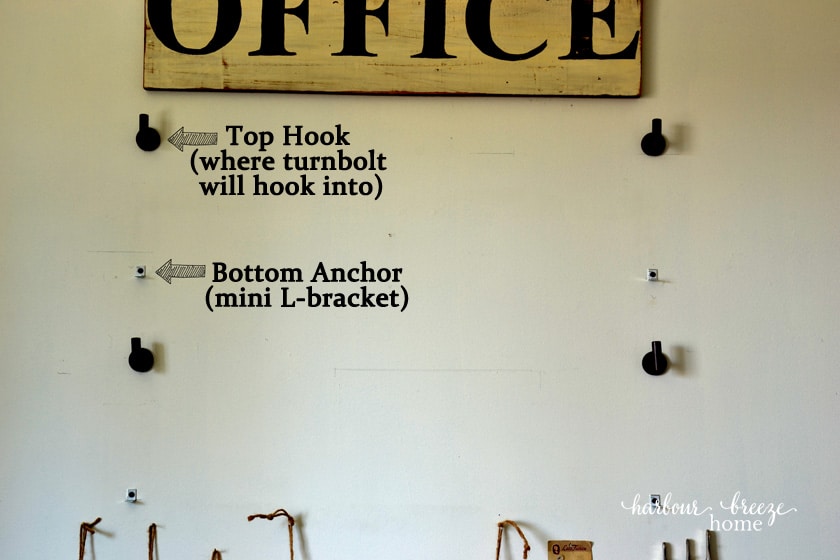
5. To prevent the shelf from tipping backward, attach the mini L-bracket to the underside of the shelf. Lightly mark with a pencil where it should go, remove the shelf, and screw the back part to the wall. Attach the shelf again and screw into the bottom of the shelf.

Additional Tips:
- To “erase” the pencil markings on the wall, I used a little Norwex cleaning paste with a spiri sponge and it came off like a charm!
- Make sure the hardware is clean and dry before you try to spray paint it.
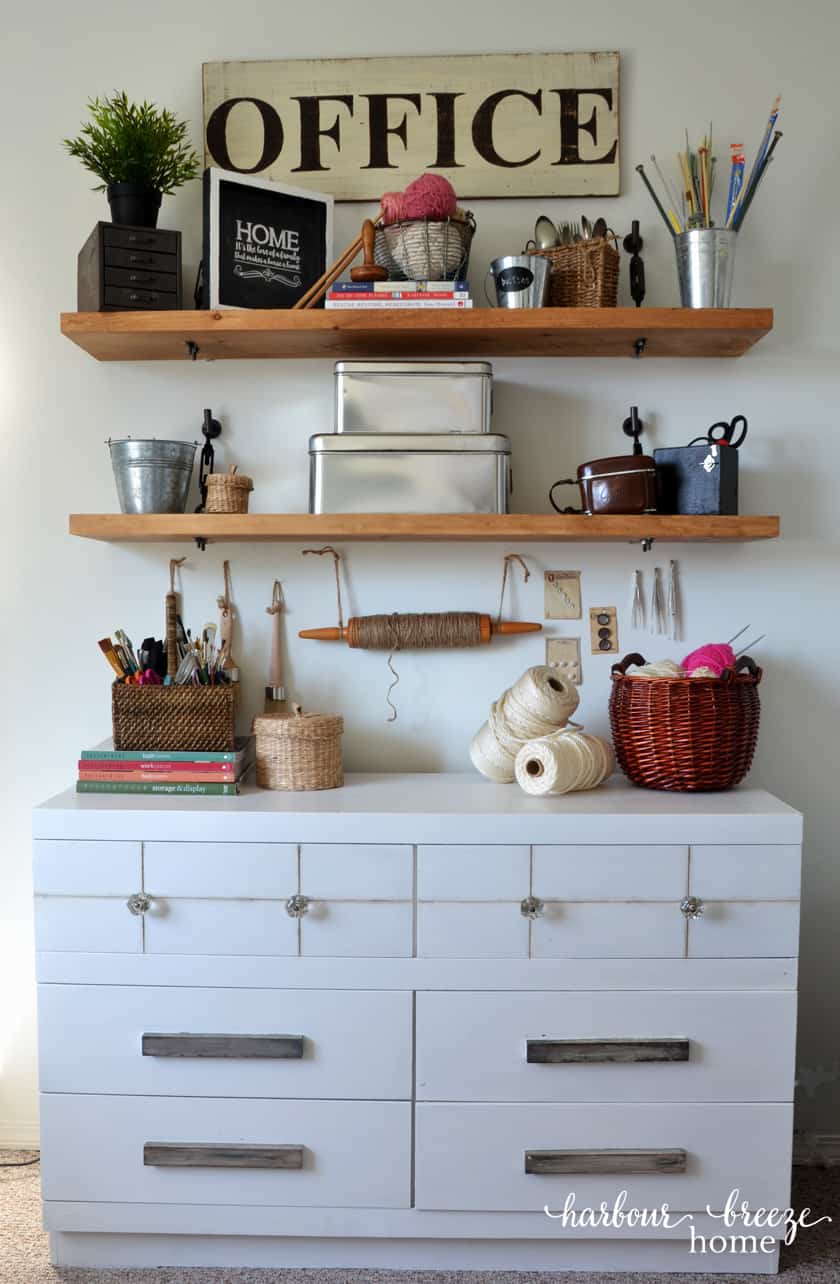
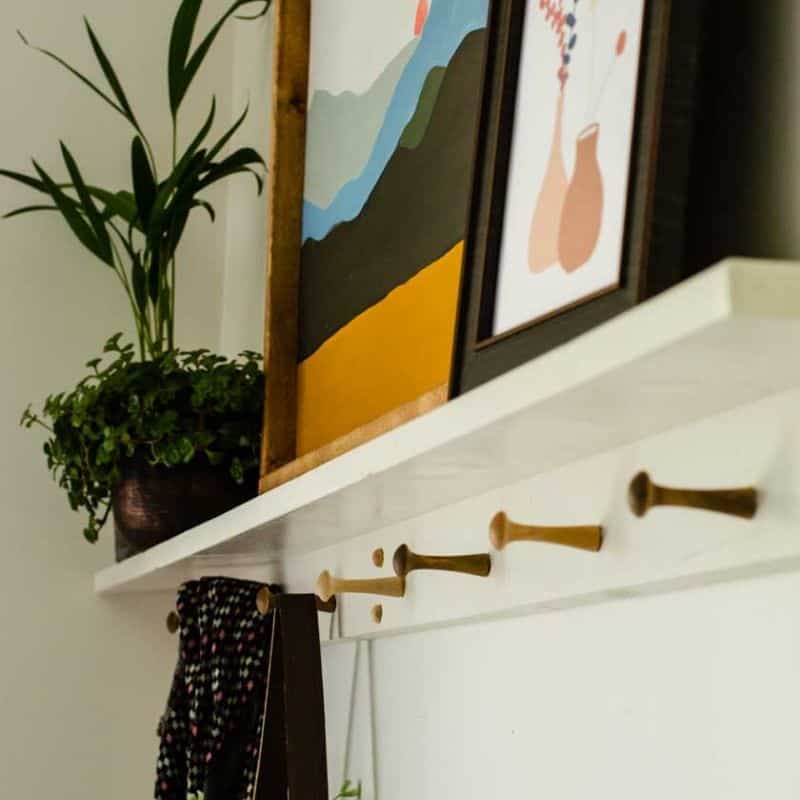
I just love how these shelves turned out. They were the perfect storage and display solution for my craft room / office.
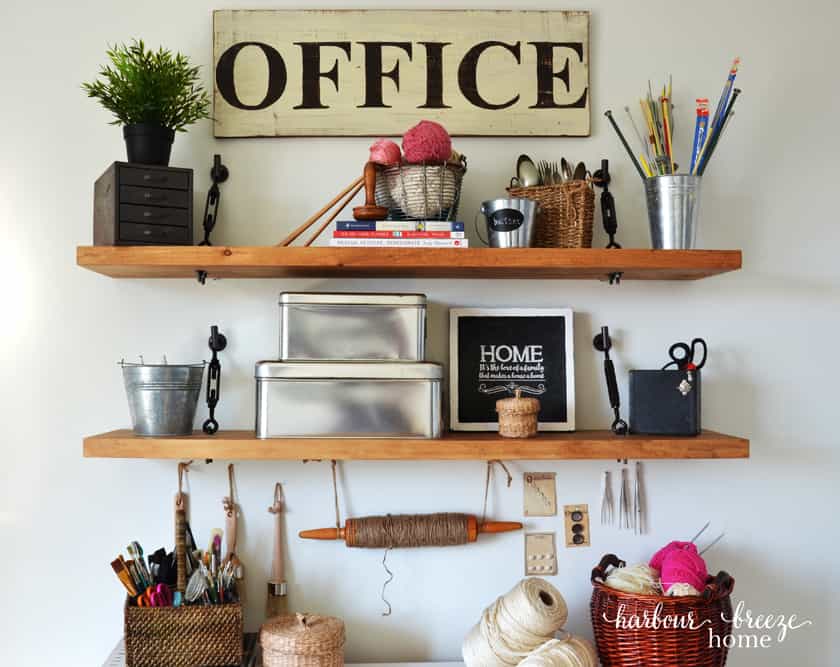
The shelves now hold both sentimental decor items (that remind me of my mom and grandmas), as well as containers of craft supplies that I reach for on a regular basis.
The antique rolling pin of Grandma’s holds my jute string. It’s both handy and adds a fun rustic farmhouse touch to the space.
Be sure to ask in the comments below if you have any questions about making floating shelves with turnbuckle hardware.
And, I want to give a big shout out to LollyJane blog, whose picture and blog post totally inspired this project! Thank you, LollyJane.
For another version of farmhouse shelves, you may want to check out this post.

I LOVE this project, sweet friend! And I loved watching it on IG, too! Thanks for sharing on Homestyle Gathering!
OH, I love these. We were just planning some floating shelves and were in the hunt for brackets – THIS IS IT!!! Thank you so much for sharing!!! We are headed to the hardware store tomorrow!!