
How to Make Bird Ornaments for the Christmas Tree
Learn how to make darling bird ornaments for the Christmas tree using fabric scraps for a vintage look.
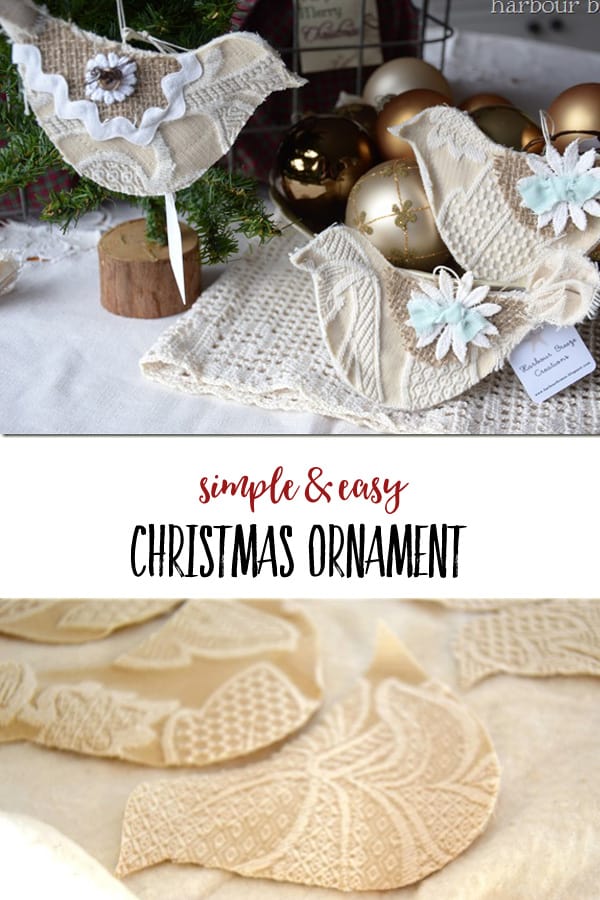

How to Make Easy Bird Ornaments using Fabric
Before we begin, I need to explain something. As I was working on this project, I did grab my camera and take some pictures of the steps. However, I didn’t spend any time at all “staging” the pictures. So, here is my creative process in real life…mess and all! You will soon discover that my ironing board is my most often used work surface!:)
Supplies You’ll Need:
- Cardboard template of a simple bird shape (whatever size you’d like)
- Heavy fabric
- Iron on heat n bond
- Pen for tracing
- Sewing Machine
- String to hang
Step by step instructions
1. Use the cardboard template to trace the bird shape on the understide of the thick damask fabric.

I wanted to do a whole bunch…so I traced a whole bunch…

2. Cut out all the bird shapes using fabric scissors.

3. On another piece of damask fabric, iron on some heat n bond to the underside of the fabric. Heat n bond makes the fabric stiff. (Iron on interfacing would work well, too.)

4. Peel off the paper backing once it is ironed and adhered to the fabric.

4. Place a sheet of “warm and natural” batting material on top of the adhesive, and then place the cut out birds on top of the batting.
The cut out birds become the top layer. {Layer one: Damask with heat and bond. Layer two: Fuzzy batting. Layer three: Cut out birds.}

5. Hold the birds in place by pinning them on through all the layers. Roughly cut them apart (with some space around the edges so you can get them easily under your sewing machine.

6. Sew a topstitch 1/2 inch from the edge. {I use the sewing machine foot as my guide.} Place a loop of string in the middle of the top of the bird and sew it in with the stitching so you can hang the birds from the tree.

7. Once sewn all the way around the edge, trim the bottom two layers to match the shape of the top bird.
8. Accessorize the birds by using a hot glue gun to attach burlap wings, rick rack trip fabric flowers and buttons.

I used burlap as “wings”. The tail feathers are a strip of canvas torn and ironed like an accordion. I just glued with a hot glue gun and “floofed” them until I liked them. I think these would also be fun with miniature tattered flowers…and ruffles!
For more easy DIY Christmas ornaments, check out:
- Fabric Christmas Ornaments – personalized trees
- DIY Book Page Star Ornaments
- Winter Wonderland Christmas Decoration (using Dollar Store supplies)
For more recipes, crafts & ideas for your home all year round, become a VIP!
Become a VIP newsletter subscriber and get instant access to the library of free printables (including wall art, gift tags, and more!). Click here or the button below to join today.


Your birds are lovely. Maybe next year the tree will be decorated in ornaments I make!
I LOVE these! I saw your birds on WhisperWood & had to find the post where you show how to make them! They look beautiful!