
How to Easily Reupholster Dining Chairs

Update worn out dining room chairs or thrift store finds with new fabric and this easy way to reupholster dining chairs. No sewing skills are required!
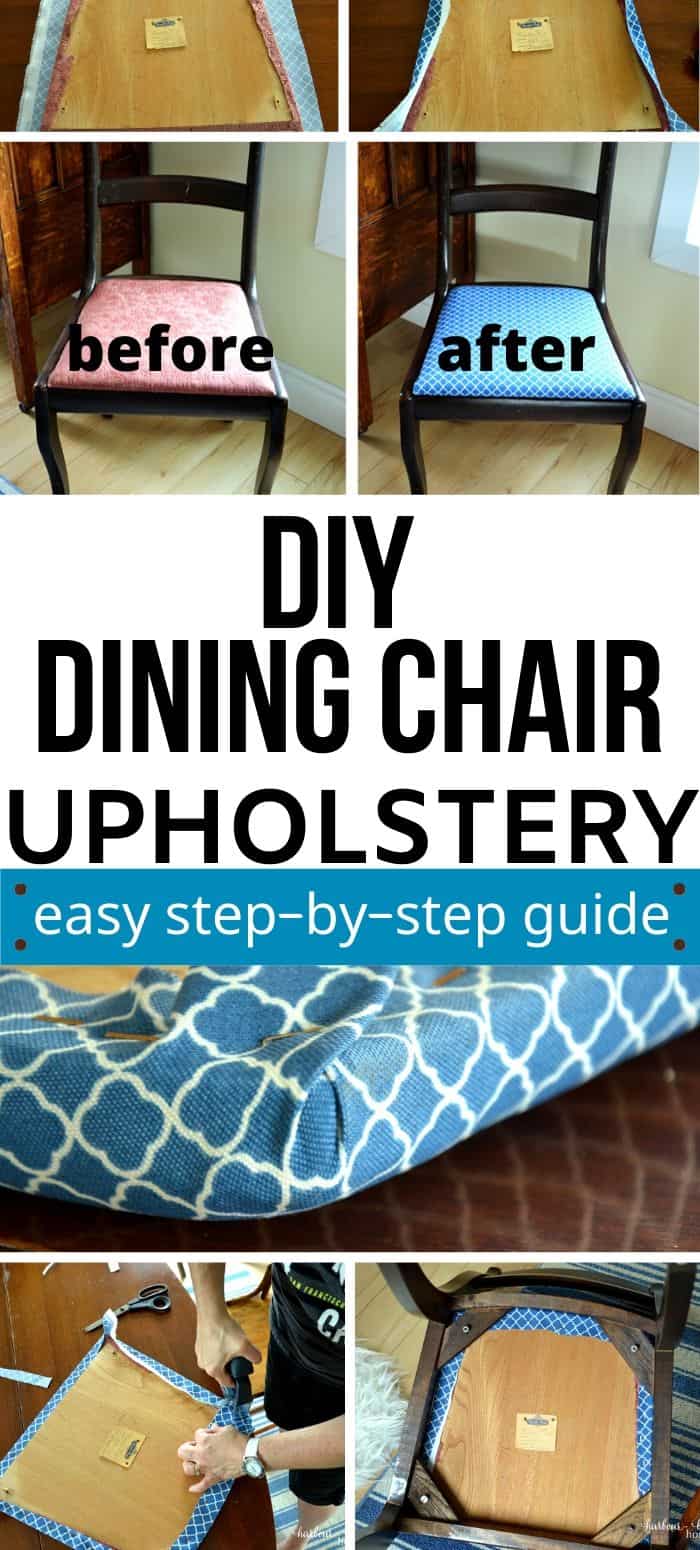
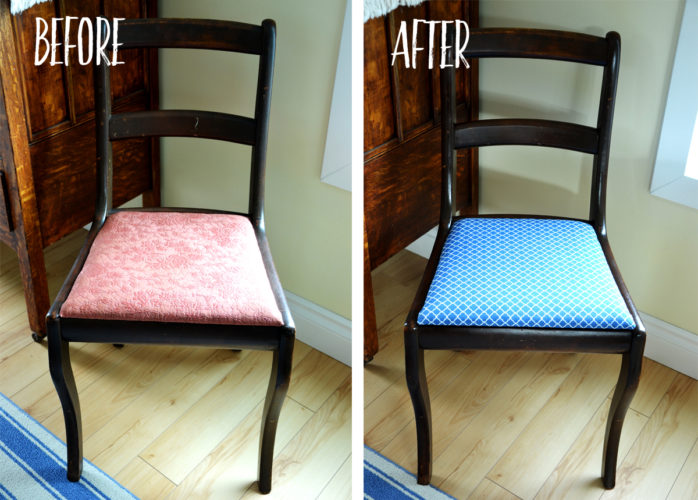
I have some old chairs in good condition sitting around the house that I love very much. They’re sturdy and classic and quite charming, in my opinion. The only problem is, the cushions are covered in outdated fabric that makes them feel a little tired. See what a difference some new fabric and a simple reupholster job can do!
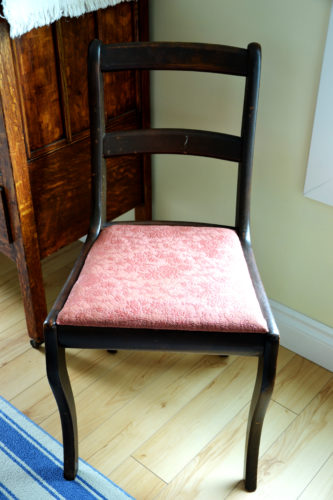
I purchased some durable outdoor fabric (that I love!) at a great sale at the local fabric store, and I decided it would be perfect for this little chair.
Re-covering a chair seat is one of the quickest and most gratifying diy projects ever! In less time than it takes for the cornbread to bake for dinner, you can have a whole new look happenin’.:) (True story…)
Supplies needed for this reupholstry dining chairs seat covers project:
- New fabric – Durable fabric is a good choice for reupholstering dining chairs. Other important factors to consider when choosing fabric is how easily it will wipe up spills, and if there are lines that will make it complicated to line up properly.
- Screw driver
- Fabric scissors
- If you are going to strip the seat completely of its original fabric and cushion (I did not), you will need a new foam pad for each seat bottom.
- Staple gun
Step by step instructions for DIY Upholstery : Dining Chair Seat Covers
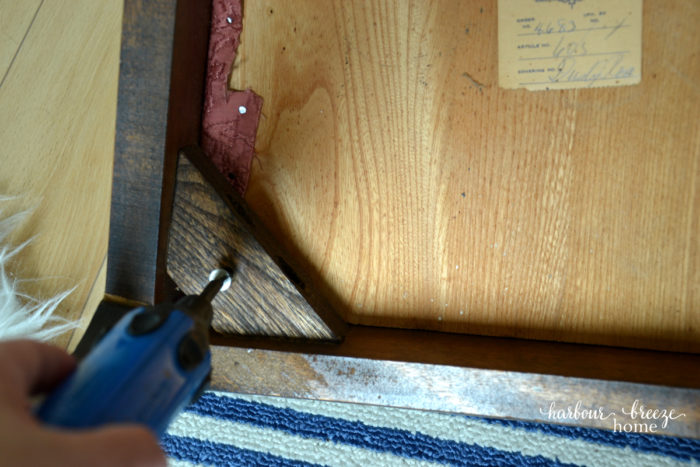
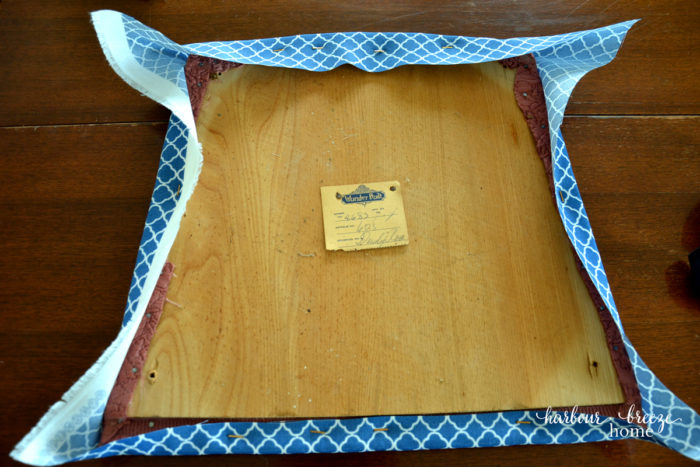
- The first thing you’ll need to do is remove the seat cushion from the chair. To do so, unscrew the 4 screws on the removable seats.
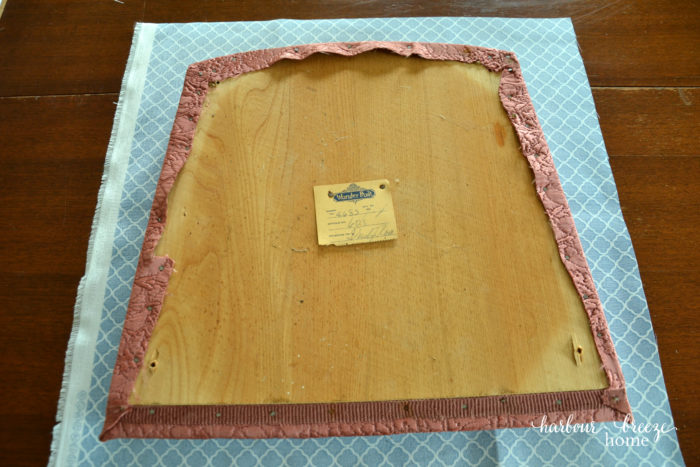
2. Cut out fabric, allowing for enough fabric to wrap up and around the sides, and lay the seat on a flat surface.

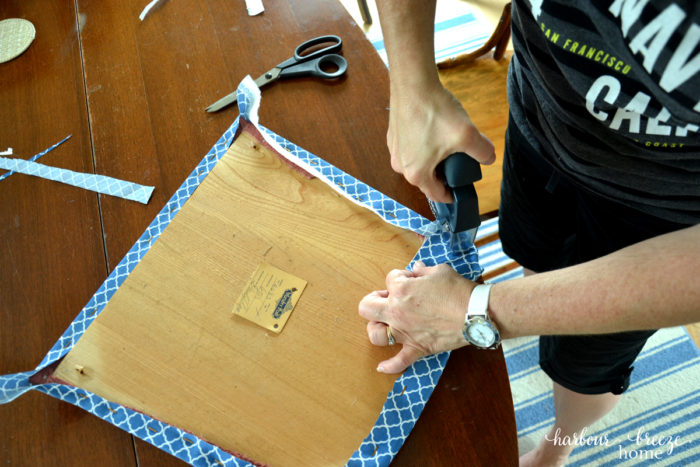
3. Using a staple gun, pull the fabric up and over the old seat cover fabric and around the middle of one side and staple. Then staple the side directly across from it, pulling the fabric of the new cover tightly before stapling. If your fabric has a linear pattern, make sure the lines are straight.
4. Continue stapling side to side until both sides are fastened securely and only the corners are left.
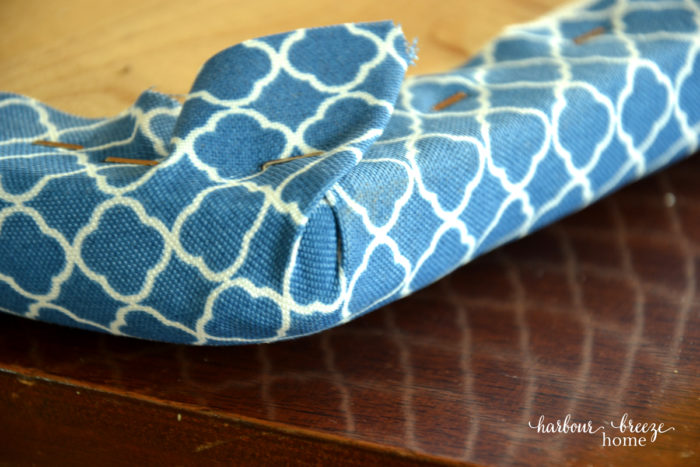
5.The trickiest part of a diy upholstery dining chair cover is the corners. Here’s how to upholster the seat cushion corners:
If you have excess fabric at this point (like I did), trim it close to the stapled area, and start on the corners. The corners are the trickiest part of this project ~ but you can do it!
Pull the long tail of the corner up first and staple it down. Then pull each side over, adjusting it carefully and checking to make sure it doesn’t pucker on the edge.
6. While the cushion is already off, wash the chair frame well.
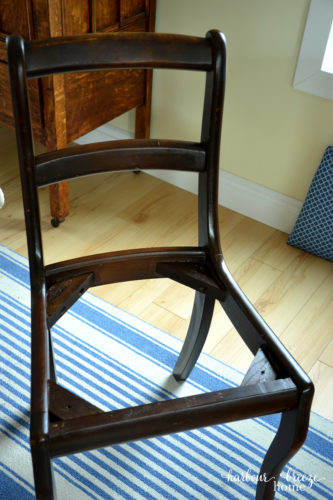
(I used wood floor cleaner, since I didn’t have my favorite wood cleaner (Murphey’s Oil Soap). Then I shined it up with a mix of olive oil and lemon juice. That old wood just drank it up!)
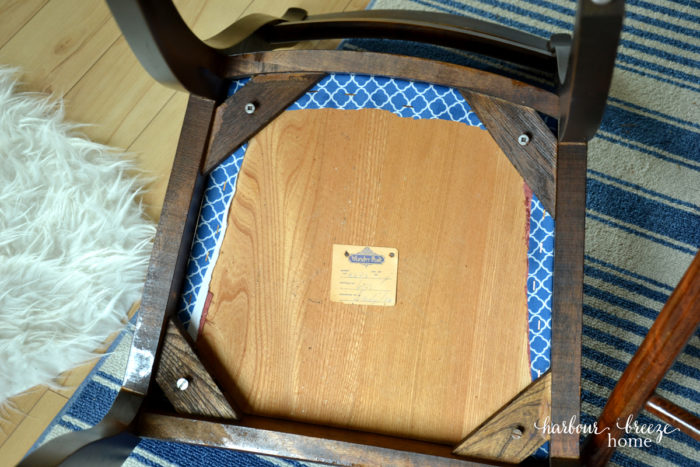
7. The last step is to attach the seat cushion back onto the chair with the 4 screws underneath.
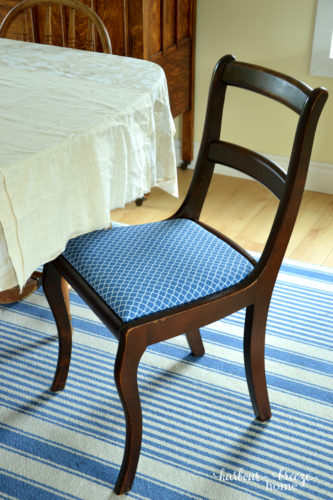
There you have it – A brand-new look for standard dining chairs or a family heirloom without a lot of time.
PS. My first experience with re-covering chair cushions was at my sister’s house last Fall. While I was working on them, my husband videoed some of the steps. I ran across the video the other day and laughed my head off. This is “Real Life DIY’ in ~ well ~ real life ~ right in the middle of the normal activity of family life and laundry.
I did 6 chair cushions that day and I think this one was the last one. You can see (while listening to the hilarious conversation going on) how I did the corners. (Blooper reel included for free…)
Happy laughing DIYing!:)
(If that movie doesn’t show up in your browser, you can find it on my Youtube Channel here.)
)")
For more DIY home projects, check out:
- 8 DIY wall shelf projects you can make in a few hours or less
- DIY pendant light for the kitchen using a wooden bowl
- 12 DIY plant stand projects using wood
- Make a DIY floating frame for canvas art
- DIY chalk paint recipe using baking soda
And here are some more DIY video projects:
For more recipes, crafts & ideas for your home all year round, become a VIP!
Become a VIP newsletter subscriber and get instant access to the library of free printables (including wall art, gift tags, and more!). Click here or the button below to join today.


The chair looks great! Even the wood looks like you’ve redone it. I have recovered my table bench numerous times and it really is the easiest thing. I really enjoyed your video, too!
This turned out lovely! Looks like I have a new weekend project to work on-Thanks for sharing 🙂