
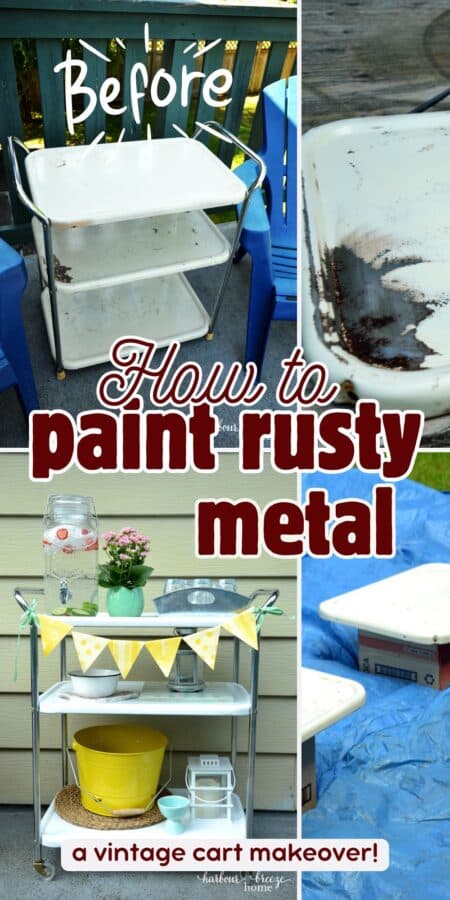
How to Paint on Rusty Metal: A Vintage Cart Makeover You Can Do in a Weekend
Learn how to paint on rusty metal with this step-by-step guide to transforming a vintage metal cart using spray paint, primer, and a little elbow grease.

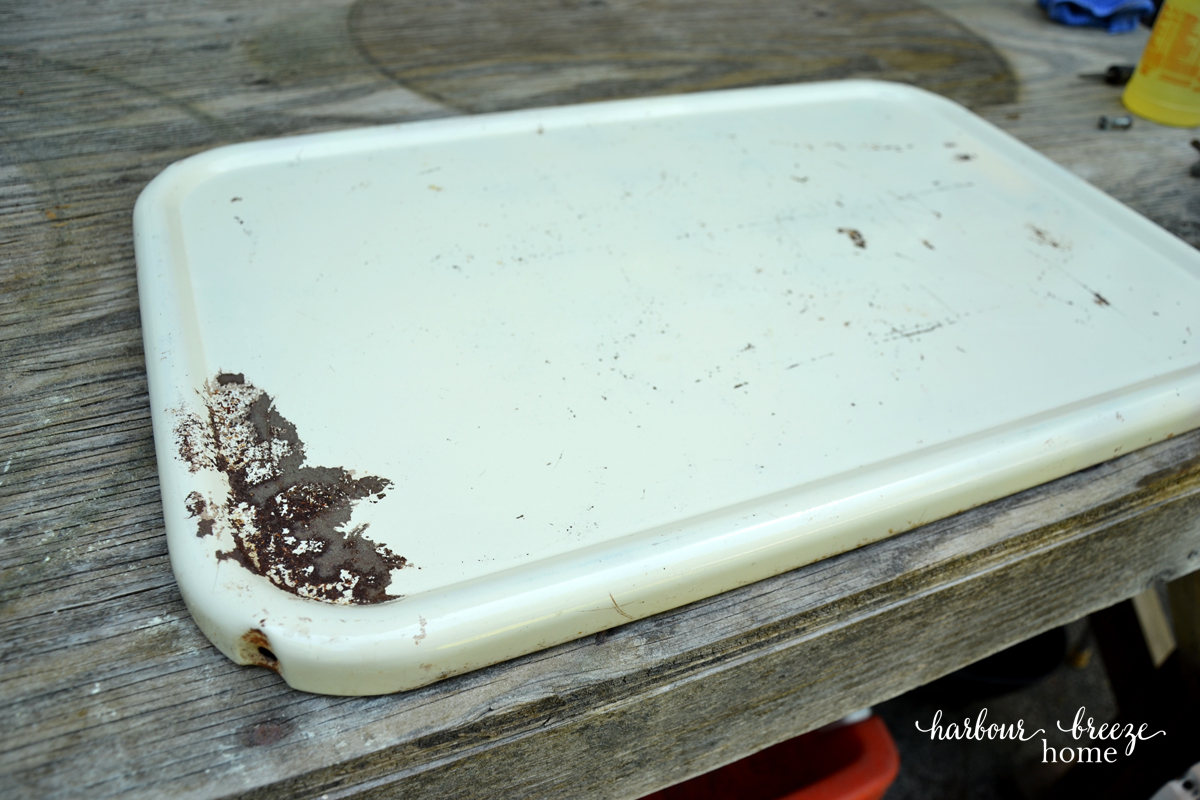
Tucked away in the corner of my storage area was a dusty, rusty 3-tier rolling cart.

Most people would’ve tossed it in a heartbeat. But I couldn’t bring myself to part with it—because this vintage metal cart belonged to my mom.
She kept it under the dining room window at the farmhouse, often loaded up with plants and wrapped in yellow daisy contact paper. For years I dreamed of giving it a makeover and turning it into a cute and functional party cart. And one sunny day, that makeover finally happened!
If you’ve ever found an old, rusted piece of furniture and wondered “Can I actually paint on rusty metal?”—the answer is YES, you absolutely can.
Here’s exactly how to restore and paint rusty metal furniture with spray paint, so you can give new life to forgotten treasures.
Why You’ll Love This Rusty Metal Cart Makeover
- ✅ It’s budget-friendly (just spray paint, sandpaper, and a dream!)
- ✅ You can complete it in a weekend
- ✅ It turns junk into a charming, functional piece
- ✅ Great way to preserve sentimental items
- ✅ Works for indoor or outdoor use
What You’ll Need to Paint on Rusty Metal
Disclosure: This post contains affiliate links.
- Random orbital sander or sanding block and
- Medium to coarse grit sandpaper
- Safety goggles
- Spray paint primer for rusty metal
- Spray paint in color of your choice (I used satin white
- Screwdriver.
- Drop cloth, tarp or cardboard for protecting surfaces.
Step-by-Step Guide: How to Paint on Rusty Metal Furniture
- Disassemble the cart (if possible)Unscrew the trays from the chrome handles to make each piece easier to work with. Lay everything out on a workbench or sturdy surface.
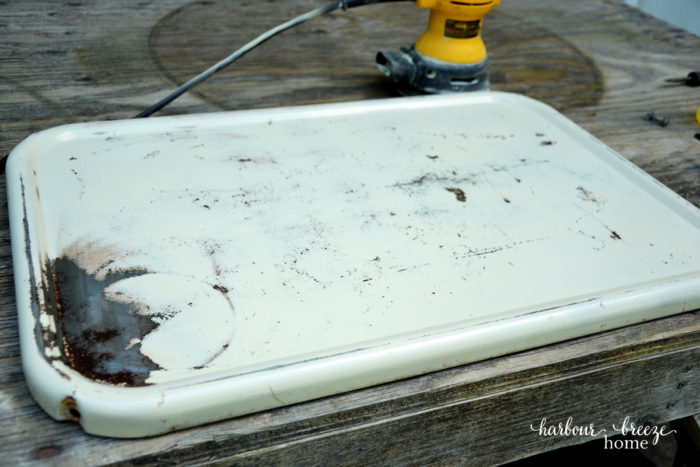
2. Remove the rust completely. This is the most important step when painting on rusty metal. If you don’t remove the rust, the paint won’t stick properly.
- Use a random orbital sander (or sanding block) to remove all visible rust, flaking paint, and rough spots.
- Focus especially on corners and edges where rust tends to cling.
- You don’t need to sand down to bare metal everywhere—just make sure the surface feels smooth and free of loose bits.
💡 Tip: Always wear eye protection and a dust mask when sanding rusted metal.

3. Wipe clean and prep your painting area. Use a damp cloth to wipe off dust and sanding debris. Let the pieces dry completely.
Set up your spray-painting area in a well-ventilated space—outside is best! Lay down a tarp or cardboard to protect surrounding areas from overspray.
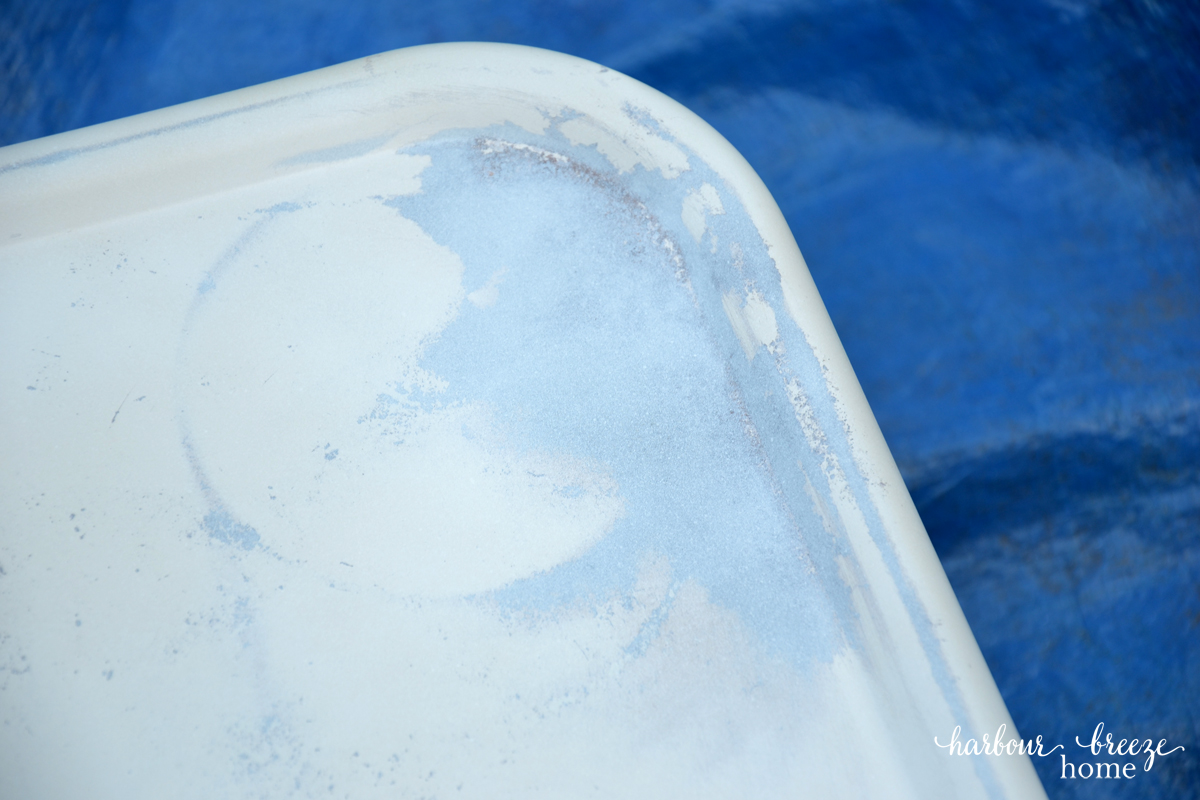
4. Apply rust-inhibiting spray primer. Spray primer is essential when painting on rusty metal. It helps the paint stick and prevents future rust.
- Shake the primer can really well (for at least 1 minute).
- Apply thin, even coats—not thick globs.
- Hold the can 10-12 inches away and move in a smooth, sweeping motion.
- Allow each coat to dry according to the manufacturer’s directions (usually about 10 minutes).
🛠️ Even if some sanded areas peek through the primer, that’s okay—it’s doing its job underneath.
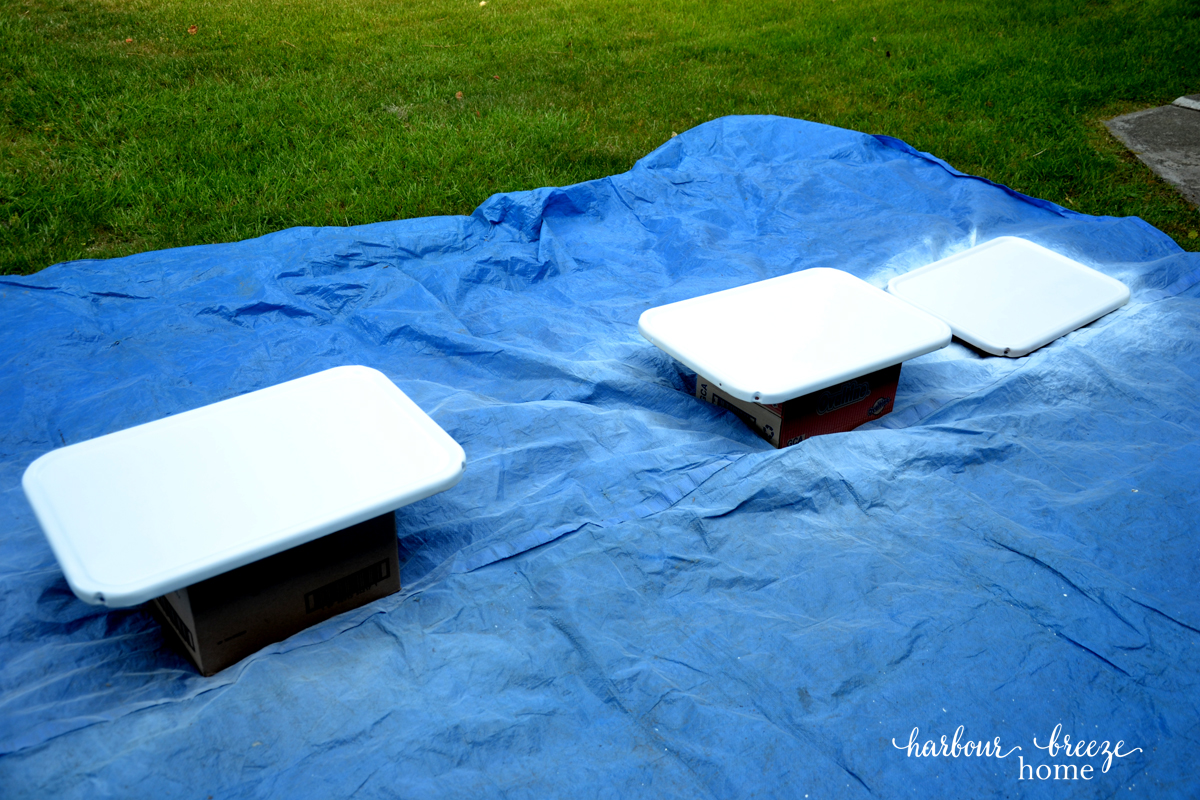
5. Spray paint with thin coats. Once the primer is dry, begin applying your color of choice.
- Use the same spray technique: thin, even coats, with drying time in between.
- I used white satin spray paint for metal and loved the fresh, bright finish it gave.
- Usually 2–3 coats are enough for full coverage.
6. Clean chrome and reassemble. While the paint is drying, give the chrome handles a little love:
- Mix baking soda and vinegar to form a paste.
- Rub it gently onto the chrome with a soft cloth to remove grime or tarnish.
- Rinse and dry well.
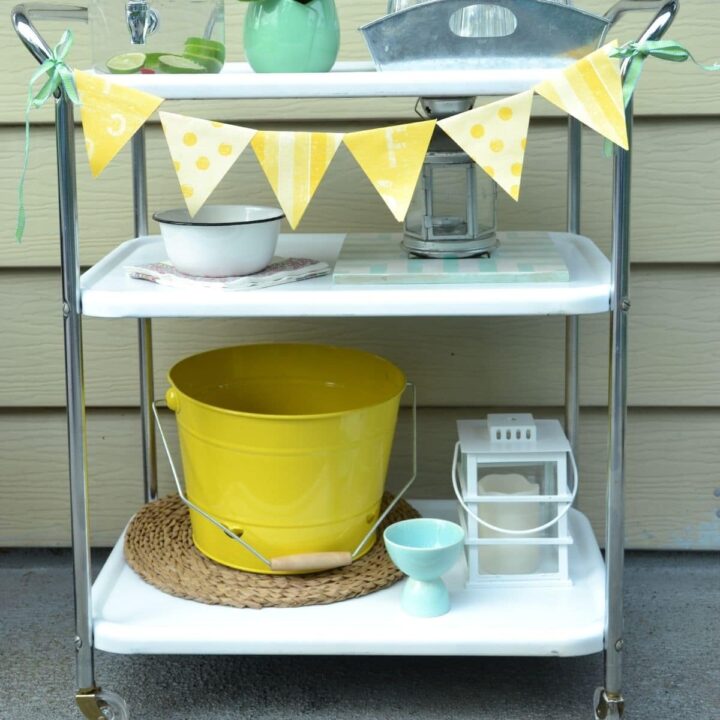
Once everything is completely dry, reassemble your cart—and admire your handiwork!
Ways to Use Your Refreshed Rolling Cart
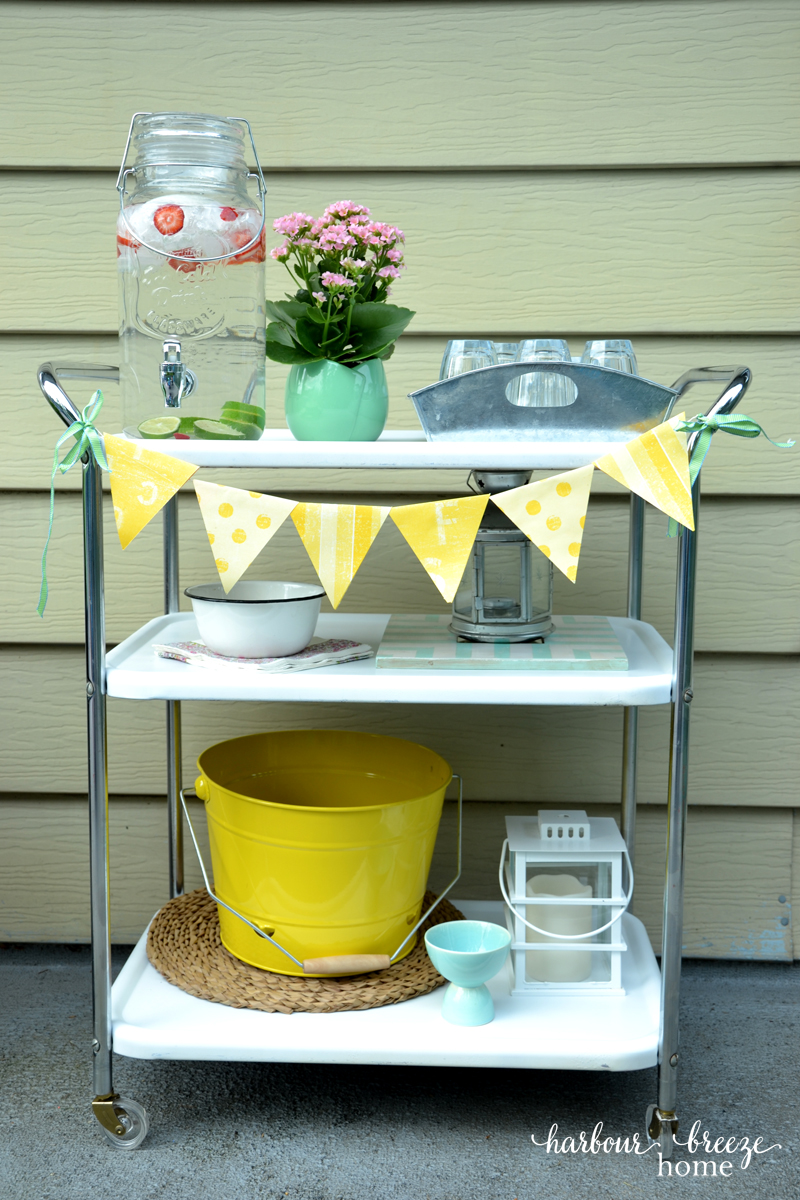
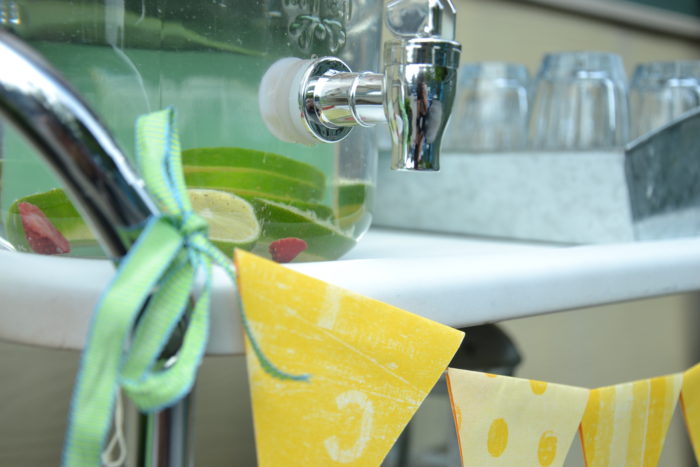
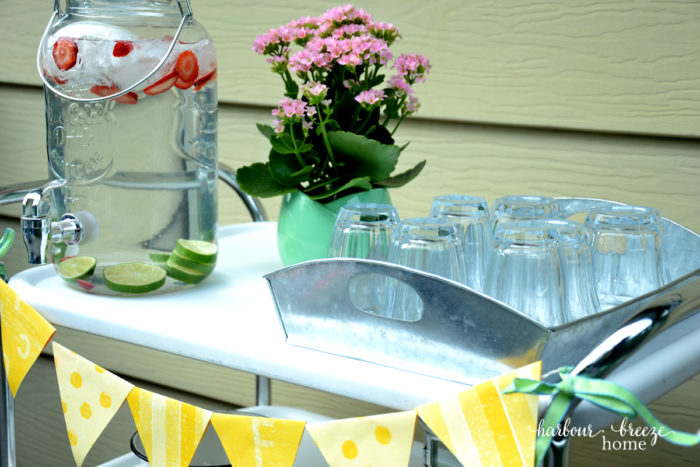
You can use your newly refreshed vintage metal cart for an outdoor drink station for summer BBQs. You can even add a fun paper bunting banner to it if you’d like.
You could use it as a plant cart for herbs and houseplants- like my mom did!
In Winter, you could turn it into a hot drink bar with cocoa and coffee.
It could become a side table or snack bar for game night.
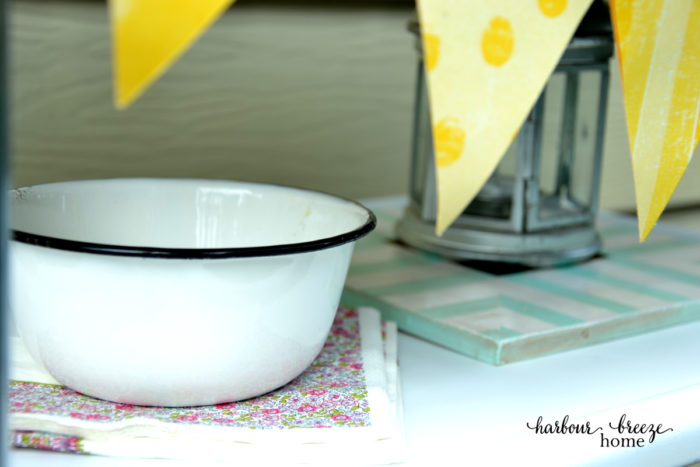
Or it could be a party decor station with napkins, flowers, and utensils
With wheels and three levels, the possibilities are endless!
For more spray paint projects, you may want to check out:
- Spray Painted Pendant Light
- Spray Painted Industrial Wire Basket with Fabric Liner
- Painted Lamp Makeover
How to Use Spray Paint for a Metal Cart Makeover
Transform an old, rusty vintage metal cart by using spray paint. Learn the basics of how to prime and paint metal with spray paint.
Tools
- Random orbital sander
- Sandpaper
- Safety goggles
- Spray paint primer
- Spray paint in color of your choice
- Screwdriver.
Instructions
1.Dismantle the shelves from the handles by unscrewing the screws on the sides.
2.Lay each shelf on the workbench and sand off the rust with the random orbital sander.
3. Once sanded well, lay them in a well ventilated area (or outside) and protect adjoining areas from overspray.
4. Following the directions on the spray paint can, prime the pieces with a few thin coats of spray primer.
5. Using the color of choice, spray on thin layers of paint ~ waiting a few minutes (about 8) in between coats.
6.Wash the chrome handles with baking soda and vinegar and then re-assembled it all back together again once it is completely dry.
For more recipes, crafts & ideas for your home all year round, become a VIP!
Become a VIP newsletter subscriber and get instant access to the library of free printables (including wall art, gift tags, and more!). Click here or the button below to join today.

Pin This Project for Later!
📌 Transform a rusty piece into something beautiful with this spray painting on metal tutorial. Save it to your Pinterest board so you’re ready next time inspiration strikes!

Do you have to sand the shelves if they are not rusted? It aunt has a dark yellow cart like this, in great condition – no rust – that I want to paint in a different color.
This looks fantastic! So glad you made use of something that was your Mom’s and you can think of her whenever you use it. ♥
Love this little cart. I remember my mom having one and it was covered by 70’s tacky contact paper. I wonder if it still exsists. The cart, not that tacky contact paper.