
How to Make Farmhouse Style Door Trim
In this article: Learn how to make farmhouse style door trim by following these simple step by step instructions.
Did you see the post on our hallway makeover reveal? If not, click here to see it’s big debut!
One of the most significant changes we made to our previously blah and dark hallway was adding farmhouse style trim around the doors.
Although the previous trim wasn’t horrific by any means, it seemed small and lacked character.

A trip to our local hardware store for supplies and a few steps later, it turned out looking so nice. Here are the details of how we did that step:

How to Make Farmhouse Style Door Trim
Disclosure: This post contains affiliate links for your shopping convenience.
Supplies Needed:
- 1 x 3 boards of primed mdf for and door frame sides
- 1 x 4 boards of primed mdf for trim at the top of the door
- 1 x 2 pieces of primed mdf for decorative trim for the top of door frame
Before you head to the store, be sure to measure your space and door frames carefully so you can calculate how much lumber you’ll need. We chose primed mdf boards over raw wood, as we felt it would give a more professional looking finish in the end.
Method:
-
Attach the side trim pieces to the door frame.
Cut two pieces of primed mdf (1x 3) to the measurement from the floor to the top of the door frame. Dry fit it to make sure your measurement is correct. 😉

2. Make the craftsman decorative top piece for the doorway.
The decorative craftsman style look was achieved by attaching 2 1×2 strips to the 1 x 4 upper trim piece of the door trim to form a “u” shape. One was attached to the top,

and one was attached to the bottom.

My husband found it was easiest to assemble these pieces before he attached them to the wall.
3. Attach the decorative top piece to the door frame.
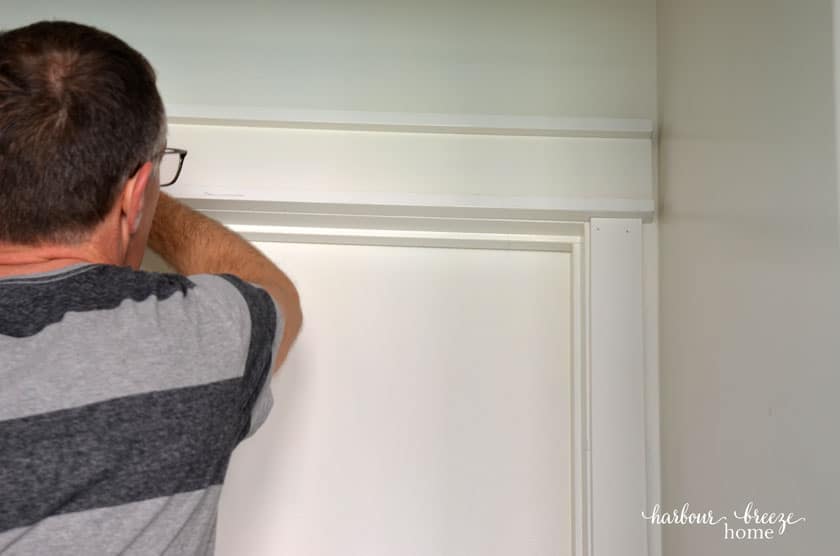
Using an air brad nailer, the top piece was attached to the top of the door frame.
Once the doors were all trimmed out, the baseboard was added to complete the finished look.
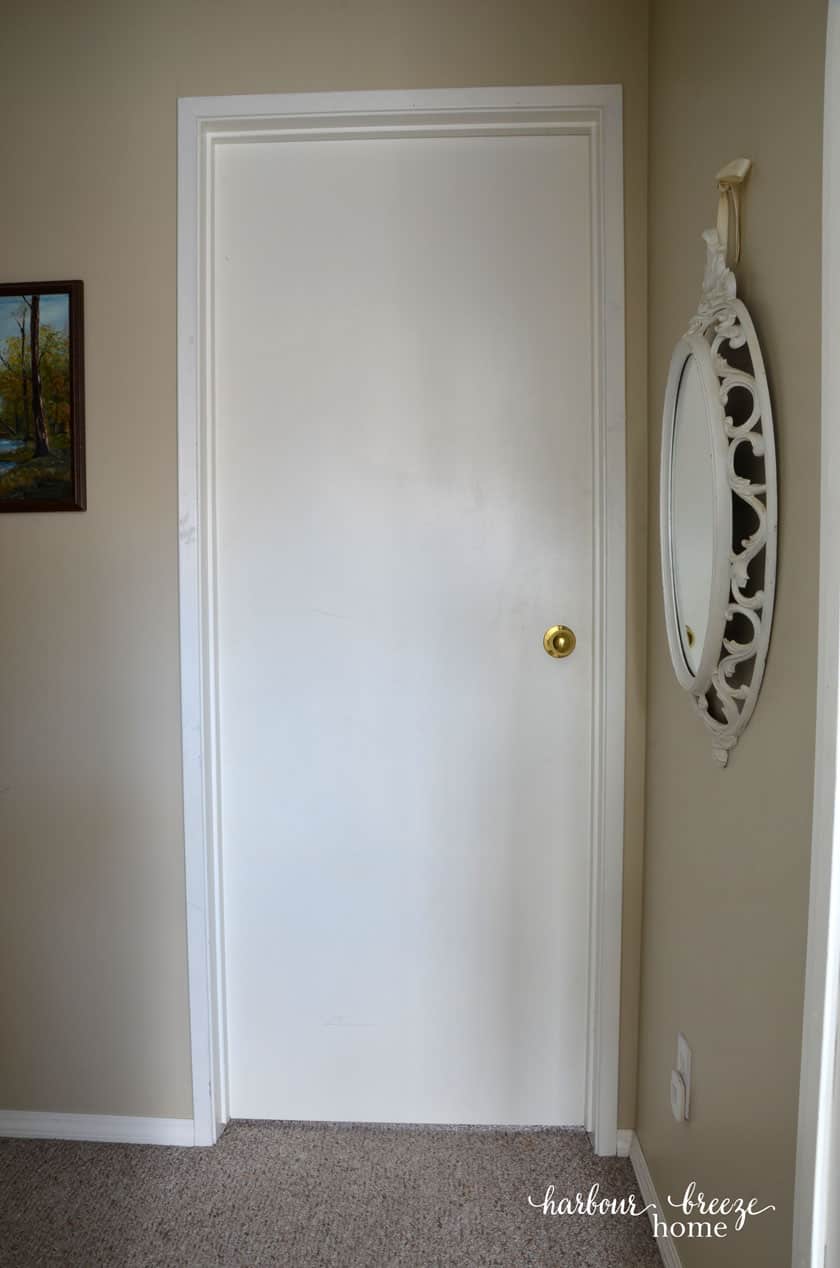
Here’s how the door trim started out:
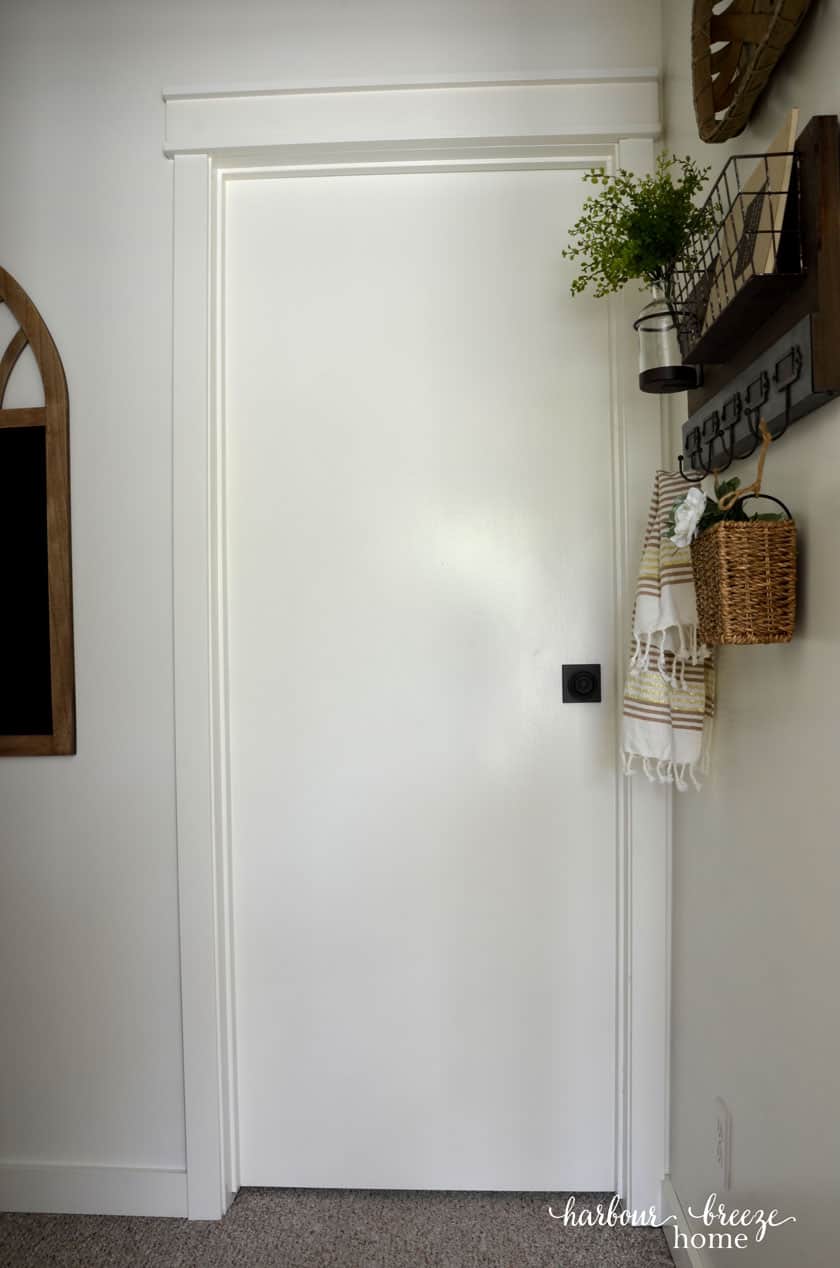
And, here it is now!
Additional tips
- Getting primed mdf saved us time in the painting department! We did paint all the pieces with Simply White by Benjamin Moore (mixed in Behr paint in a semi-gloss finish) before they were nailed to the walls. Once they were nailed, we filled the nail holes with 3M patch plus primer filler and touched them up with a final coat of paint.
- This farmhouse trim feature goes nicely with the trim we added to our Billy Bookcases to make them look like custom built-ins.
- You can find all my painting tricks in this post, and my favorite painting supplies in my Amazon Shop.
- If you have the space, this look can also be done with larger width boards to achieve an even more dramatic makeover look. We had to stick with a smaller width due to the closeness of the wall to the door frame.
Wao, Mr. HB did a great job. Congratulation.
It definitely inspires me to try it on my own doors.
This farmhouse style door trim just looks lovely! What a difference it makes on your door! Tell Mr. HB he did a great job! 😉