
Adding Moulding to Ikea Billy Bookcase
Add farmhouse style and a built-in look by adding moulding to the Ikea Billy Bookcase system.
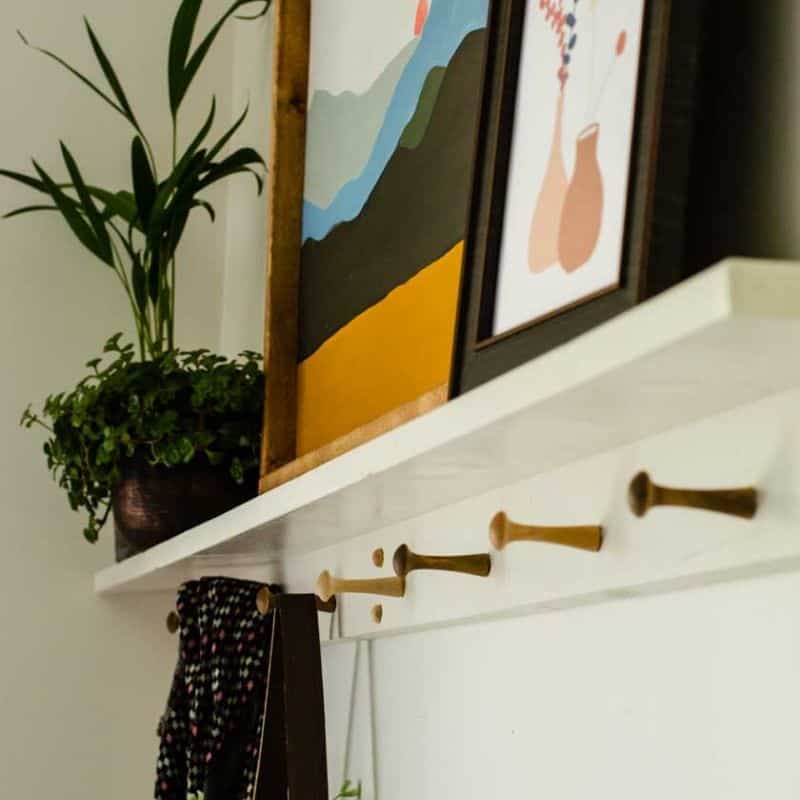
Ikea’s Billy bookshelf “built-in” wall is by far my favorite addition to our small townhouse home. It provides both practical storage that we desperately need, as well as a pretty place for decor.
We’ve built it up piece by piece as the budget allowed & added finishing touches for a farmhouse look.
It might just be the answer to your storage and display problems, too. Here are the step-by-step details.
How to Add Moulding to the Ikea Billy Bookcase System
Disclosure: This post contains affiliate links for your shopping convenience.
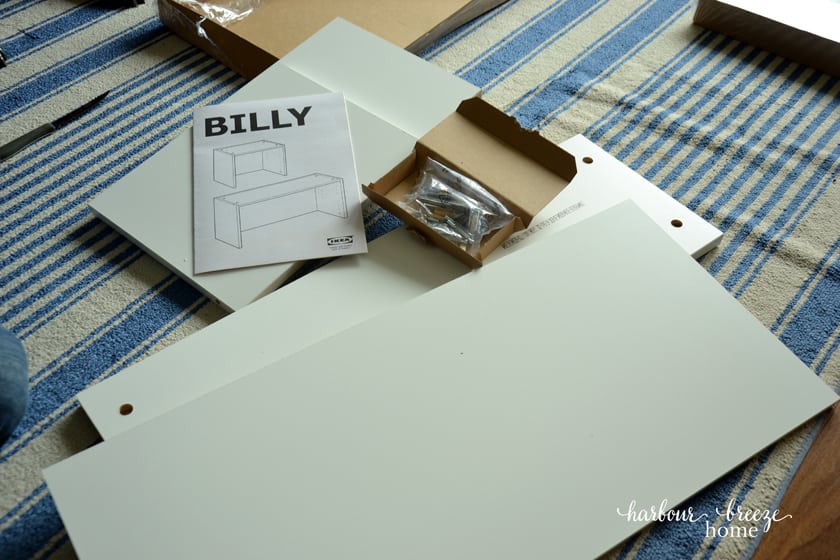
Step One: Assemble the Billy/ Oxberg Bookcase system that fits best in your space.
Before we even headed to our nearest Ikea, we measured carefully the space we were considering. We had a relatively long, empty wall space to fill, so we had a few options.
We started out with two Billy/ Oxberg Bookcase units with doors:
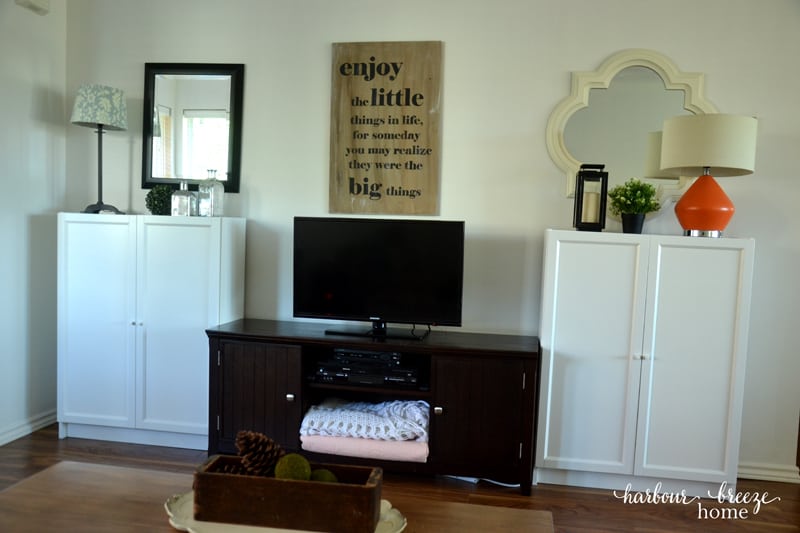
They came with all the pieces necessary to assemble. By simply following the included instructions, I put them together myself with no problems.
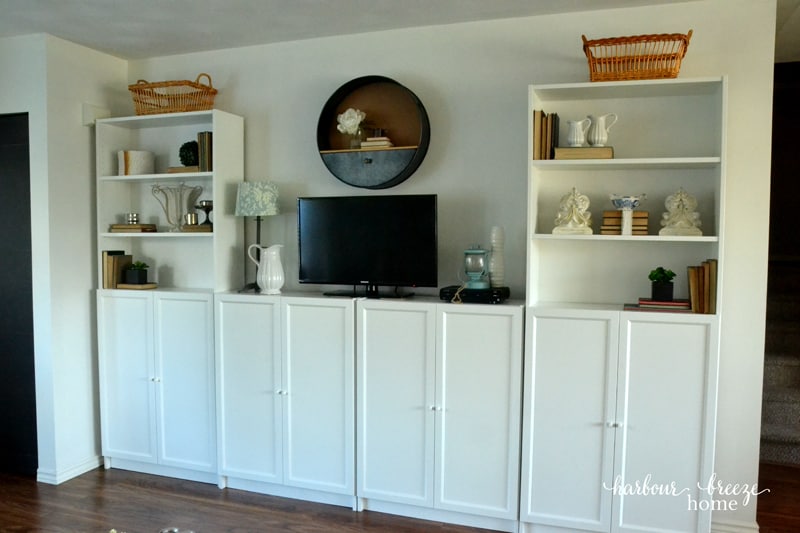
Then, a few months later, we purchased 2 classic Billy Bookcases to fit beside the low units.
When we purchased them, we also bought 4 more Oxberg doors so we could have more closed storage options. The doors on the bottom of the units help hide a multitude of everyday items ~ like my office supplies!
Then to finish it off, we purchased the height extension shelves:
They, too, were easy to assemble and attached to the top of the bookcases, making them nearly ceiling height.
(I forgot to take a good picture of this step, but you can see a peek of it to the left of the above picture…)
Step Two: Add visual interest to the wall by installing faux shiplap for a farmhouse look.
The icing on the cake was adding shiplap to the wall in between the two tall units. It adds the farmhouse touch that I’ve been longing for and gives the space so much more personality!

Add diy craftsman style trim moulding for a built in look.
The custom craftsman style trim is definitely the cherry on the top of this project. I’m not gonna lie. My husband did every little part of this step. I just took pictures and wrote about it!
Here’s how to add trim:
Supplies Needed:
- 1x2s
- 1x3s
- Tape Measure
- Chop Saw
- Pneumatic Nail Gun
- Paint
- Caulking
Step 1: Measure carefully to determine how much lumber will be required for the moulding.
You will need the same amount of 1x2s as 1x3s. If you want the molding to be wider, you may want to choose 1x4s instead of 1x3s.
Step 2: Cut the side pieces of the moulding with a chop saw.
Measure from the back of the wall to flush with the front edge of the bookcase. Each side piece will be 1- 1×2 and 1 1×3.
Step 3. Attach the 1×2 to the top of the 1×3 with a pneumatic nail gun, referring to the pictures below for placement.
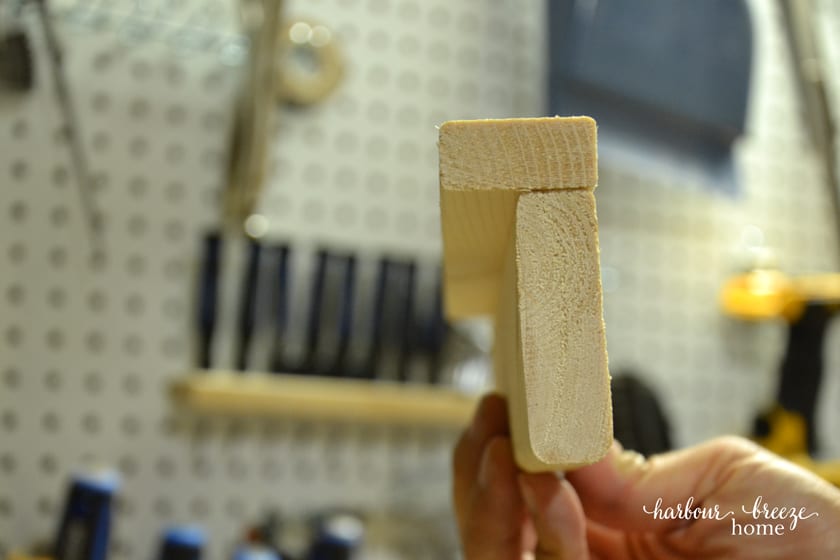
(The right side piece will be a mirror image of this piece.)
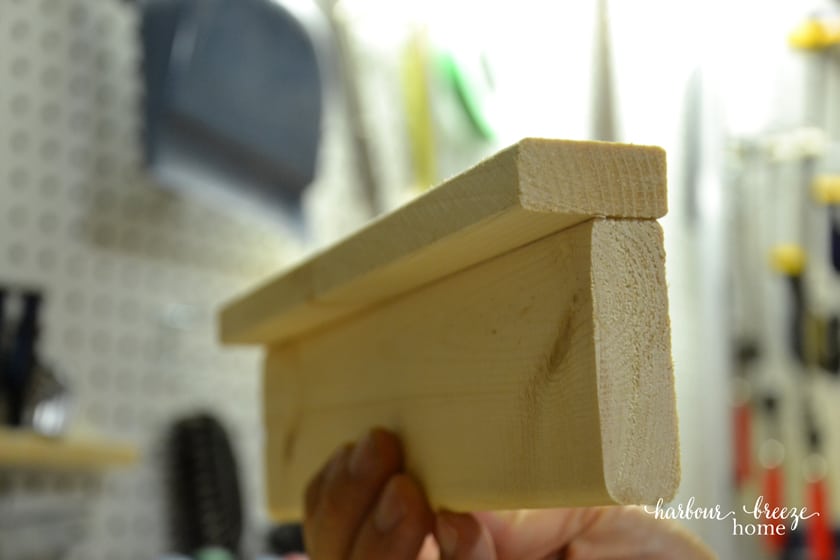
Step 4: Prepare the front trim pieces by measuring the width of the billy bookcase plus adding in the measurements of the side trim pieces you prepared in step 3.
The front piece will have the 1×2 extending beyond each end of the 1×3 (as illustrated in the picture below).

Step 5: Paint the trim the color of the bookcases.
I found lots of helpful images on Pinterest for the color match formula for the Billy Bookcase system. I took the image from this helpful article and had the paint mixed up in the exact same paint type at Sherwin Williams.
However, the paint color did NOT match! I don’t know what happened. It may have very well been a mistake in the tint done by the young man who mixed it at my local store, so refer to that formula at your own risk!;) I ended up creating a custom mix with Simply White and repainted it after we had it installed ~ which helped take out the overabundance of yellow in the tint…
Step 6: Using the pneumatic nailer, attach the side pieces to the bookcase, with the top of the trim touching the ceiling.

Step 7: Attach the front piece to the bookcase, ensuring all joints are lined up correctly.

Step 8: Caulk the nail holes and the gaps.
(Sidenote, that gap up there drove my husband crazy… He probably would have redone it, but I just said to fill it with caulk!! It works like magic.)

This is the Dap product we used called “Dap Fast Dry Acrylic Latex Caulk Plus Silicone“. We don’t bother using any fancy tools. Just applying it with a finger works great.
Step 9: Once the filler is totally dry, touch up paint with a final coat.

All those little finishing touches will pay off in the end.

We love this Modern Farmhouse feature in our house!

Related Articles:
- How to Style Billy Bookcases for a Modern Farmhouse Look
- How to Add a DIY Shiplap Wall
- How to Make Fixer Upper Farmhouse Shelves
- DIY Turnbuckle Shelves

Rita, I had seen this before but am just as impressed seeing it again. I gasped along with everyone else! Your hubby is a handy guy to have around not to mention that he is clever and quite good at the DIY projects. Your explanations along with photos and sketches make the process entirely clear. You are the type of person who should be writing instructions for products!!! You and Hubby are transforming your dwelling into a charming home. It cheers me to see what you manage to come up with because the end result is tasteful, practical and inviting. Rita Joy, you and the Mister are a delight!!! Big hug sent from N.J. to across the border (the only thing I get probably get across these days!!!). Bless you both, Sharon Joy
Thank you for posting! I’m thinking of doing this project– can you tell me how high and deep the lip at the back is? I want to know if it’ll fit over my baseboards. Thank you!
Great post! I didn’t realize until you showed the process that it wasn’t store bought molding! Go you!
Looks awesome Rita! I love your solution…just fill it with caulk! That’s my kind of hack 😉. The trim looks fab, love seeing the progress pics!
It looks great, Rita! You’re so clever! It looks like it was custom made!