
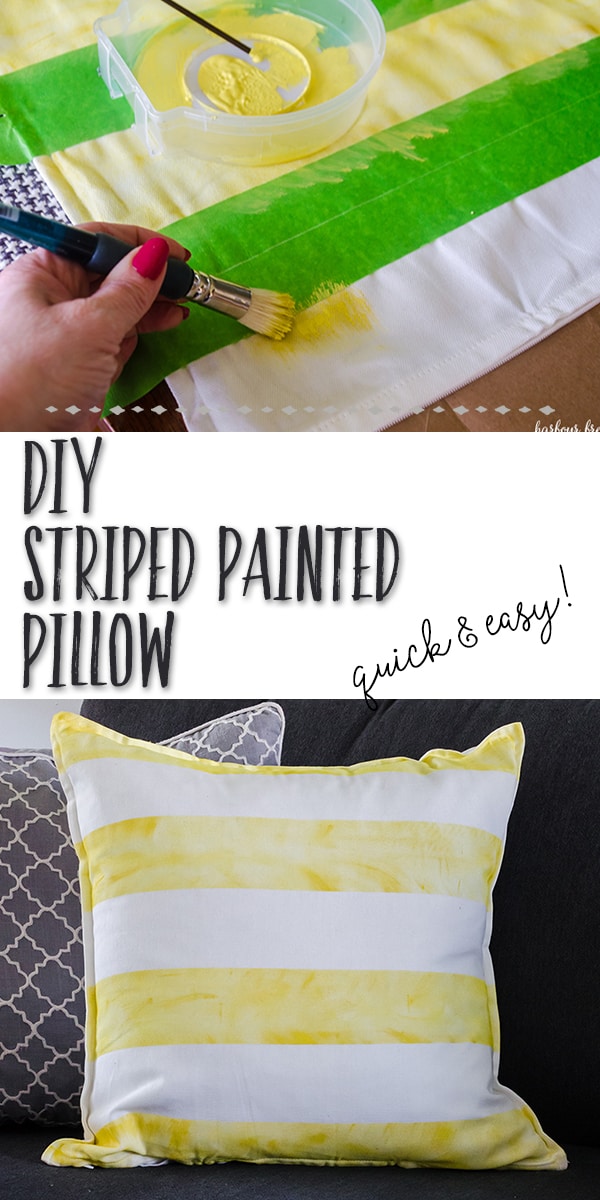
How To Make a DIY Striped Pillow Quick!
Can’t find (or afford) the perfect accent pillow for your space? Learn how to make a DIY striped throw pillow cover in less than 15 minutes with this quick DIY painted pillow technique.
I’ve been looking for the perfect yellow throw pillows for months now.
When I recently spiffed up my living room for Spring, I decided to take matters into my own hands and make my own.
(Desperate times call for desperate measures, right?!;))
I discovered a super simple and fun way to turn plain Ikea throw pillow covers into large striped nautical ones in less than 15 minutes.
Let me show you how!
DIY Striped Pillow using Paint
Disclosure: This post contains affiliate links for your shopping convenience.
Supplies Needed for this Striped Pillow Craft:
- White Pillow Cover (This one is the GURLI from Ikea.)
- Frogtape
- Fabric Textile Medium
- Yellow Paint – I used this type in the color “mustard”. Here is a similar product.
- Stencil Brush
- Scrap paper (like a paper grocery bag)
Step 1: Fold the pillow in half to determine the center line. Place one piece of frog tape above the center line and one piece directly below it.
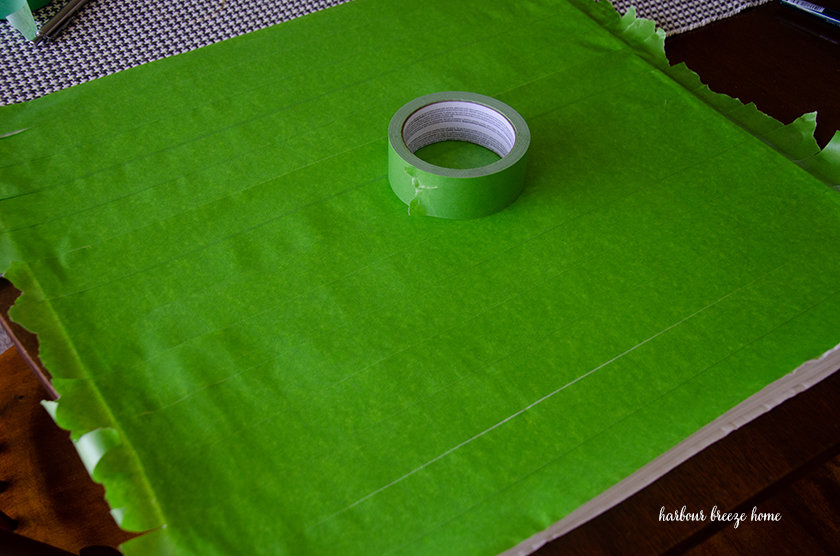
Continue taping the entire pillow cover front.
Step 2: Remove the tape where you want the stripes to be.
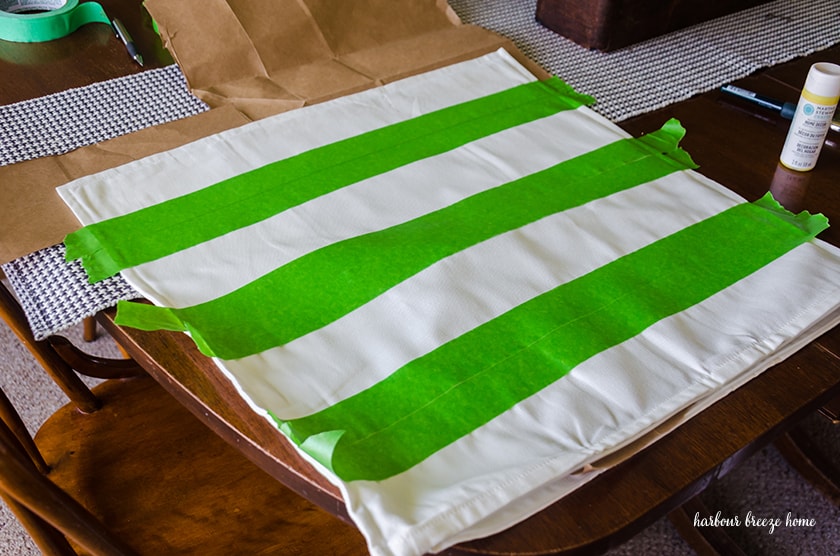
Although it might feel strange to tape up the whole thing and then remove part of it – it’s a slick way to do stripes! It makes perfect dimensions – no measuring required!!
Step 3: Put some scrap paper – like a grocery bag – between the layers of fabric to prevent bleed through.
The paint might seep a bit through the fabric and you don’t want it to bleed through to the back of the throw pillow.
Step 4: Mix the color of your choice with textile medium.
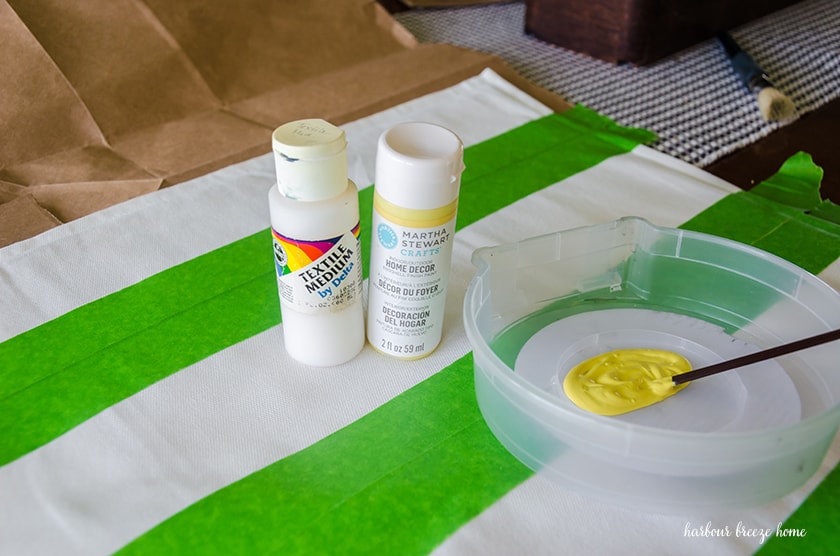
Textile medium is a liquid that can be added to paint to make it appropriate for fabric. Since stenciling doesn’t require a lot of paint, I used only about 1 teaspoon of yellow paint. Then I added about the same amount of textile medium and stirred it together.
Step 5: Use a stencil brush to apply the paint onto the pillow.
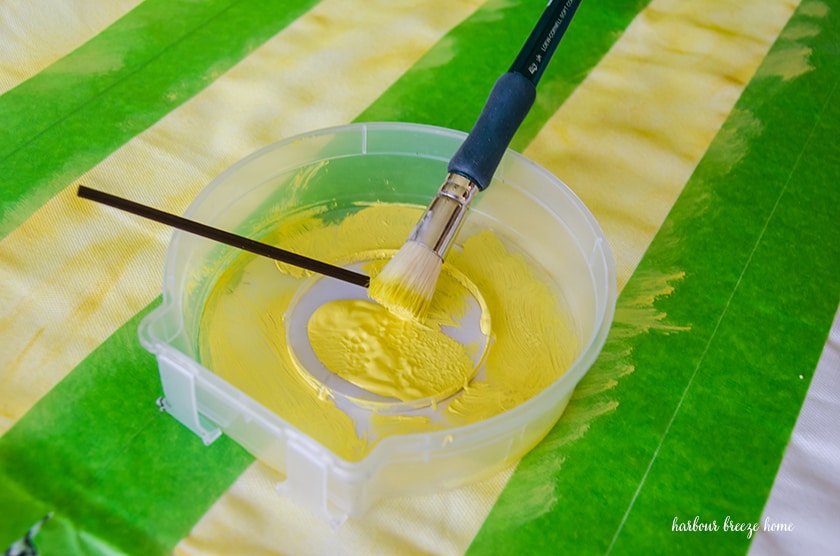
The secret to a successful stenciling project is to start with just a little bit of paint! You can always add more, but you can’t take it away!
Dip the stencil brush into the paint and wipe off all the excess on the sides of the container or on a paper towel.
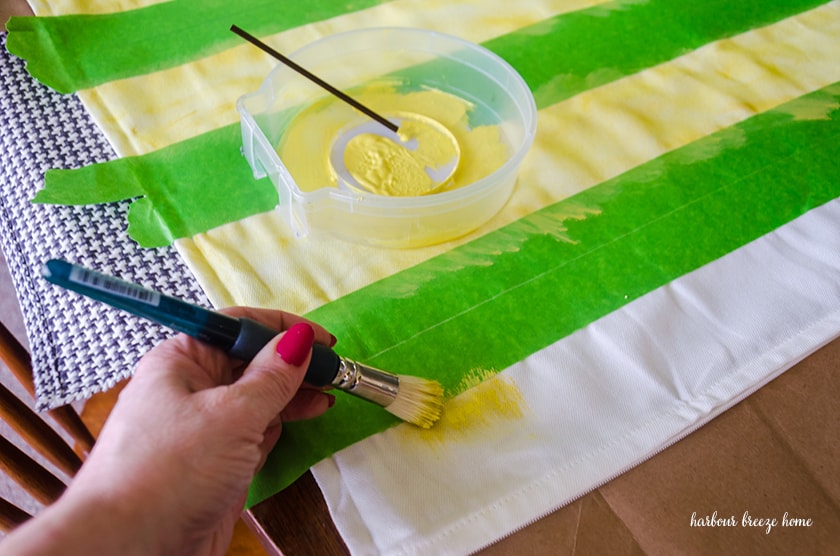
Start at the top of the pillow and work your way down to the bottom stripe.
Rub the paint away from the tape lines and build up the paint til it looks the way you like it. This method creates a watercolor effect on the pillow cover.
Follow the instructions on the textile medium bottle to set the paint.
This particular textile medium recommends heat setting the paint stripes with an iron to prevent it from fading when it is washed.
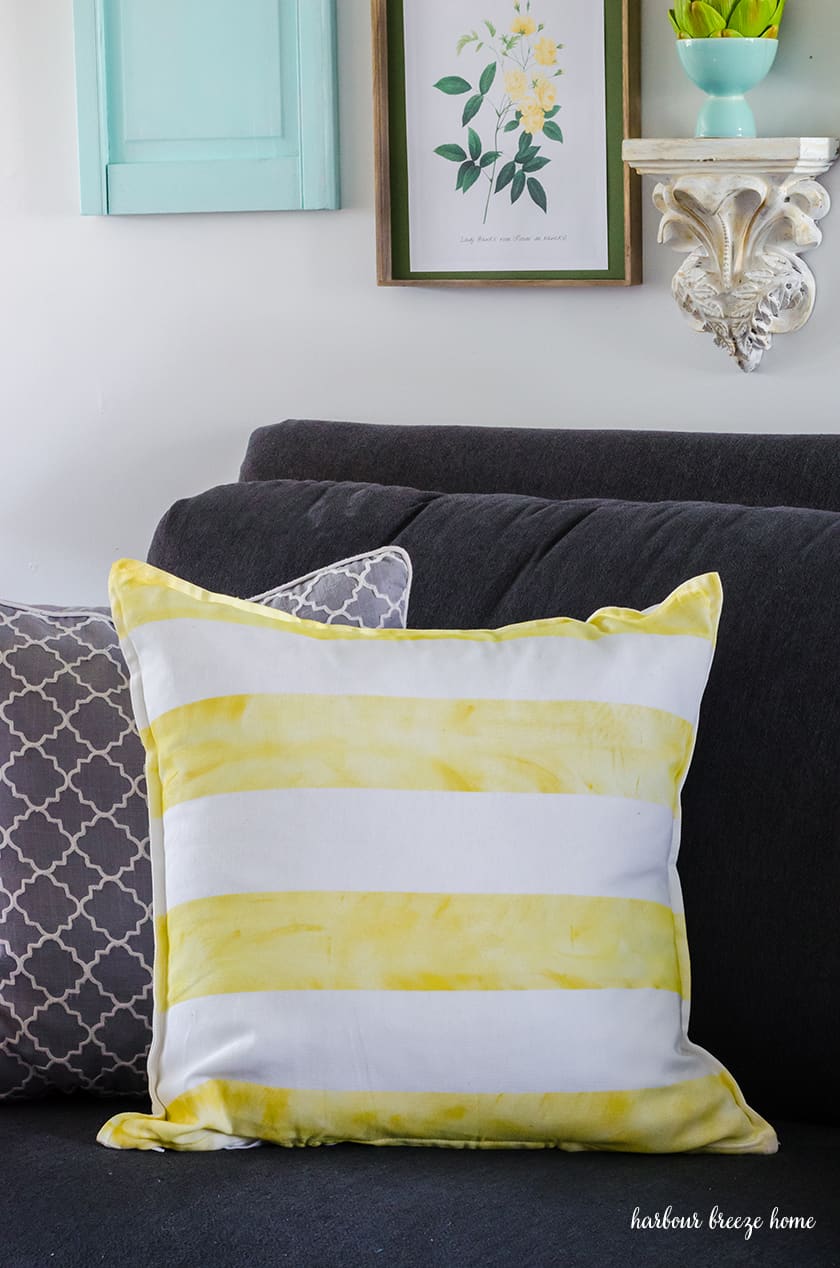
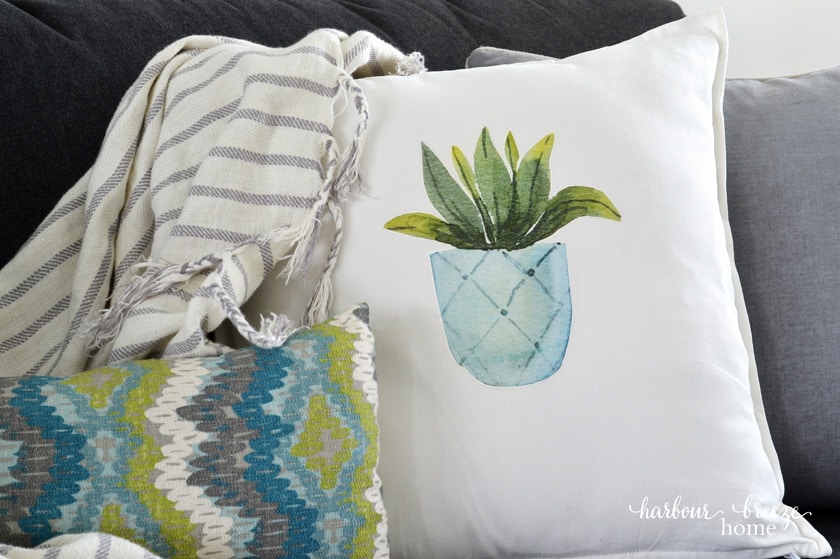
These happy throw pillows are a great Spring decor idea. And, they’re even holding a secret…
The other side of them is the planted pots pillows with iron on transfers I made last year!!
For more DIY pillows, you might want to check out these posts:

For more Spring Craft ideas, check these out:
And, now, have fun visiting my blogger friends who are participated in a Spring Craft Blog Hop. You’ll meet some new friends and get some great ideas!
Celebrate & Decorate
At Home With Jemma
Hearth and Vine
My Hubbard Home
My Thrift Store Addiction
Home is Where the Boat Is
The Painted Apron
Chas’ Crazy Creations
Harbour Breeze Home**You are here!
My Family Thyme
Sustain My Craft Habit
Birdz of a Feather
Decorate and More with Tip
Our Crafty Mom
Design Morsels
White Arrows Home
Create With Cynthia
Debbee’s Buzz
Calypso in the Country
B4 and Afters
Purple Hues and Me
Bluesky at Home
Raggedy Bits
Faeries & Fauna Craft Co.
Elle Marie Home
Zucchini Sisters

So cute and easy, Rita! Thanks for sharing!
This is such a great project, Rita! I never used textile medium, but now will be on the hunt for it!! I love the yellow you chose. It is so bright and cheery for spring. It’s always so much fun to hop with you. Pinned!