
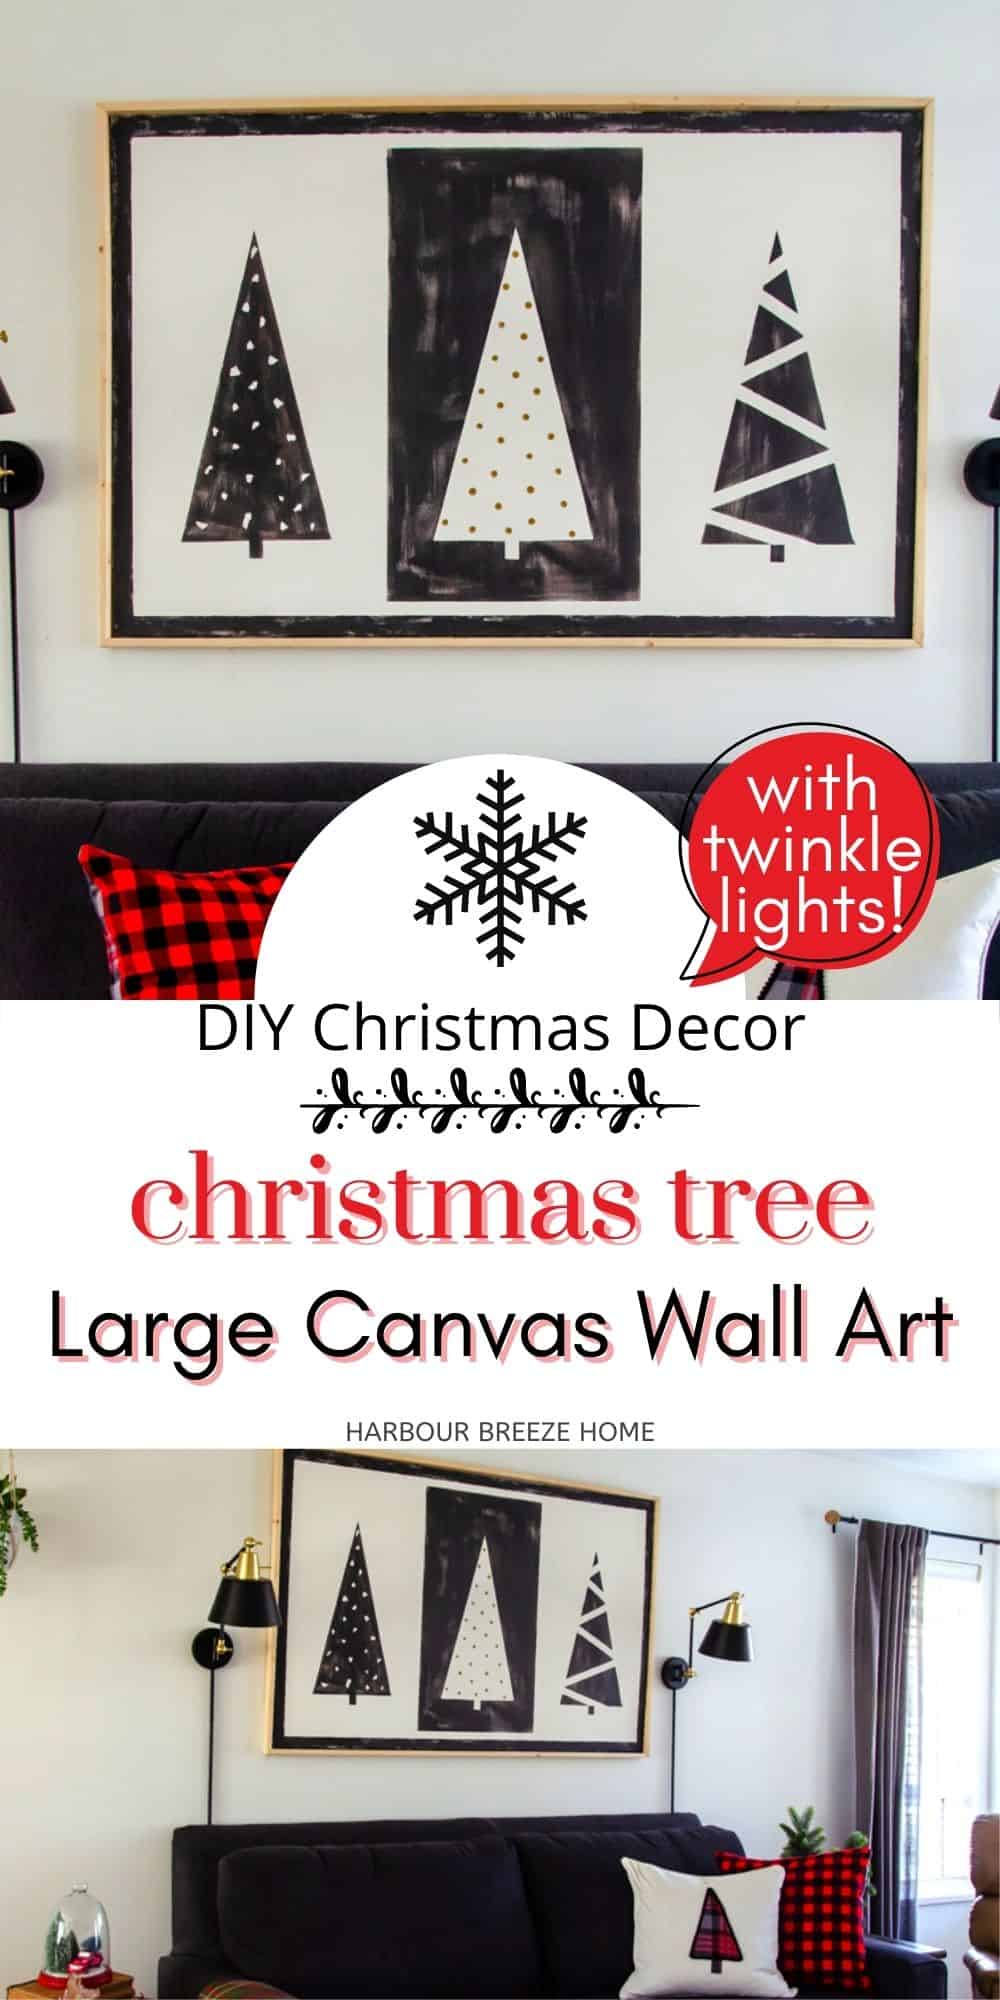
DIY Canvas Wall Art that Lights Up for Christmas
Make this amazing framed canvas wall art with twinkle lights and Christmas trees. It’s the perfect Chrismas wall art for above your couch in the living room!
I’m beyond excited to share with you this large canvas wall art DIY project.
Although it’s not a quick & easy craft project, it was so fun to do – and saved us LOTS of money!
Read on and I’ll share all the details of each step. (Click a part to jump to that section.)
Part 1: How to build a large canvas art frame.
Part 2: How to stretch canvas on an art frame.
Part 3: How to prime art canvas for painting with gesso.
Part 4: How to paint simple Christmas tree art using painters tape.
Part 5: How to add twinkle lights to the back of canvas art.
How to Make Your Own Large Stretched Canvas Wall Art for Christmas
Disclosure: This post contains affiliate links for your shopping convenience.
Part 1: How to build a large canvas art frame.
One of the reasons why we chose to build our own canvas art frame is because of the cost.
Yes, they are readily available pre-made. But, the bigger they get, the more expensive they are!
We wanted to make one 55.5 x 32 inches, which would put it over the $100.00 range here in Canada.
The total cost of ours was less than $10 for the frame and $12.00 for the gesso primer (more about that step later). I used fabric I had on hand.
Remember how we recently built a floating canvas frame for a beautiful piece of art above our couch?
For this new Christmas wall art, we wanted to use the same floating frame, with our own custom canvas inside. To accomplish that goal, we popped out the canvas art that was in the floating frame, and purchased 1 x 2 inch wood pieces for the new canvas art frame.
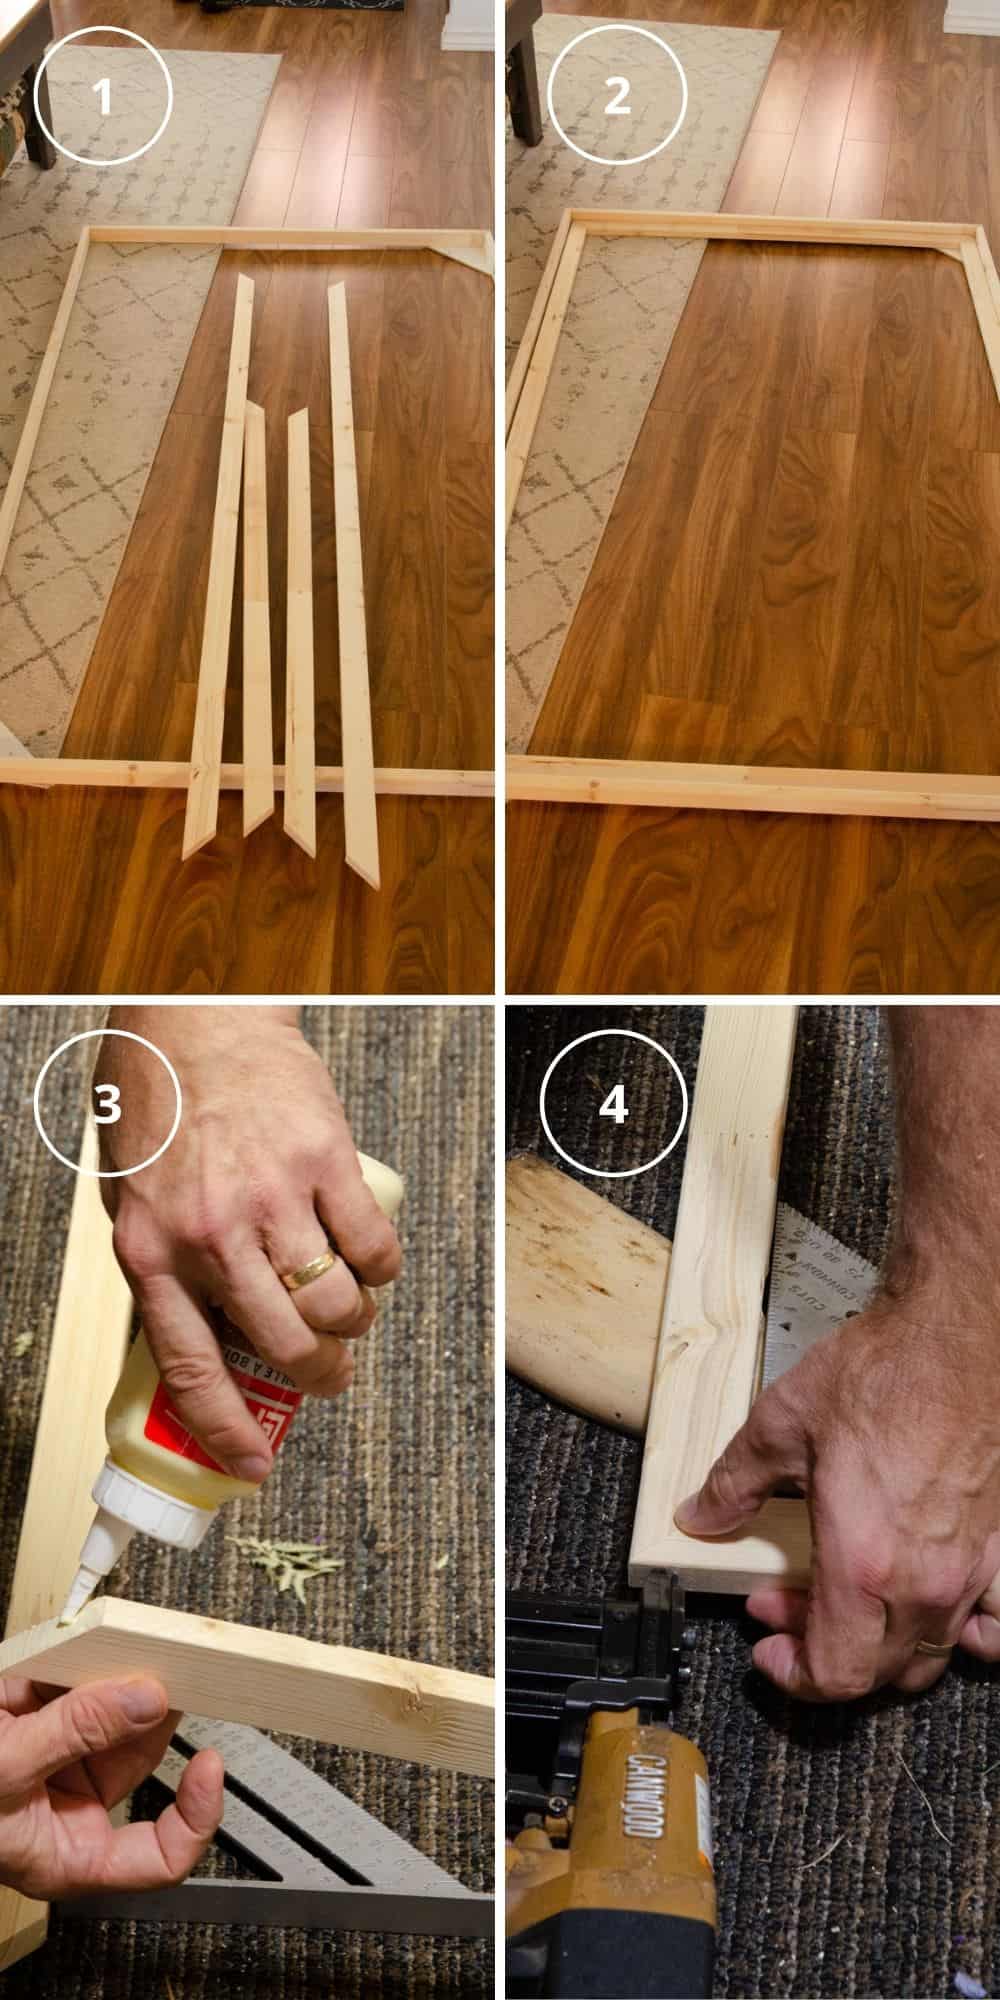
Here’s how to build a canvas art frame:
- Cut the wood strips with miter corners to the size you want.
- Dry fit the strips into the floating frame to make sure they fit.
- Glue each corner with Wood Glue, then
- Using a brad nailer, tack the corners together.
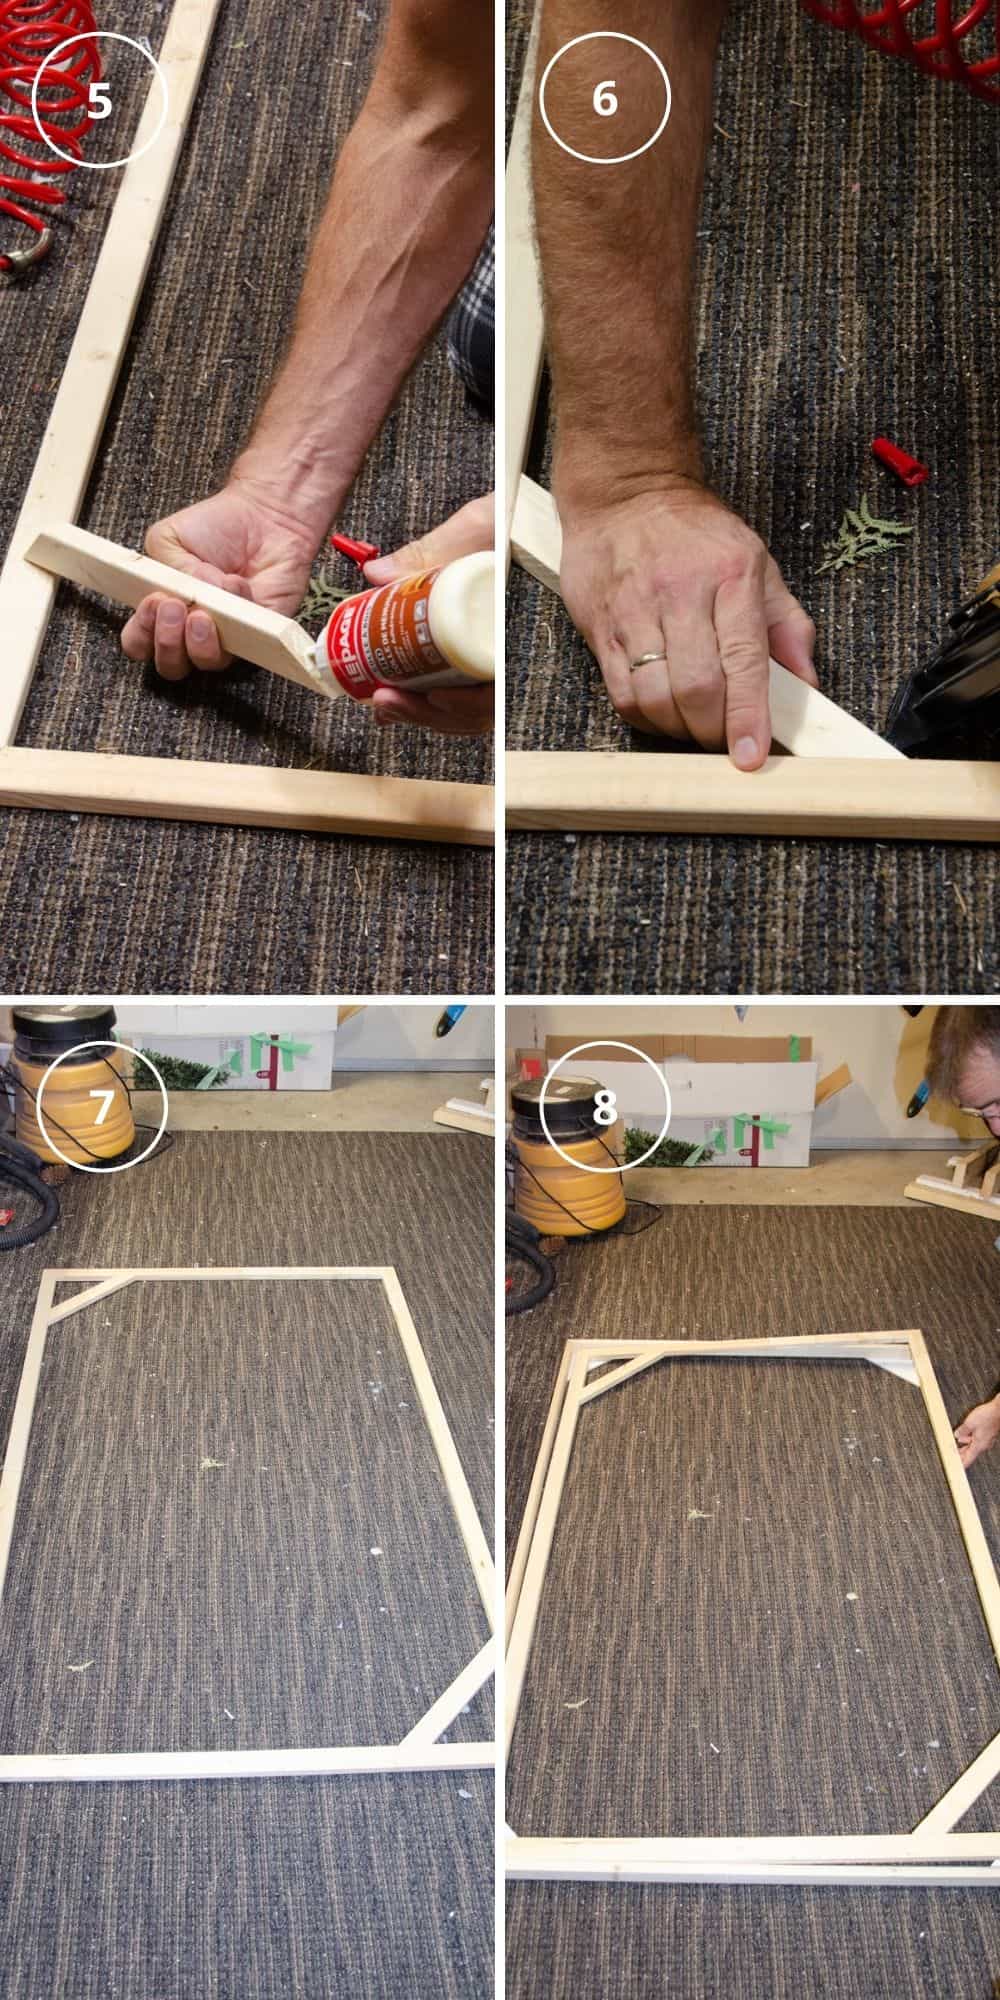
- 5. Cut 2 corner angle pieces for added support. Glue them in 2 opposite corners.
- 6. Use a brad nailer to tack them in place.
- 7. Picture of the finished canvas art frame
- 8. The finished canvas art frame inserted into the floating frame (just to make sure it still fits right!).
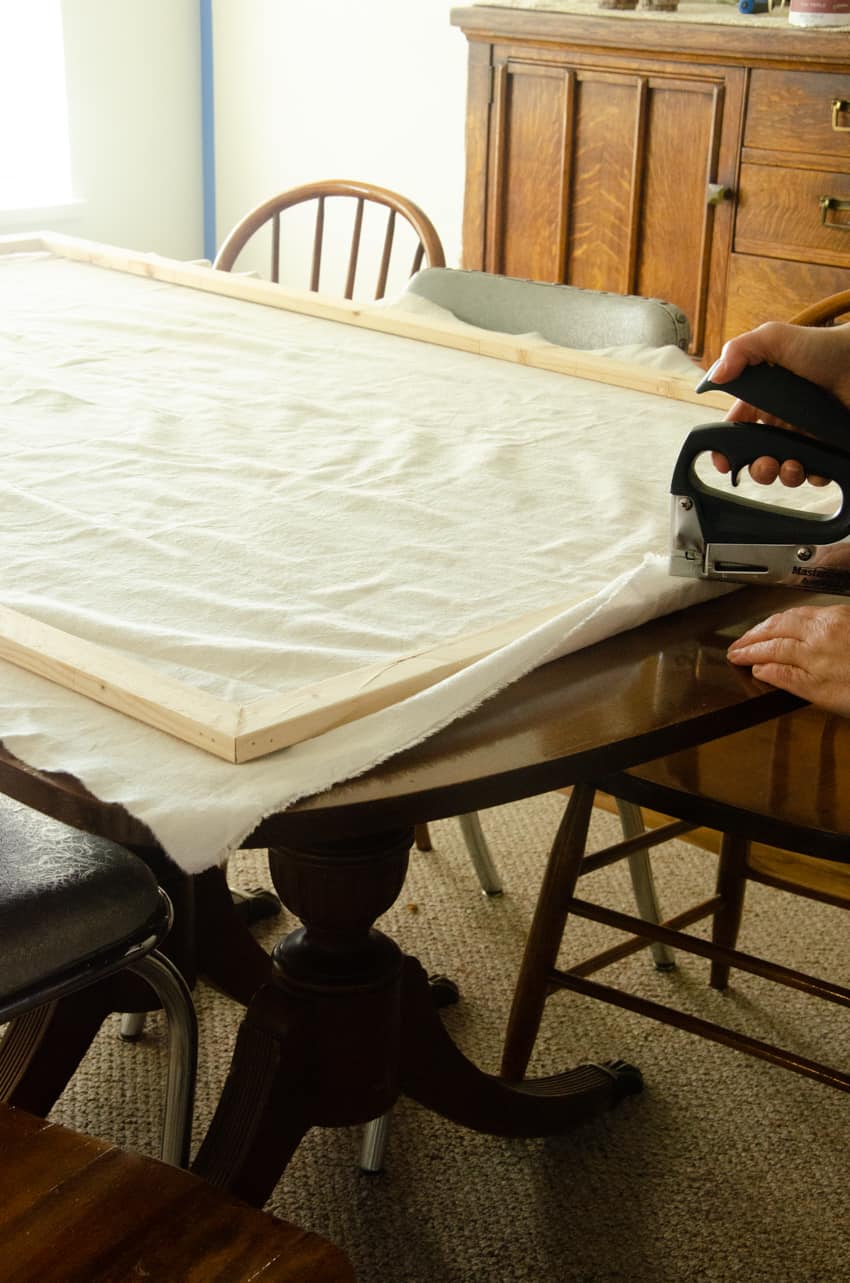
Part 2: How to stretch canvas fabric on an art frame.
I used a white canvas curtain panel I already had on hand for this step. However, you can purchase canvas at a fabric store for this purpose if you don’t have any on hand.
One thing to note is that there is actually pre-primed canvas you can purchase by the yard for this purpose. I didn’t know about that option when I started this project, so I primed my plain canvas after it was stretched on to the frame.
If you choose to use pre-primed canvas, you will obviously be able to skip the priming step!
Despite watching various YouTube videos on this process, we failed to stretch the canvas as tight as it needed to be at first.
As a result, I had to remove all the staples and do it again.
There are many, many YouTube videos out there on how to stretch a large art canvas, but here is one that we found super helpful:
I didn’t have canvas pliers, so I used this man’s technique of stretching it tight with my fingers and using my knuckles for leverage. (I did get some blisters with this project!;))
Part 3: How to prime stretched canvas using gesso.
Before you can begin to paint on your stretched canvas, you need to prime it for painting. This will seal the fabric and prevent the paint from soaking through. You cannot skip this step!
I had to look long and hard to find gesso in our town, but finally found it at an art supply store. You can also order gesso online here.
Our large canvas required almost the entire 500 ml bottle of gesso for 2 coats.
For a great explanation on how to prime canvas with gesso, watch this video:
Part 4: How to paint Christmas tree art using painters tape.
Now that all the preliminary work is done, it’s time for the fun part!!
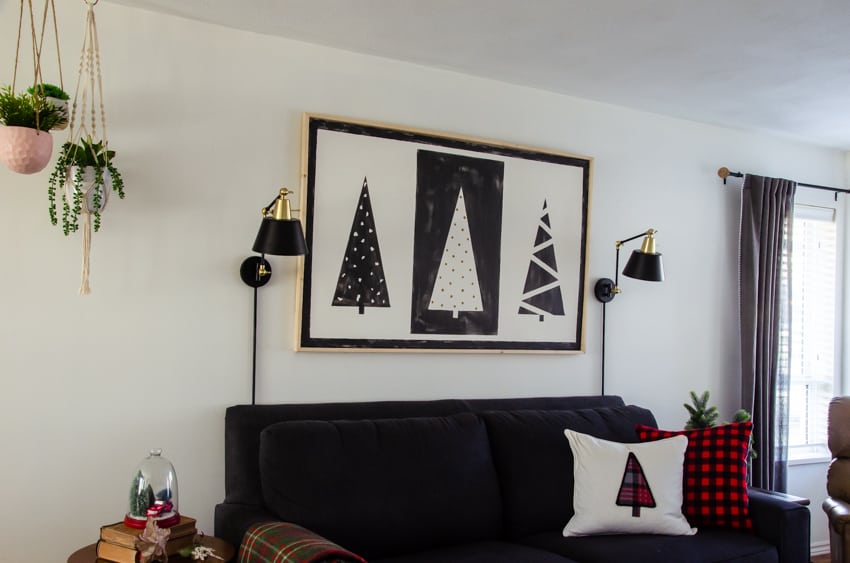
I wanted a Scandinavian inspired Christmas art piece above our couch, so I chose to paint simple Christmas tree shapes.
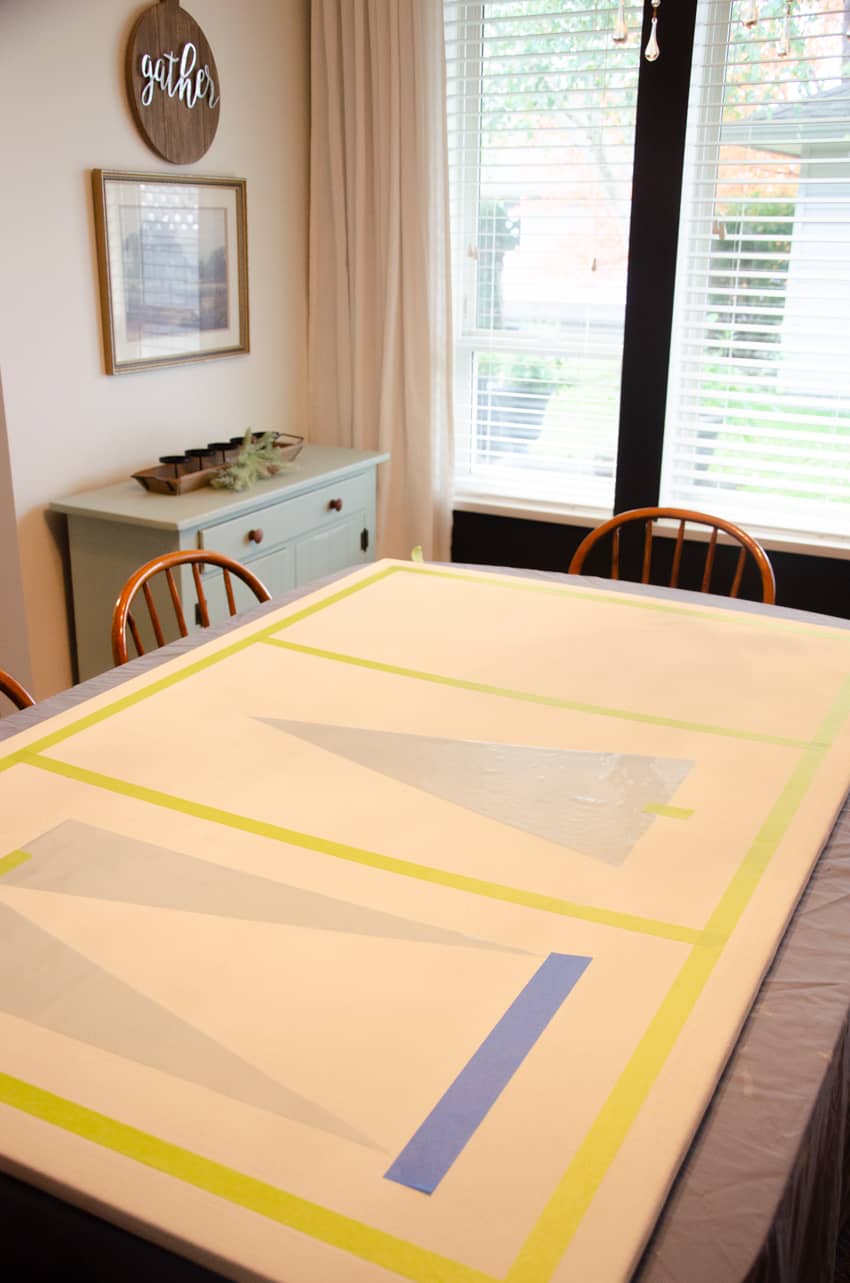
After I figured out a design, I used painters tape and adhesive stencil sheets to help keep the lines crisp.
Then, I used my Wooster handle less paint brush and latex house paint to paint on the black paint.
I read that latex house paint isn’t recommended for professional art projects as it “won’t last 100 years”.
Since I don’t plan on this being a historic art piece, I decided to take my chances!;)
I brushed the paint on so that a bit of the white still showed through, giving it a bit of a more distressed look.
I painted it on small sections at a time, and removed the painters tape while the paint was still a bit tacky, so the lines would remain crisp.
Part 5: How to add twinkle lights on timers behind canvas art.
Ever since I added twinkle lights to the back of our bookcases one year, I’ve been wanting to try it again.
It is so fun to have twinkle lights turn on during the dark evenings of winter!
To add twinkle lights:
- Shine a flashlight from the front of the art piece so you can see where you want to place your twinkle lights.
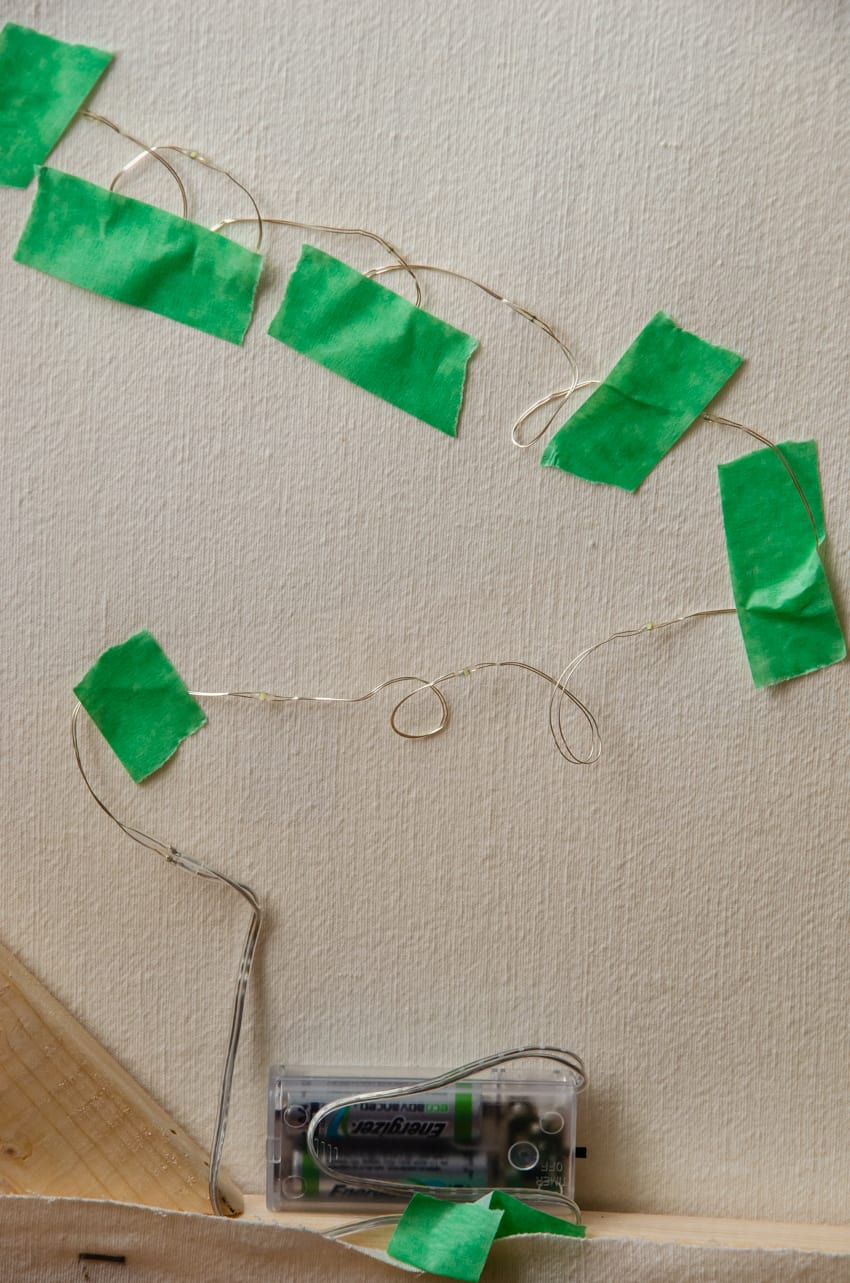
- Use double sided tape or painters tape to tape on the lights where you’d like them to be. (We found that painters tape worked best.)
- Adhere the battery packs to the canvas with double sided tape.
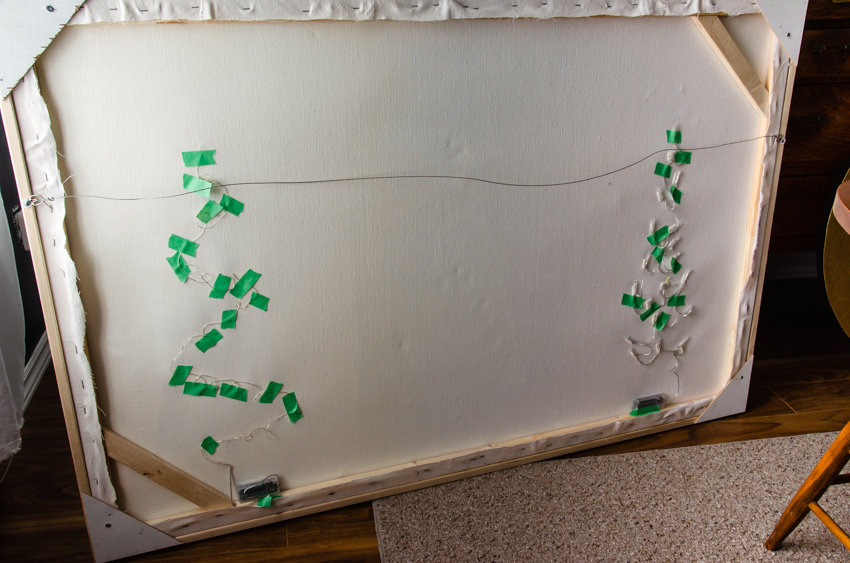
We found that the painters tape shows through the canvas on the white areas, so we chose to tape the lights on the black painted areas with the twinkle lights showing on the white areas.
Double sided heavy duty tape made the battery pack adhere well.
Step 6: Turn the twinkle lights on the timer setting (at the time you want them to turn on), attach the canvas to the floating frame, and hang your Christmas Tree Wall Hanging on the wall!
- For details on how to make a floating frame for a canvas print, click here.
- To find out how to hang a large painting on the wall, click here.
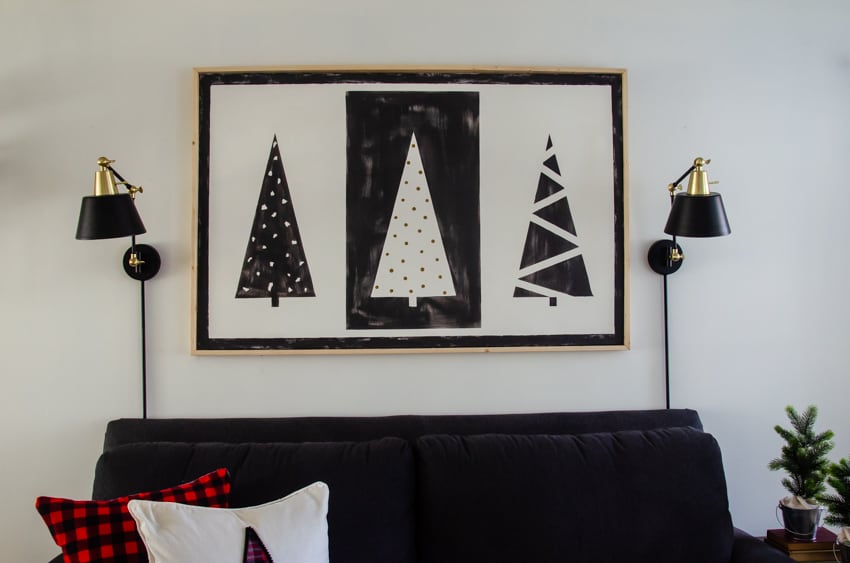
Yay! You did it!
Enjoy your handiwork, and glowing twinkle lights at night!;)
For more DIY Christmas decor ideas, check out:
- Wood Christmas Tree Sign using wood slices
- Painted Noel Wreath Christmas Canvas Sign
- Burlap Gift Farmhouse Christmas Shelf Decor
Sign up to receive FREE printable Christmas Gift Tags!
Become a VIP newsletter subscriber and get instant access to the entire library of free printables – including these Christmas gift tags. Click the button below to join today.


Rita, I LOVE your twinkle light picture (AND those darling pillows on your couch! I want to come spend Christmas at your house❣️
That is so pretty! It must be so nice when it is dark and you turn those lights on! 🙂