
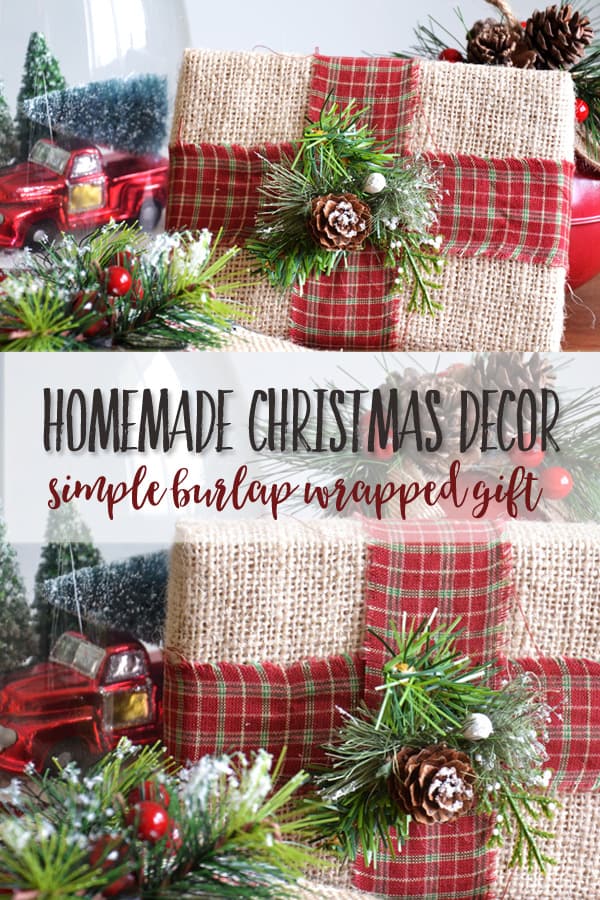
DIY Christmas Decor | Burlap Wrapped Gifts
In this article: Learn how to make a simple DIY Christmas decor craft. This burlap wrapped gifts project was inspired by a similar item in Hobby Lobby, and will add a rustic farmhouse style to your Christmas decor.
Related Articles: Burlap and Flour Sack Tree Topper; Burlap & Flannel Christmas Stockings; Burlap Pillow
Last month I had the opportunity to enter the magic sliding double doors of Hobby Lobby. (As a Canadian, I don’t have that chance very often!)
I grabbed a cart after coming up with a plan, and filled it with selected items for my Dining Room farmhouse shelves. And then, I browsed through the Christmas aisles and studied and studied the items.
Oh, how I wanted to fill up another cart with Christmas decor…(It was, after all 40% off that day!!…) But, instead, I decided to tuck away the ideas and see if I could re-create them with my craft supplies at home.
So today’s homemade Christmas decor craft is inspired by the Christmas aisles of Hobby Lobby.
DIY Christmas Decor | Burlap Wrapped Gifts
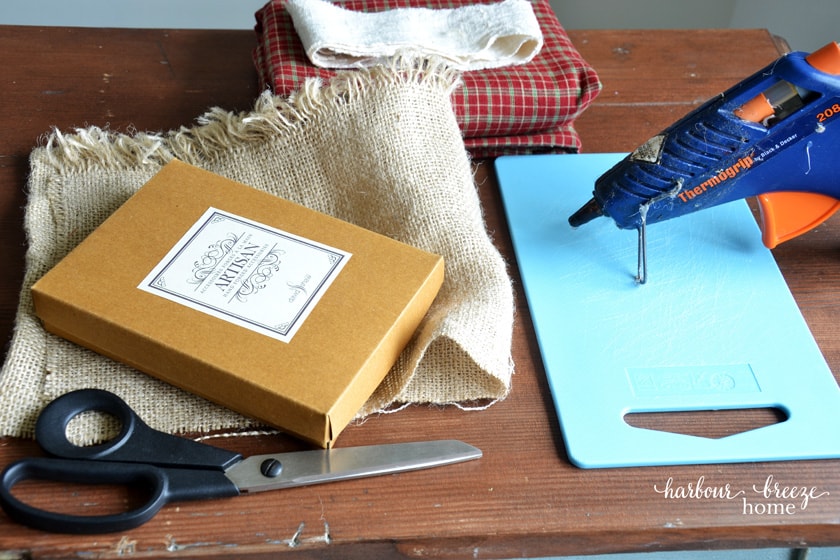
Supplies Needed:
- A box, wooden block, or piece of styrofoam to wrap
- Burlap fabric
- Scissors
- Glue gun and glue
- Plaid fabric (cotton or flannel) for the “ribbon”
- Faux Christmas greenery
Wrap burlap fabric up and around the longest edge of the box and cut where ends meet.
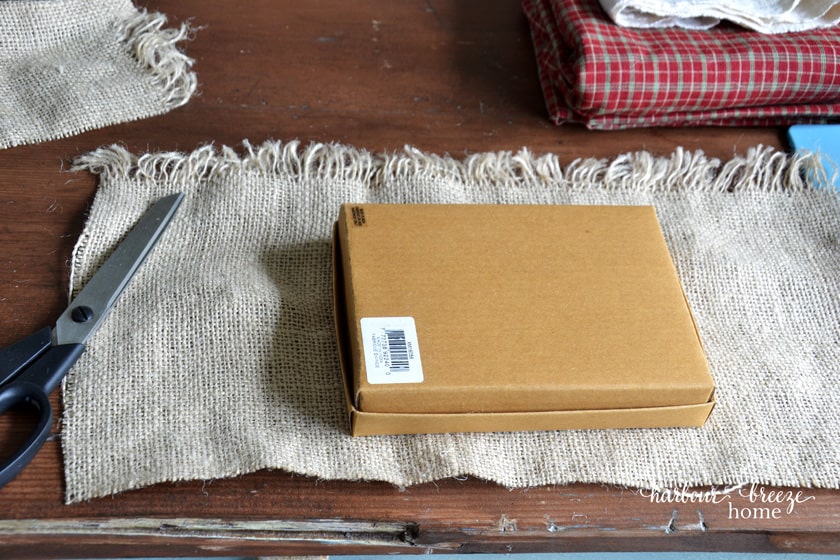
Keep in mind as you are cutting and wrapping this project that – unlike traditional wrapping, you don’t want overlap. Because the burlap is thick, overlapping will cause all the seams to be bulky.
Once you’ve trimmed the burlap length, run a bead of glue down the center bottom of the box and glue the ends together. Remember, the fabric ribbon will hide this seam, so if it doesn’t quite meet, that is ok.
Clip the side corner and trim off all the bottom portion of the burlap on the side.
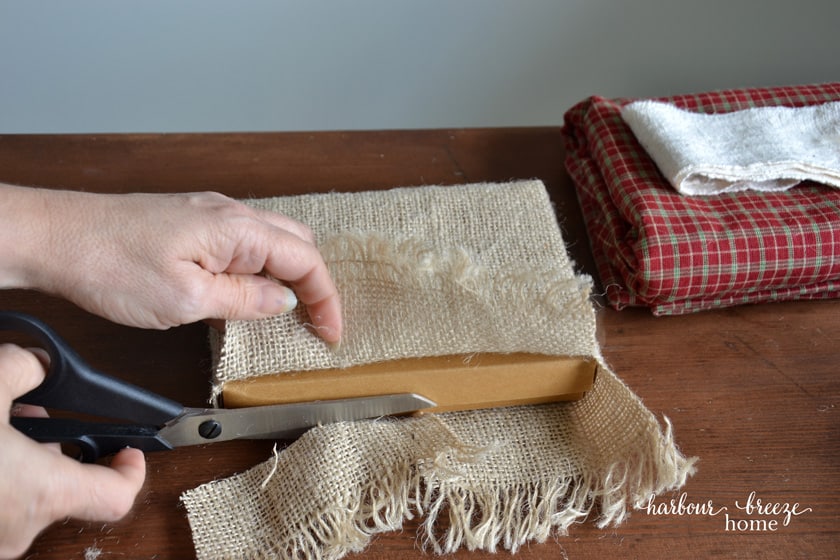
Again, you will want to trim away as much excess burlap as possible. Once you have the bottom portion of the side trimmed away, you will just fold and glue the side flap down.
Rip fabric strips for “ribbon” and glue in place.
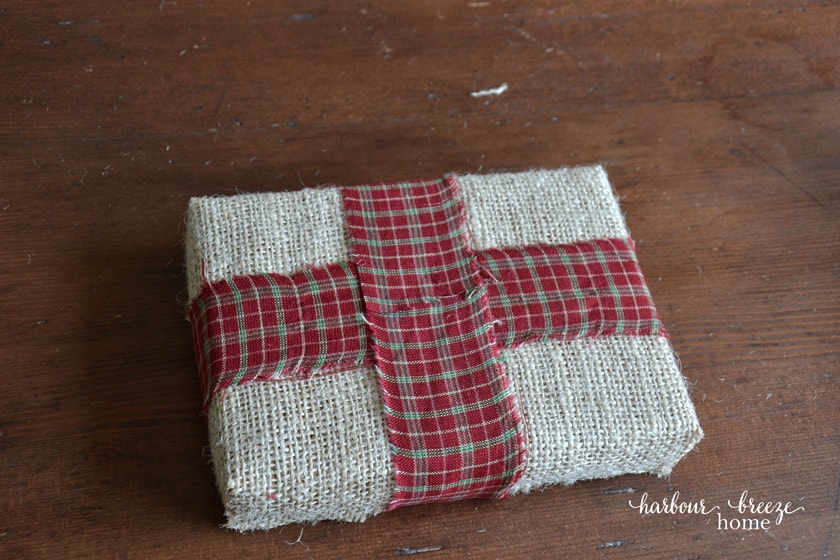
After gluing all the burlap down, it’s time to add the finishing touches! I ripped a long strip of cotton plain fabric. Then measured and cut two strips. Gluing them one at a time, I wrapped them from the bottom side and glued them on the top.
Glue faux greenery on top
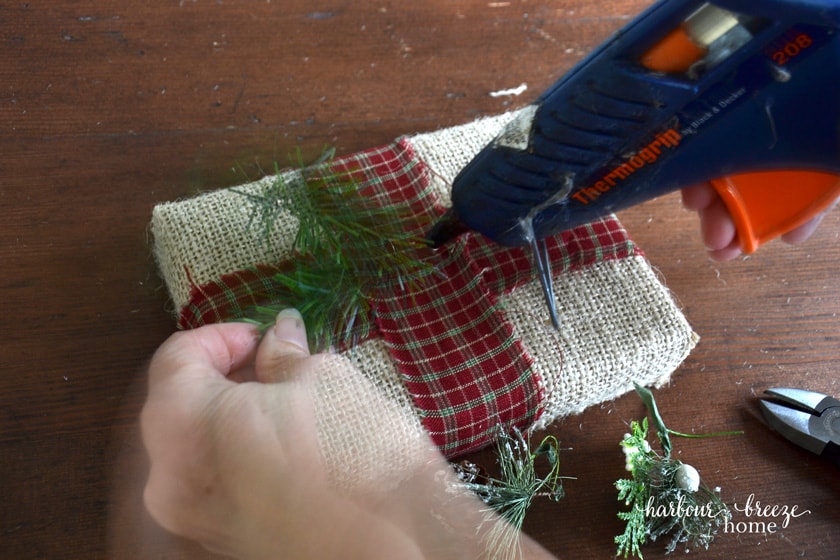
Gluing on a few sprigs of faux greenery and a mini pine cone hid the seams of the ribbon and makes a festive finishing touch!
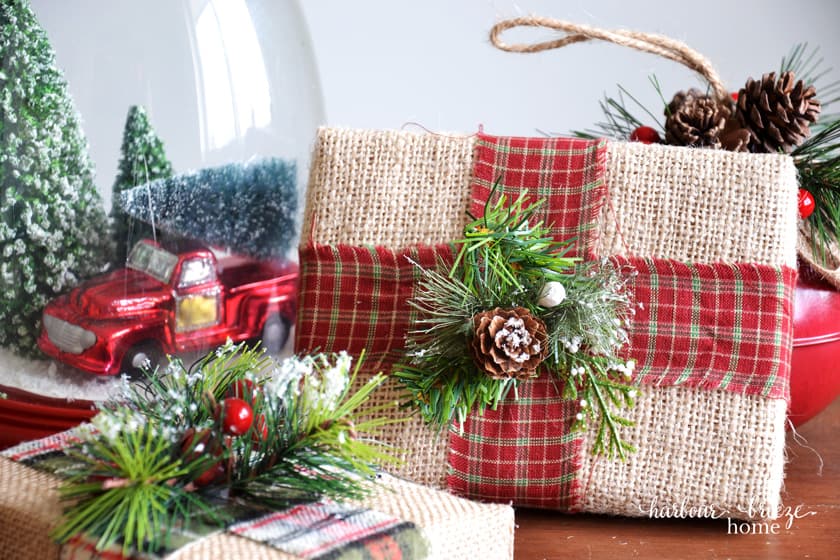
Now they’re all ready to tuck into the corners of my farmhouse shelves for some Christmas cheer.
Additional ideas:
- Add different sized wrapped burlap gifts along the table or stacked on a tray for a table centerpiece.
- Make miniature wrapped burlap gifts for placecard settings for the Christmas table.
- Large burlap wrapped gifts could be piled under a tree in a corner for a fun farmhouse touch.
Are you making any homemade Christmas decor this year? If so, what is your favorite project? I’d love to know!:)


Love this idea!
That is a great idea!
Absolutely LOVE this… I think I will do the burlap, but use some aqua ribbon for a more coastal look… Burlap takes on the look of a tight fish net when used with coastal elements (at least I think so!). You are rocking Christmas, Rita-dear!