
Small Budget Kitchen Remodel Before and After
If the budget doesn’t allow for a full fledged kitchen renovation, have no fear! This small budget kitchen remodel before and after shows you can make over a kitchen – and make it fabulous! – for under $200.
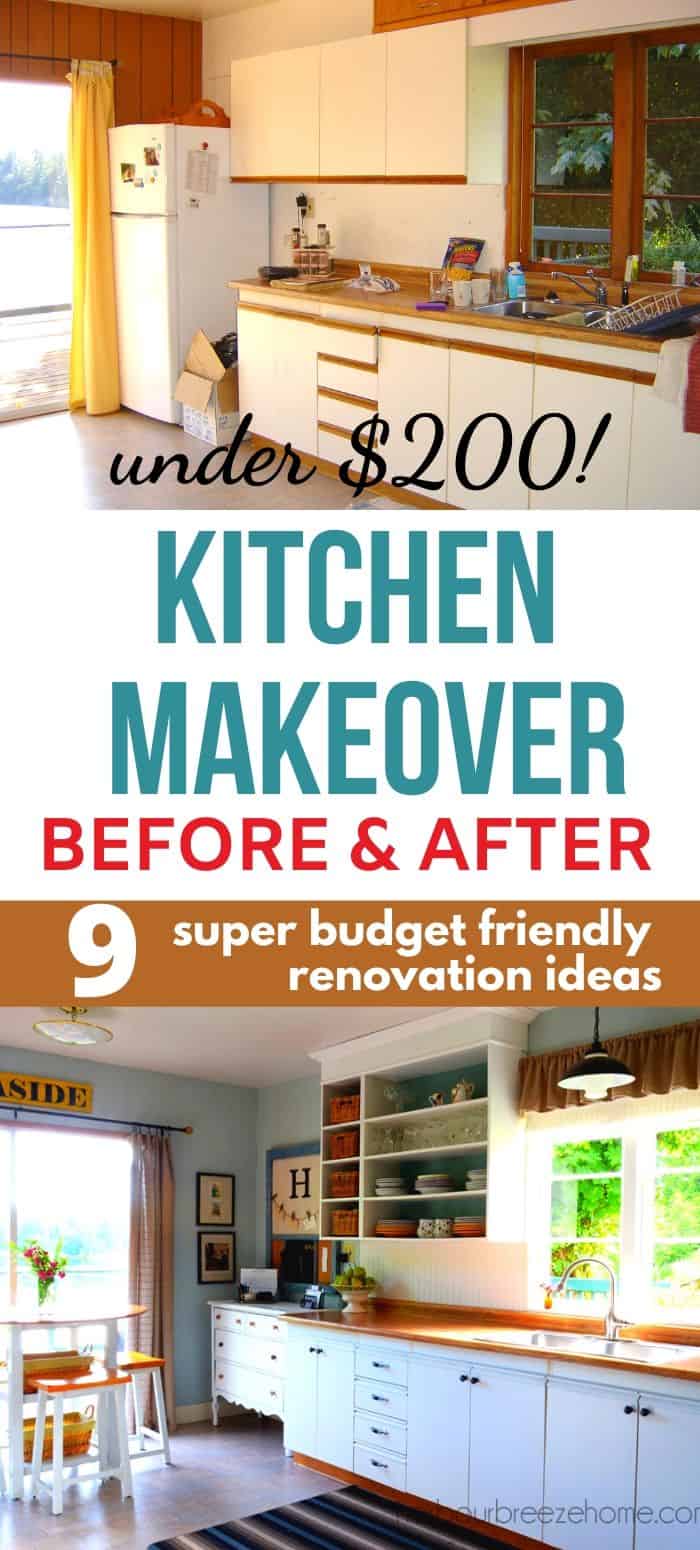
How to do a Kitchen Remodel Before & After On a (tiny!) Budget
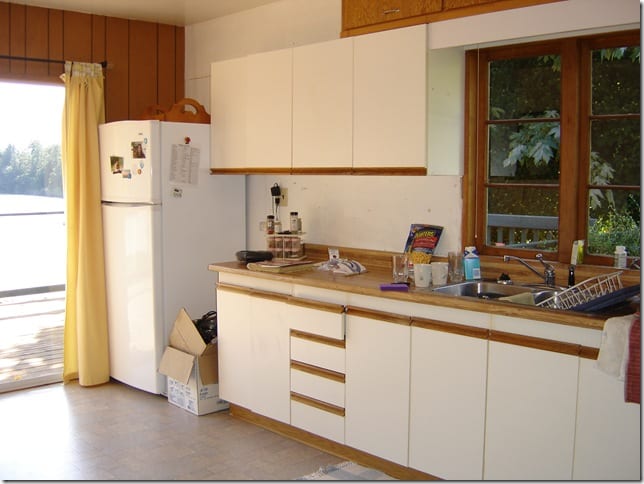
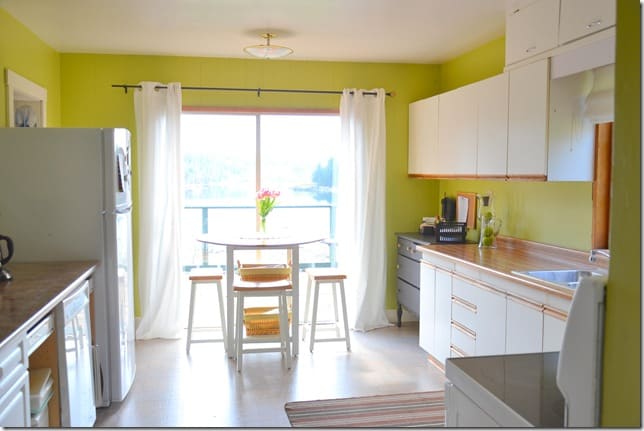
1. Take a good look at how the “Before” looks and functions. Here are the details of our kitchen space before the budget friendly remodel:
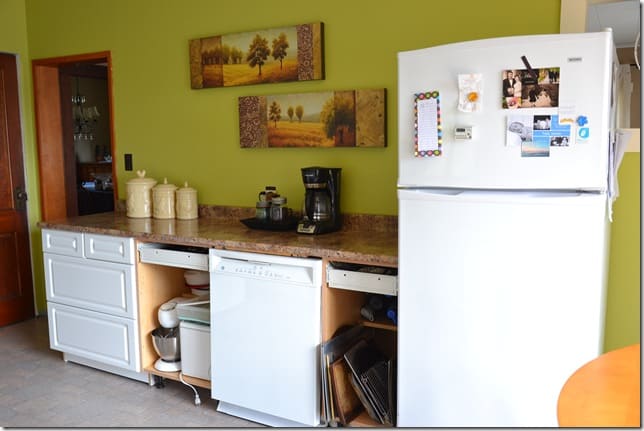
The big kitchen space in our old historic farmhouse had lots of potential when we first moved in. The view out the window of the ocean was breathtaking. But inside? It looked and felt sad. Just. sad.
The layout was awkward, old plywood cabinetry was perched on top of newer European cupboards, and there was wasted space everywhere.
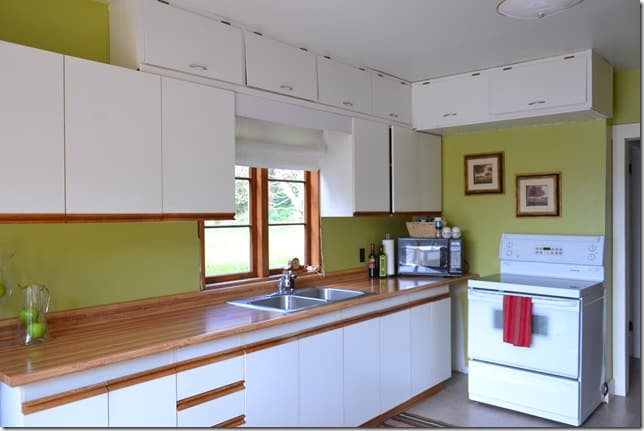
2. Do what you need to do to create a more pleasant space while you figure out more major updates needed. For us, painting the old kitchen’s walls was a quick, temporary fix
Although it was a strange hodge podge of elements, we first painted the upper cupboards white, the walls candy apple green, and lived with that for a few years.
And for those of you who wonder who picked out that wild color – it was me, and I loved it at the time!;) The gray sky weather really affected the paint colors inside the house, and that color that looks real wild in the pictures actually felt very cheerful and pleasant to me in real life.
3. Sometimes REMOVING something from the room can make it better, and this budget friendly kitchen remodel started by removing cupboards!
One night on a whim, we made the decision to go ahead renovating this space with as much creativity as we could come up with ~ since our budget was basically non-existent!:) It started by ripping out some of the old plywood cupboards.
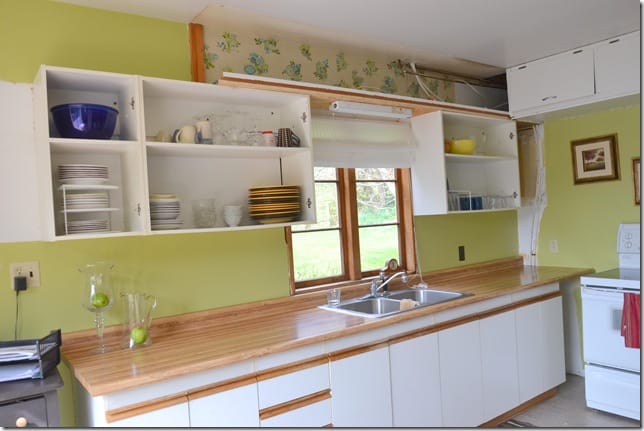
Once the cupboards were ripped out, we knew we were committed! Throughout the entire process we tried to focus on making the most of what was already there, re-purposing items we already had, and sourcing out specific items we needed at thrift stores.
Here are the inexpensive kitchen make over ideas included in this kitchen makeover remodel:
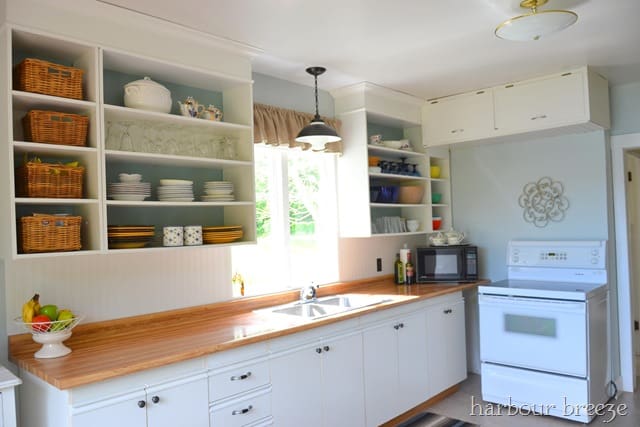
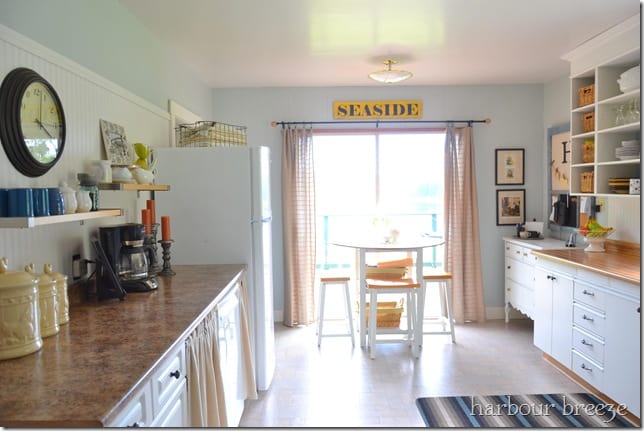
1.We removed the doors on the upper cupboards and added shelves and crown molding above them.
The largest part of the budget ($100) was spent on building materials for the upper cabinets. it was definitely a high impact change for low money! We think it was money well spent.
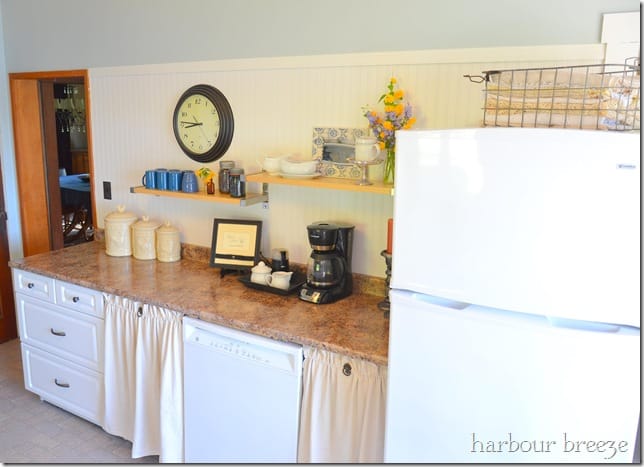
2.Painting out the wood strips of the European cabinet doors and adding handles made them much more modern and up-to-date looking.
Rather than rip them out, we gave the melamine kitchen cabinets a makeover.
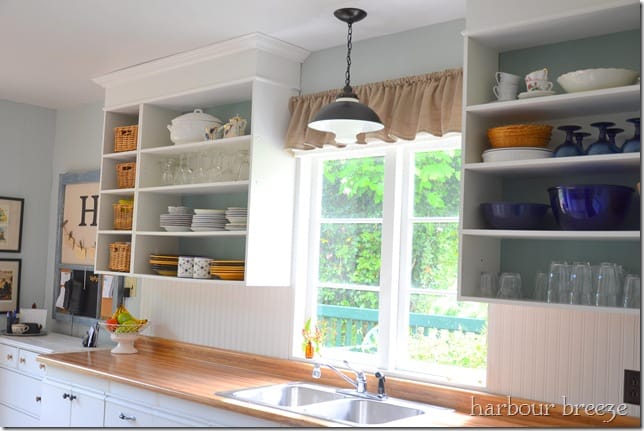
3. We searched out thrift stores and sale items for creative ways to DIY elements we needed – like a light fixture above the sink.
This thrift store light was spray painted to give an old farmhouse feel to the space. A really inexpensive blanket from Ikea became curtains for the sliding door and a small curtain above the kitchen sink.
4. By sourcing out discount cabinets, we were able to utilize former un-used square footage.
On the other side of the room used to sit an empty wall. Then we added a very functional (but admittedly strange!) concoction of cupboards (without doors!) that we scored at the local ReStore.
4. Unusual and “out of the box” ideas – like fabric cabinet curtains, gave the space a handmade farmhouse feel – and didn’t cost much money!
(Click here to see how to make these cabinet curtains!)
5. Thick, beadboard wallpaper created an interesting back splash idea that tied in with the overall look of coastal farmhouse.
Here are instructions of how we installed the Beadboard wallpaper .
6.A fresh coat of Benjamin Moore’s Gray Cashmere paint completed the look of this budget friendly kitchen remodel.
Here’s a reminder of how the kitchen looked when we started (partway through):
And here it is now! :
We absolutely love it, and encourage others not to be scared to add budget friendly changes to spaces you don’t like. It’s amazing how a few well placed changes can completely revive a worn out old space.
Other Budget Friendly DIY Home Decor ideas for a Kitchen Remodel:
Every little piece of this process was documented here on the blog. For all the details & tutorials, click on the links below.
From Black to White – A Dresser Makeover
DIY Kitchen Curtains
Painting European Cupboard Doors
Restoration Hardware Inspired Pendant Light
Old Window Message Board
Fabric Cupboard Doors
Beadboard (Wallpaper!)
Paint Colors:
- Walls: Designer Gray from General Paint (a close match to Benjamin Moore’s Gray Cashmere)
- Backs of cupboards: Stratton Blue from Benjamin Moore
- Trim and cupboards: Cloud White from Benjamin Moore
Other Kitchen Remodel Posts
- The 7 Day Kitchen Makeover
- Here are some options for the best paint color for small kitchen
- Adding kitchen storage with clever storage ideas
- Make your own pendant light for above the sink
- Our current before and after small kitchen remodel
Would you like to do a room makeover in your house, but don’t know where to start or how to do it? I created a FREE course with you in mind. Click below to find out more and join today!

If you like this budget friendly makeover, then you just might want to check out this one, too!

What an inspiring transformation on such a tight budget! The open shelving with crown molding completely changed the feel of the space, and those fabric cabinet curtains are such a creative touch.
What an incredible transformation! Your kitchen makeover strikes such a beautiful balance between functionality and aesthetics. The lighter cabinets and open shelving really make the space feel airy and inviting, and the thoughtful touches like the backsplash and hardware add so much character. I also appreciate how you considered the practicality of the layout—it’s clear you’ve optimized the space for both cooking and gathering.
As a photography enthusiast, I couldn’t help but notice how well you captured the “after” shots. The angles and lighting really showcase the details, like the textures of the countertops and the color contrast between the cabinetry and flooring. Did you use natural light for these photos, or did you enhance them with additional lighting or editing techniques? I’d love to hear any tips you might have for photographing interiors to highlight their best features.
medical pharmacy 24 hours pharmacy texas state board of pharmacy