
How to Paint a Wooden Tray
Turn a thrifted and dated wooden tray into a decorative tray that fits your personal decor style with these simple steps for how to paint a wooden tray.
My friend Coleen gave me a fun and creative birthday gift. She knows I love nothing more than “making over” crafty things, so she gave me an assortment of thrift store/ garage sale finds and told me to have fun with them… {Ooooo….So much fun!}
One item was this thrift store wooden tray:
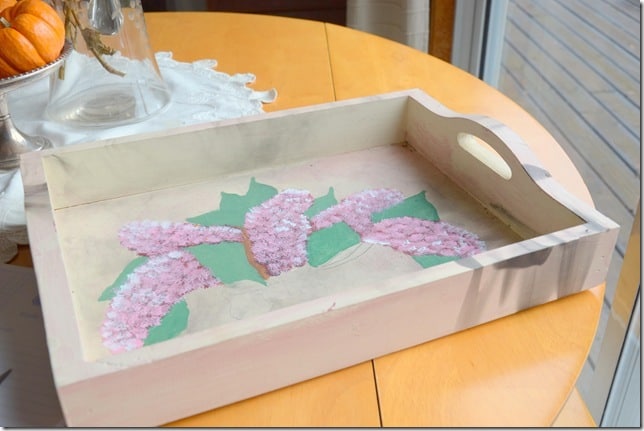
Someone had started doing some painting on it…but it looks like it met a little disaster near a candle? The black soot streaks are my hint …
In spite of its flaws, I love this little tray. It’s wooden and is the perfect size to sit on a coffee table or as a table centerpiece. It definitely needed an update, though, so I decided to get out my painting supplies and see what I could do.
Supplies needed to paint a wooden tray
- Sandpaper
- Old cloth or tack cloth to wipe off sandpaper dust
- Paint primer (if you feel it needs it)
- Acrylic house paint in colors of your choice
- Paint brush
- Wood tracing paper
- Small craft brush
- Painters tape
- Black acrylic craft paint.
How to paint a wooden tray
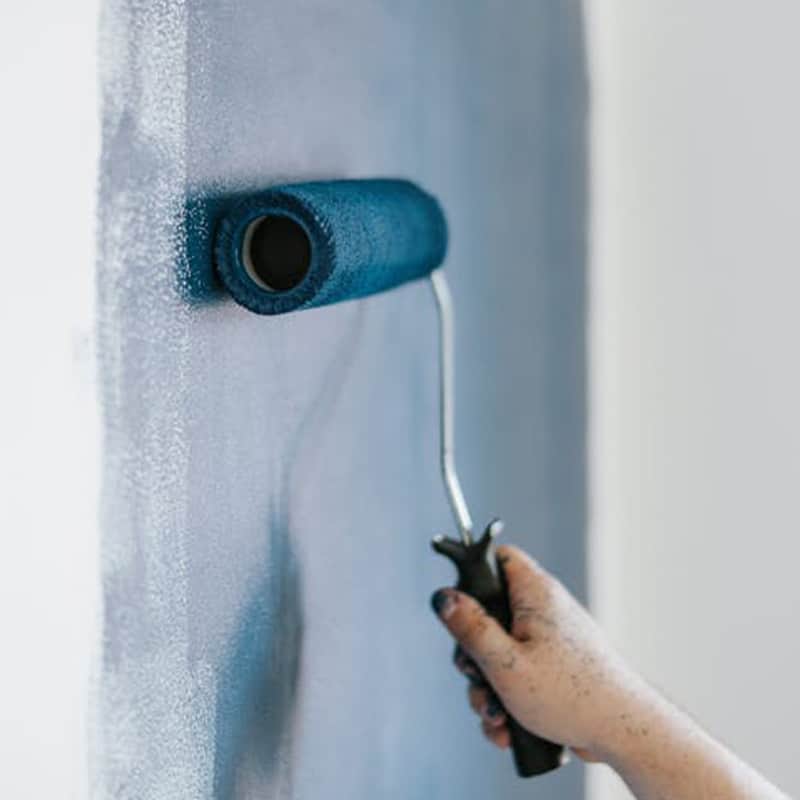
- Prep the tray by sanding it and cleaning it well.
The prep part of painting is probably the least favorite step, but it’s also the most important! If a piece isn’t prepped properly, the paint will not stick and last. If the wood has been painted before (as this one was), it may just need to be scuffed up with sandpaper, and then wiped clean.
Scuffing up the finish will give the new paint colors “tooth” to hang on to. If that doesn’t seem like it will be enough to make the paint stick, I would recommend using a good quality primer under the paint color you want to use.
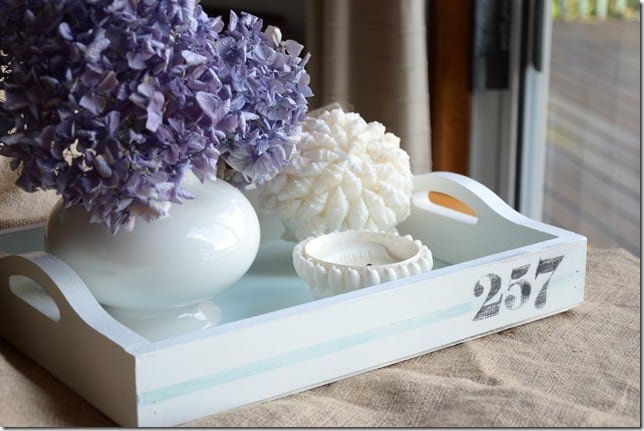
2. Paint the wooden tray in the colors of your choice.
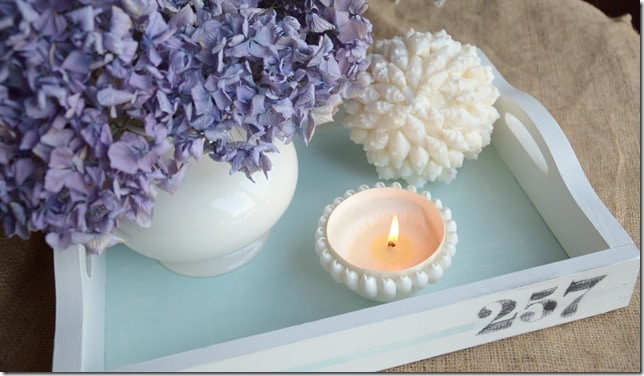
I primed the whole thing and painted it Cloud White (Benjamin Moore) with a light aqua blue Tide Pools (Behr) on the bottom of the inside.
“Tide Pools” is my current favourite color…
3. Paint accents on the outside if you’d like.
I painted the numbers on using my trace and paint with brush method (decorative painting basics found here). I masked off the line with painter’s tape and filled it in. (You can find tips for using how to paint a straight line using painters tape here.) Then I heavily distressed the numbers with a sanding block to make them look old and aged.

Different ways to use a painted wooden tray
There are many uses for decorative trays in your home. Here are a few:
- Use it on a coffee table to stack books or magazines in and top with a candle.
- A wooden tray works well as a centerpiece for a dining table. Add in a bouquet of flowers, a container with napkins, and the salt and pepper shakers.
- I love using a wooden tray on top of my dryer in the laundry room. It holds my jar of laudry detergent, a basket with woolen dryer balls, and essential oils that I like to use to help make my laundry smell great.
- Of course, a wooden tray can also be used as a serving tray. I sometimes like to fill it with coffee and tea mugs along with cream and sugar containers with a pretty jar with stir sticks when I have guests over.
Other painting posts you may be interested in:
- Painting materials list for painting interior walls
- Can you paint over stained wood? (Yes you can!)
- DIY chalk paint with baking soda

oh wow i love this idea! very pretty!!! love the colors too! yay following along:) you've inspired me with this idea:)
What a great gift idea! I don't have any friends who would appreciate a gift like this from me 🙁 but boy would I appreciate someone giving me some thrifty finds. Great job on the makeover! Love that Tide pools blue.
Kim
http://www.todayismysome-day.blogspot.com
Thanks for linking up! ~Jen @ http://www.icantstopcrafting.blogspot.com
Love your birdies and the tray.
Keep going
Kylie x
I've just recently found your blog, and all I can say is WOW!!! Love your style and creativity. I've already gone back through your "30 Days" series and look forward to finding more treasures in your archives. :o)