
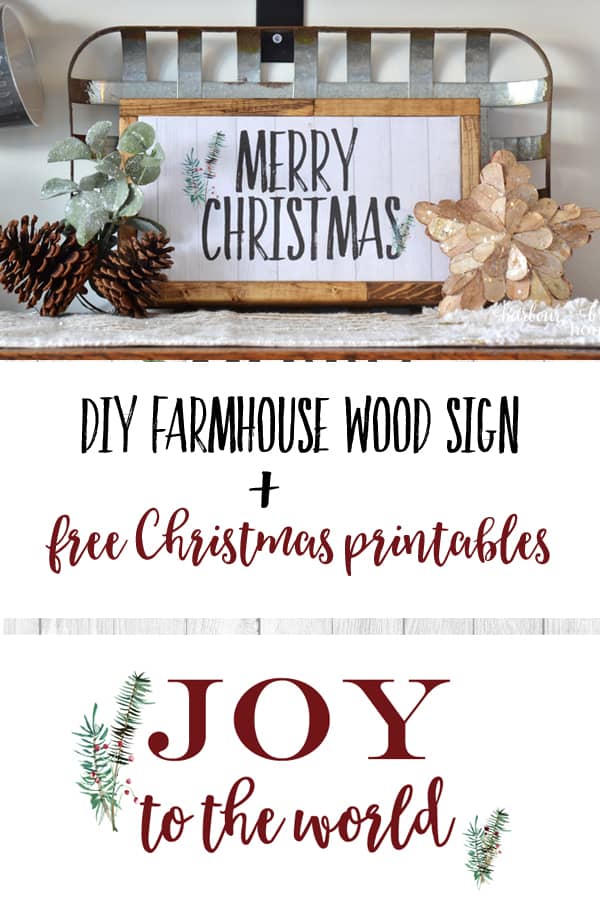
DIY Farmhouse Sign + Free Christmas Printables
In this article: Learn how to make a no-paint DIY wood farmhouse sign with free Christmas printables. It’s quick, simple, and can be changed easily for the seasons.
I adore farmhouse signs. I love the sayings, the beautiful fonts, and the character they bring to a room.
I’ve done my time with stacks of pallet wood and paintbrushes. I’ve painted signs with verses, stenciled antlers, a canvas Noel wreath, a big window with Margaret’s verse, and much, much more.
I’ll be honest. This girl is tired. of. handpainting. letters. So, I’ve been on the lookout for an alternate solution. The “guide to farmhouse signs for lazy girls”, or something like that.;)
I finally decided to test drive an idea with today’s project, and I must say, I quite like the simplicity of it. Here it is (no handlettering required!):
DIY Farmhouse Sign + Free Christmas Printables
Supplies needed for this Christmas signs diy:
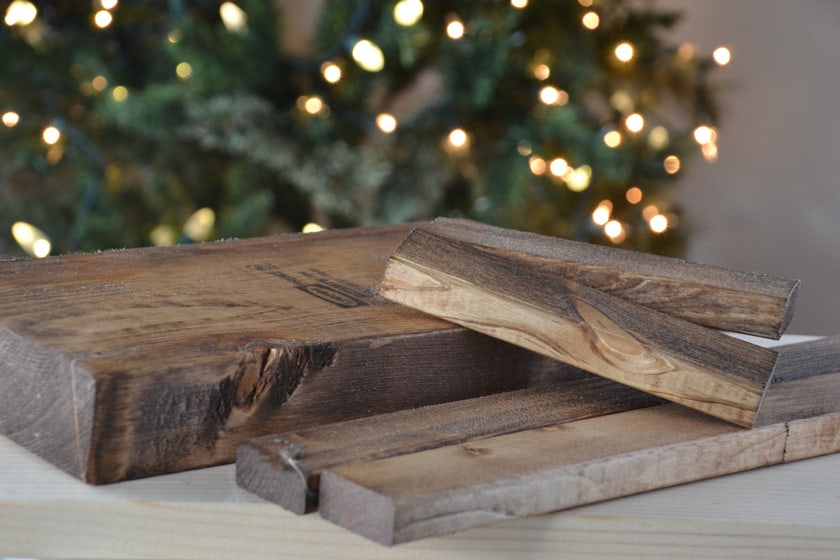
- A 2 x 6 board cut at 10 1/2 inches long
- 2 pieces of 1 x 2 boards cut 5 1/2 inches long (for side frame pieces)
- 2 pieces of 1×2 board cut 11 3/4 + 2 little marks (for top and bottom frame pieces)
- wood stain
- foam brush
- rag
- cardstock paper
- spray adhesive
- Christmas printables (below)
- wood screws
- scotch tape
Stain all sides of the frame pieces
Using a foam brush, I applied the stain to all sides of the wood pieces and wiped it off with a rag. Before moving on to any of the other steps, I made sure it had dried well.
Apply white cardstock to one side of the 2x 6 board with spray adhesive
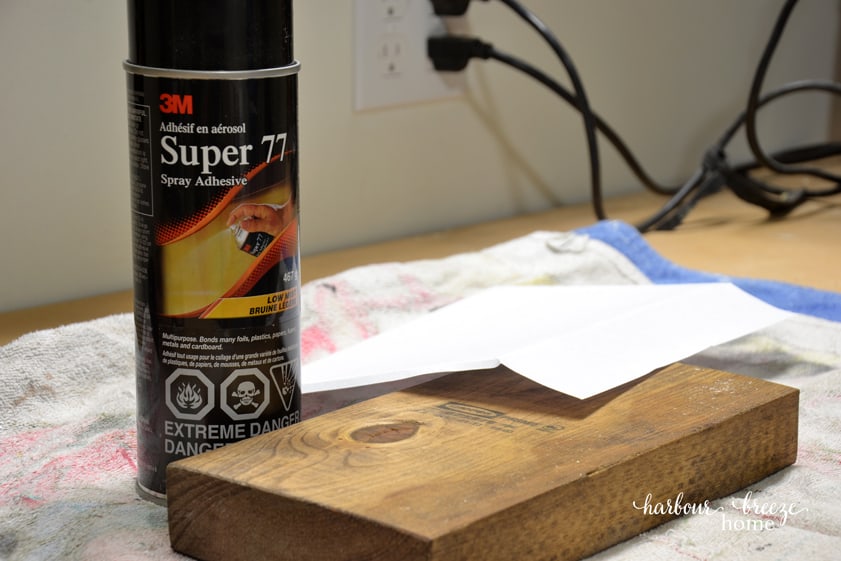
I wanted to make sure that the wood wouldn’t show through any of the printables, so I applied a piece of white cardstock to form a nice clean background for the printables to lay on. I sprayed the adhesive on the board and pressed the paper firmly down on it.
Print off a printable of choice
This is where it gets fun! As a fan of printables, I’ve always looked online for other people’s designs. But, this time, I decided to make some myself.
See these previous printable round-up posts: Farmhouse Printables for Fall; Free Christmas Printables; 100+ Botanical Printables; Modern Farmhouse Printables
So, here are 3 designs I put together specifically for this project size (*Note: The print size of these printable images is 10 1/2 by 5 1/2 inches ~ Designed specifically for a project with a 2 x 6″ board.):

“Joy to the World” with no background. Click here to print the PDF

“Merry Christmas” on shiplap background. Click HERE to get the printable PDF.

“Joy to the world” on shiplap background. Click HERE to get the printable PDF.
Fold your printable to wrap around the sign and trim the excess cardstock

Using scotch tape, tack down the printable on to the top and bottom edges of the board.
I folded the sides down and tucked them under the side trim pieces. However, I didn’t tape them down because I wanted to be able to remove the printable easily when changing it out.
Attach the side trim pieces.

We used the pneumatic nail gun for this step, but a hammer and nails would work in a pinch, too. Make sure that the edges are perfectly lined up on the board before you nail.
Screw on the top and bottom board pieces
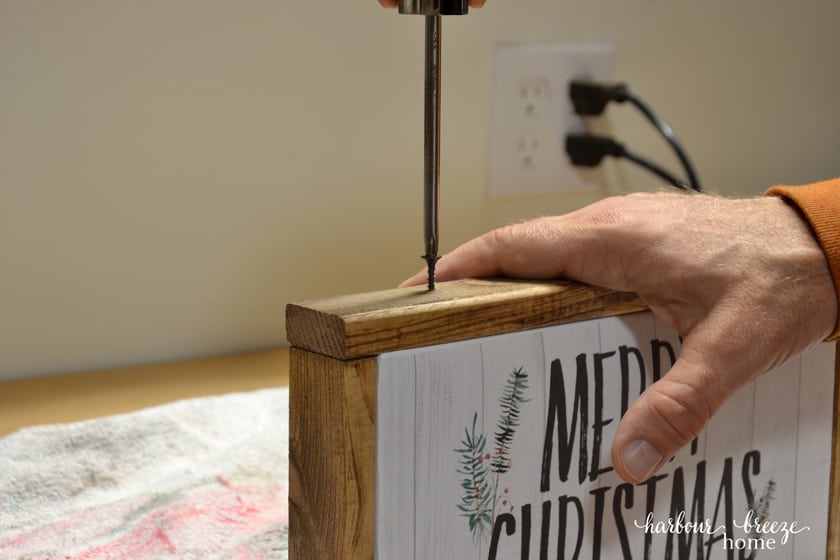
You could attach the frame with the nail gun if you prefer, but I wanted to use screws so that I could CHANGE OUT the printables!! I thought it would be fun to be able to just unscrew the top and bottom and pop in a new design for the new seasons of the year…
So for now, here is look #1:

And look #2!
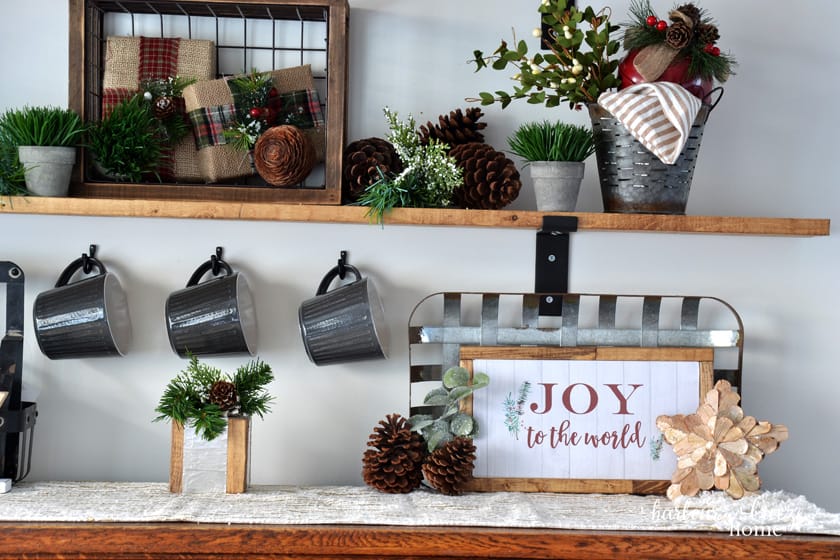
This sign was the final homemade Christmas decor item for my Christmas shelves this year. (I’ll be back another day for that reveal…)
Now, I’m pleased as punch to announce that today I’m hosting a Homemade Christmas Decor Blog Hop with some of my blog friends! One of my goals for the Home-Made Christmas series was to introduce readers to other creative ladies. So, why don’t you grab yourself a cup of coffee, click on the links below, and get some more crafty ideas!


What a great idea! I might just to make some to give as gifts. Thanks for the inspiration Rita!
OH, now this is a GREAT innovative idea! And, you can swap it out for each holiday! Woohoo!!! And, you know I love me some farmhouse style! 🙂
Carrie
curlycraftymom.com