
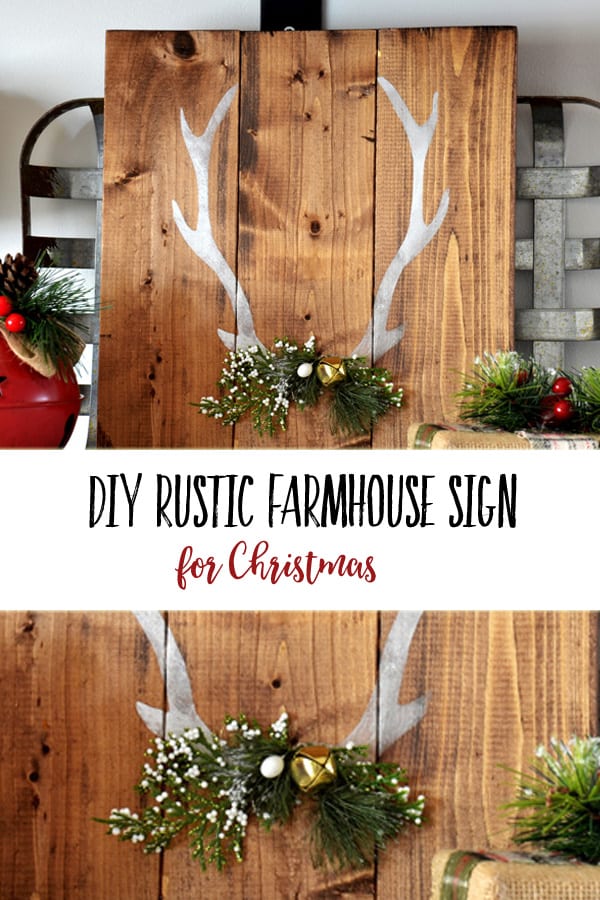
Simple DIY Farmhouse Sign for Christmas
In this article: Learn how to make a simple DIY farmhouse sign for Christmas using a custom stencil. The project illustrates 2 different ways a stencil can be used.
Why you might want to make a wooden sign!
Learning how to make a simple DIY farmhouse sign for your home is a budget friendly way to add style to a space, give as gifts, or sell at a craft fair. By adding some Christmas greenery, it becomes a seasonal decor piece. This project uses a custom stencil ~ allowing you to make it say or be whatever you’d like it to be!
Related Articles: Decorative Painting on Wood Signs; As for Me and My House Sign (and 6 other sign projects); Painted Noel Sign
How to Make a Rustic Wood Sign for Your Home
Disclosure: This post uses affiliate links for your shopping convenience. Harbour Breeze Home is a participant in the Amazon Services LLC Associates Program, an affiliate advertising program designed to provide a means for sites to earn advertising fees by advertising and linking to Amazon.com.
Supplies Needed:
- A wood sign base (This one was made with 1 x 3 pine boards cut and assembled in this manner.)
- Wood stain (I used Varathane in Mission Oak)
- Foam brush
- Rag
- Stencil Film
- Folk art Chalk Paint in Adirondack (white) or this type of paint in whatever color you’d like!
- Stencil brush
- Exacto Knife
- Scissors
- Piece of glass
- Faux greenery or felt flowers, optional
Step 1: Stain the Wood Base
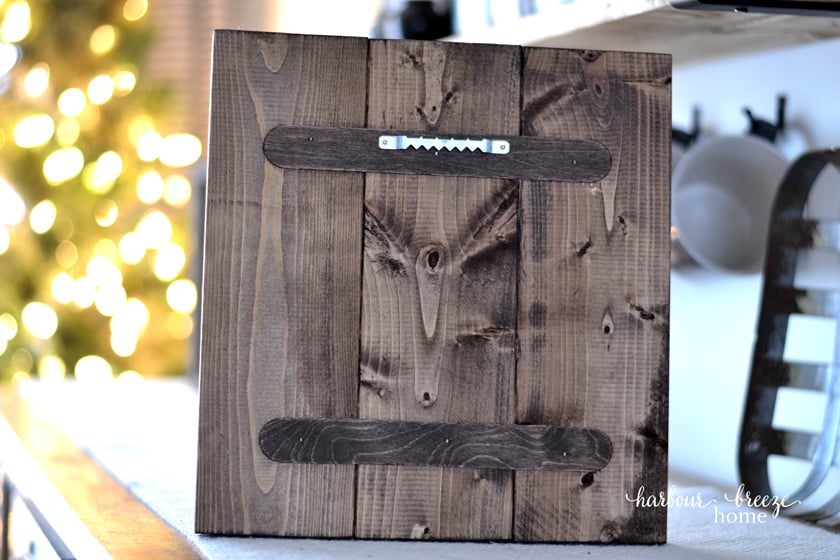
For each of these signs, I started with a pallet sign type base that was stained. (You can read the details on how to do that here.) However, you can use a single board (or any size!) if you’d like.
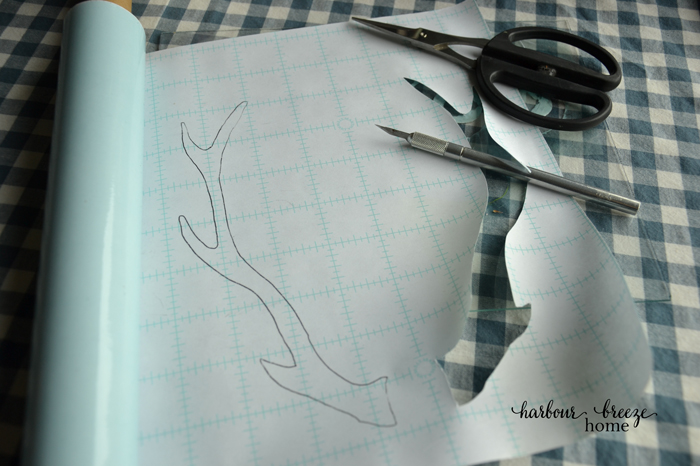
I began by googling “antler horns” until I found a printable image that I liked. I then used it as a guide and cut out a custom stencil with the pattern.
Step 2: Cut out the custom stencil
{The custom stencil product I like to use is Martha Stewart’s peel and stick stencil film.}
If you are careful when cutting out a stencil, you can apply it two different ways for 2 totally different looks. One look uses the cut-out portion as the stencil. The other look uses the solid pieces you removed as a “reverse stencil”. (See examples of both below.)
A few tips on cutting out stencils:
- Place the stencil paper on a piece of glass while cutting with an exacto knife. The glass allows the blade to slide better. I’ve tried using a cutting board, but it grabs and sticks into the cutting board surface.
- For the 2nd antler I cut out, I cut a part with the exacto knife, and then finished it with a sharp pair of scissors. It was so much easier that way!
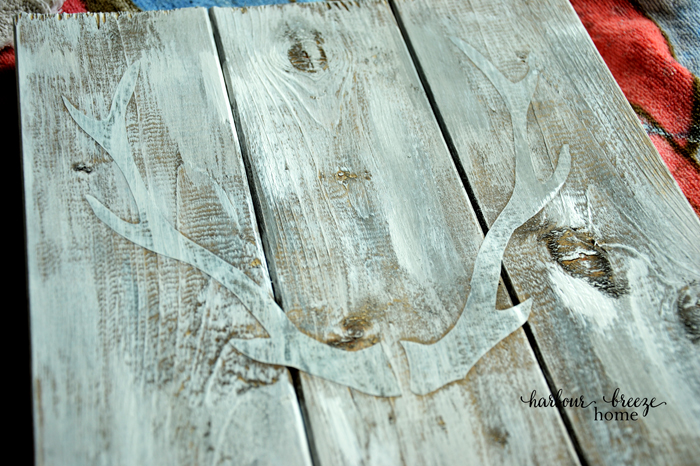
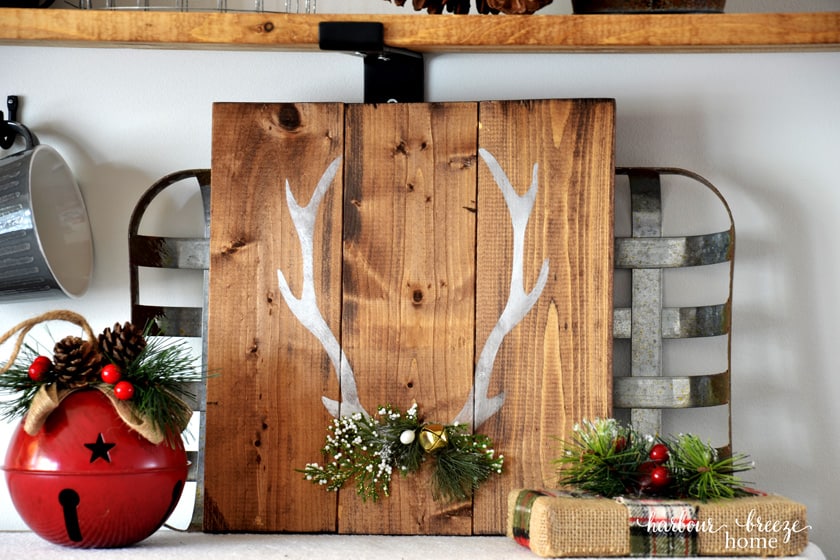
For Painted Antler Sign Option 1 ~ The “Reverse Stencil”
- Remove the white backing on the cut out shapes. Stick them on to the stained wood, and press down really firmly on all the edges. (I pressed the end of a paint brush down on it, and pushed it along. A credit card also works well for this step.)
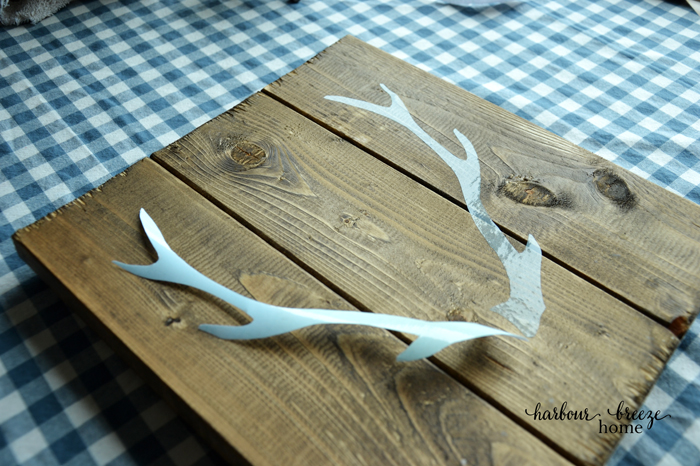
{The right antler in the picture is stuck down. The left antler still has the backing paper attached.}
2. Once the antlers are firmly in place, paint the background color on. Although it’s tempting to just quickly slap the paint on, you will need to slow down and apply the paint in thin layers to prevent a big fat line around the antlers.
 If you water down the paint slightly, a bit of the wood grain will still peek through. (That’s what I did. I also layered white and rain gray acrylic craft paint, to give a rustic weathered look). Once you get the background color you desire, then the fun part:
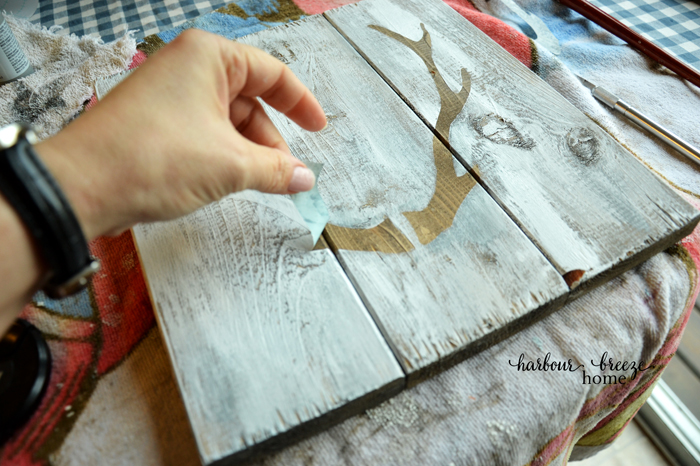
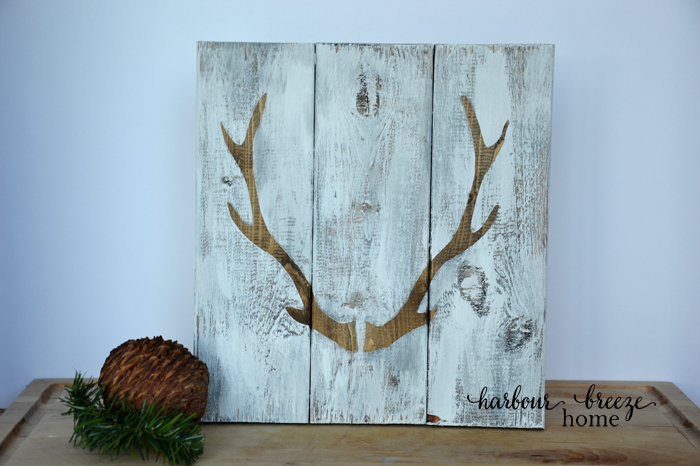
3. Peel off the stencil and reveal your masterpiece!
For Painted Antler Sign Option 2 ~ The Stencil Method
1.For the other sign option, begin by painting the whole sign background the color of your choice. (Don’t forget the sides, too!) I used a layered mix of white and rain gray acrylic paint.
2.Once completely dry, apply your custom peel and stick stencil film:
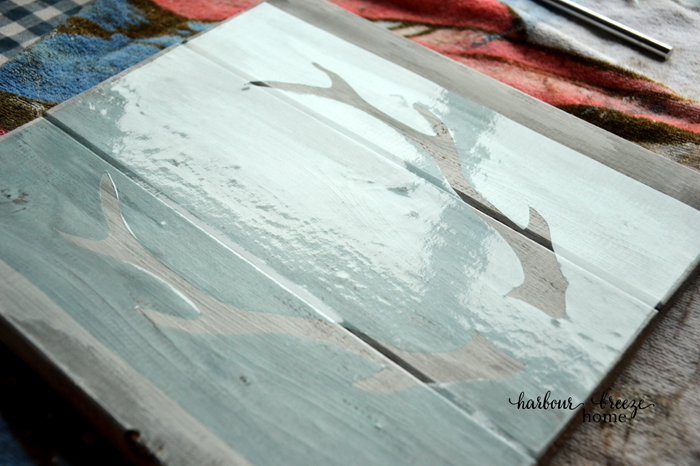
Press firmly around the cut out edges to prevent paint from seeping underneath.
3. To stencil, dip your brush into the paint (I used black for this one), and dab off almost all the paint onto a paper towel. Then brush and “pounce” onto the stenciled antler area, pushing the brush from the outside of the stencil in. It will take a bit of time to build up the paint this way, but it helps prevent paint from sneaking under the stencil.
4. After it is covered well, peel off the stencil:

And, voila, antler sign option 2!

Optional Embellishment Ideas:
- To make the sign more Christmas specific, add greenery and jingle bells
- Felt flowers and leaves could give the sign a more feminine feel. Pink and green ones would be so cute in a little girl’s nursery!
**Update: I recently did a Facebook live illustrating all the steps of this project. It marks the start of this year’s Home-made Christmas series, and is the first idea for both home decor and a gift idea. To catch future Facebook live craft classes, be sure to join the Facebook group here.

Wood Farmhouse Sign with Stencils
Learn how to make a simple DIY farmhouse sign for Christmas using a custom stencil. The project illustrates 2 different ways a stencil can be used.
Materials
- A wood sign base (This one was made with 1 x 3 pine boards cut and assembled in this manner.)
- Wood stain (I used Varathane in Mission Oak)
- Foam brush
- Rag
- Stencil Film
- Folk art Chalk Paint in Adirondack (white) or this type of paint in whatever color you’d like!
- Stencil brush
- Exacto Knife
- Scissors
- Piece of glass
- Faux greenery or felt flowers, optional
Instructions
- Stain the wood base
- Cut out a custom stencil using a design online that you print out.
- Use the stencil and paint on the design. - See the post above with pictures showing two different methods of stencilling.
Notes
On cutting out stencils:
If you are careful when cutting out a stencil, you can apply it two different ways for 2 totally different looks. One look uses the cut-out portion as the stencil. The other look uses the solid pieces you removed as a “reverse stencil”. (See examples of both below.)
A few tips on cutting out stencils:
- Place the stencil paper on a piece of glass while cutting with an exacto knife. The glass allows the blade to slide better. I’ve tried using a cutting board, but it grabs and sticks into the cutting board surface.
- For the 2nd antler I cut out, I cut a part with the exacto knife, and then finished it with a sharp pair of scissors. It was so much easier that way!


I need to make some new Christmas wall decor, and this might be the project I do this year. Totally my style Rita, I love the rustic wood and simple design so so much!
This is just gorgeous! I love the reverse stencil and just how simple and clean the design is on it. So perfect!
Carrie
curlycraftymom.com