
How to Make an Inexpensive Floating Frame for Canvas Art

Make an inexpensive floating frame for canvas art using this step by step DIY tutorial.
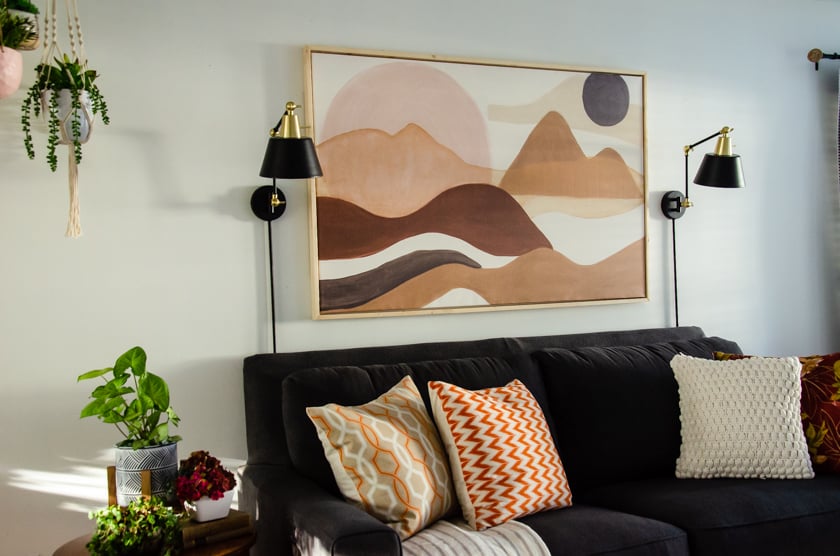
I recently showed you our new Boho style living room with a large canvas print as the focal point wall decor above the couch.
We absolutely love it.
After we hung it, we decided to add a special finishing touch by making a floating frame for it.
Canvas frames can be very expensive, so this diy floating frame is a budget friendly alternative.
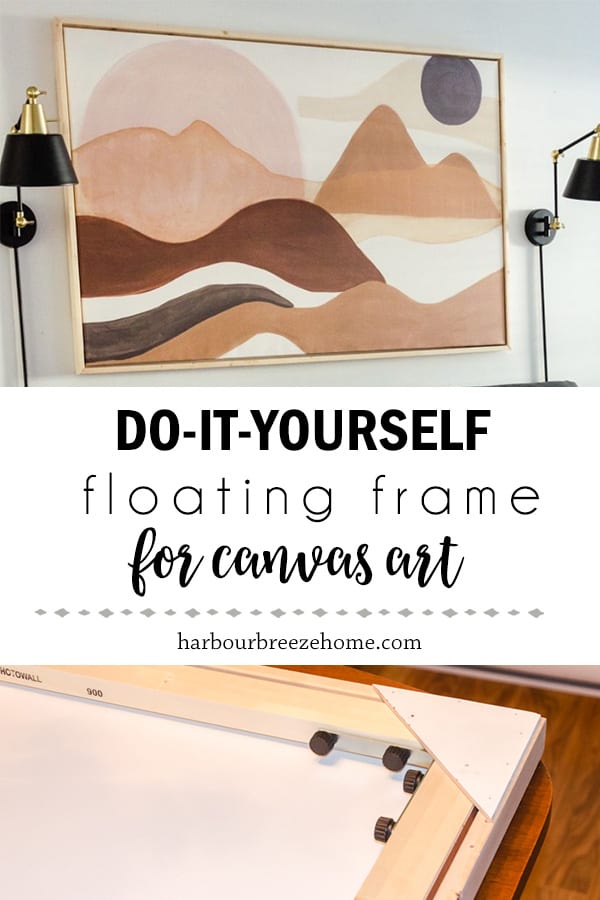
How to Frame a Canvas with a DIY Floating Frame
Disclosure: This post contains affiliate links for your shopping convenience.
Supplies You’ll Need to Make a Floating Frame
- 1 x 2 pine boards
- wood glue
- miter saw
- brad nails
- brad nailer
- thin wood for corner pieces (we used leftovers from our shiplap wall)
- wood stain, optional
- clear wood sealer – like polyurethane
(Click here to find links to our favorite DIY & craft supply items.)
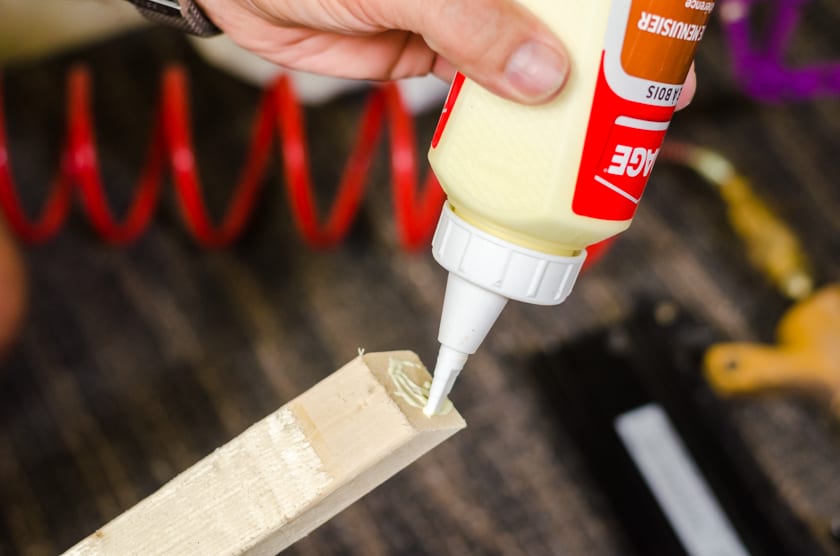
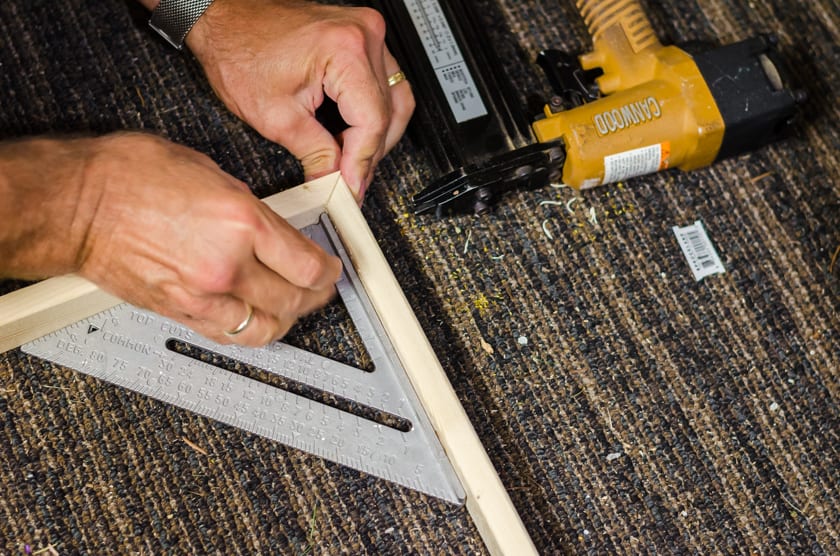
Step 1: Cut the 1×2 boards into the correct measurement using a mitered corner.
You’re going to need to do a little math for this part. Measure the size of your canvas and mark down the measurements. Ours was 57″ x 37 1/4″.
Then, determine the size of gap that you’d like between the frame and the edge of the canvas. We wanted ours to be 1/8 of an inch, but something went awry in the measuring, and it ended up being a little over 1/4 of an inch – but we like it anyway!;)
Take the measurement of the canvas + the gap measurement + the thickness of the wood (3/4) and that will equal the length you’ll want to cut your frame pieces with a mitered corner.
The finished measurement of our frame is 57 x 37 1/4.
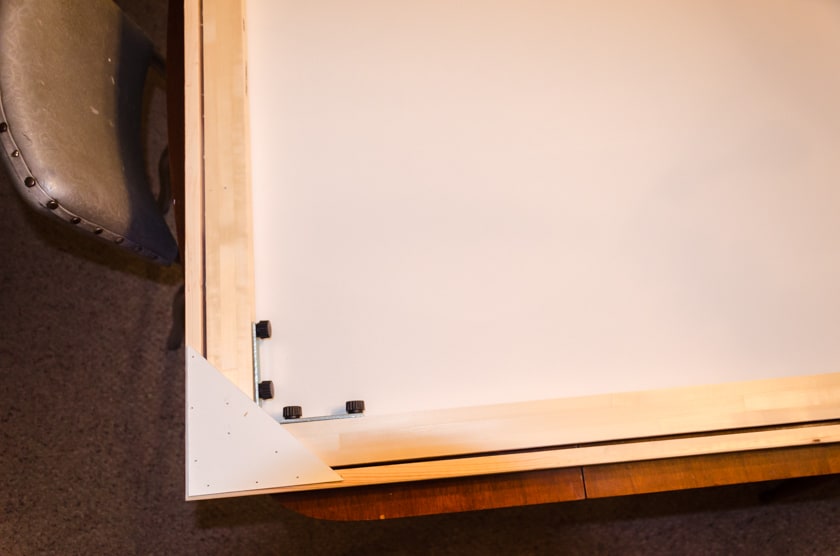
Step 2: Cut the veneer boards at a 45 degree angle cut to form the backing to hold the frame in.

Step 3: Glue the mitered corners together with wood glue and attach with brad nail.
Step 4: On the back side of the frame, use 1/4 inch brad nails, and attach the corner pieces.
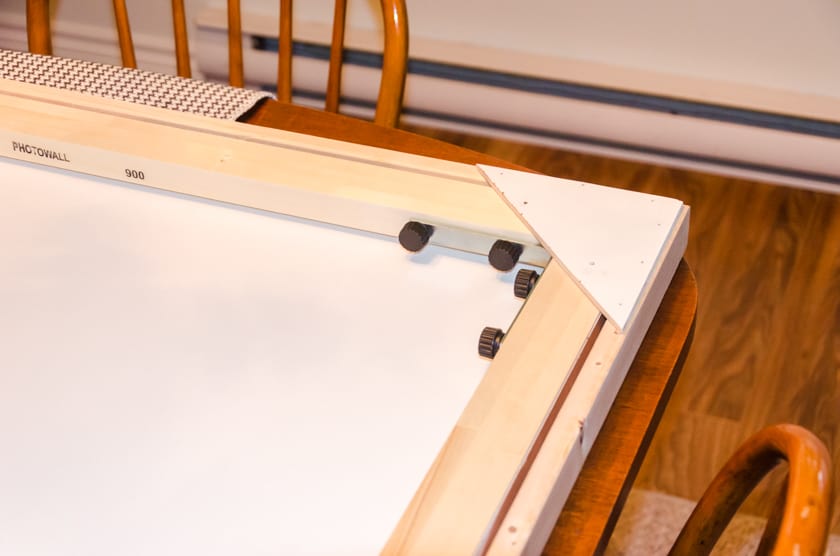
(I realized I didn’t take a picture of this step while it was happening, but I’ve taken a picture of the finished frame with canvas already in it so you can see how the corner pieces were attached.)
Step 5: Stain or seal the frame.
Because I liked the light natural look of the frame with the canvas, I ended up just using a clear matte sealer finish. However, you can use whatever stain color you’d like for your finished look.
Step 6: Using small nails, carefully attach the floating frame to the canvas print using the corner veneer pieces as the backing.
We tried using short brad nails for this step, but found out quickly ours were just a teeny tiny bit too long and they poked through the canvas! So, learn from us and make sure your nails are not too long!
Step 6: Hang up your new canvas with a floating frame!
Because I know some of us struggle with the particulars of how to hang a picture on the wall, I thought I’d walk you through the process of how we hung this large floating frame canvas art above our couch.
Supplies you’ll need to hang a large canvas on the wall:
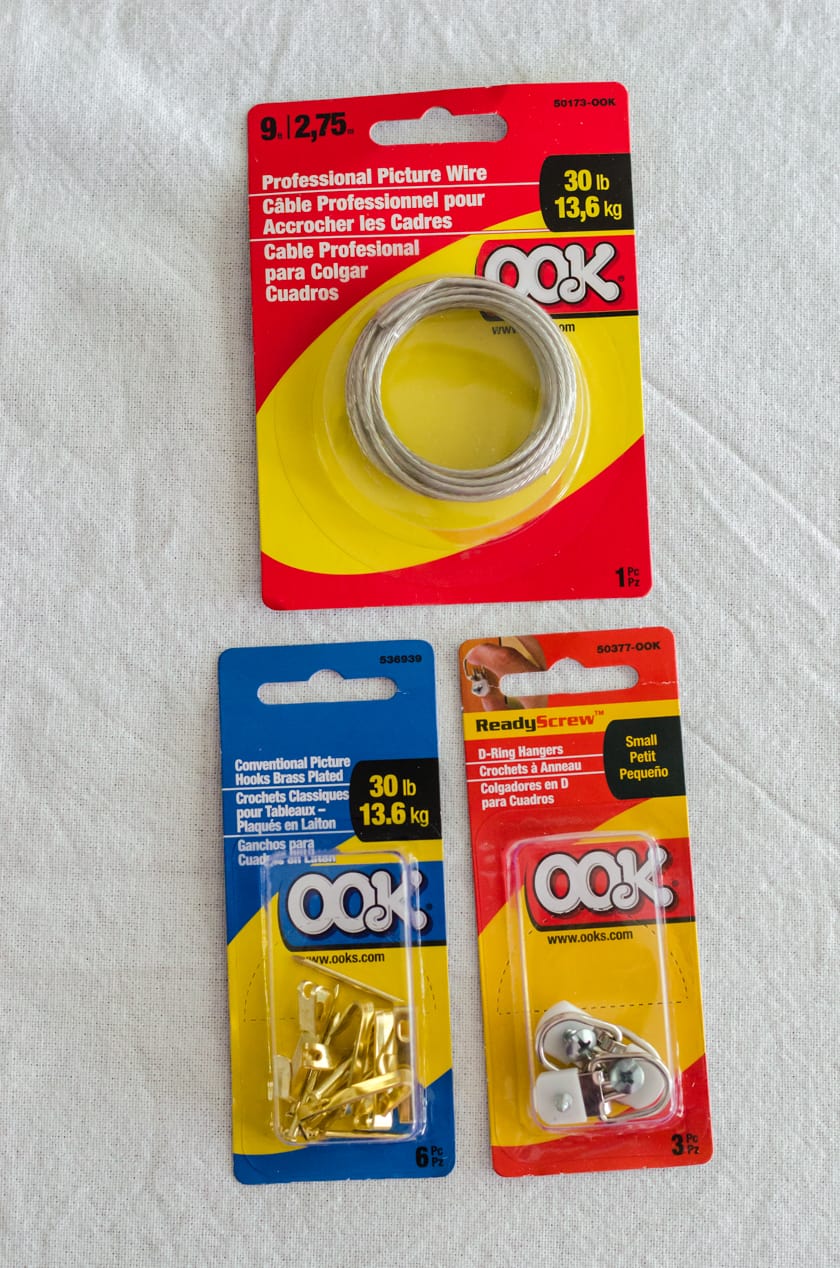
- Picture wire that holds up to 30 pounds
- Small D- Ring Hangers
- Conventional Picture Hooks that hold up to 30 pounds
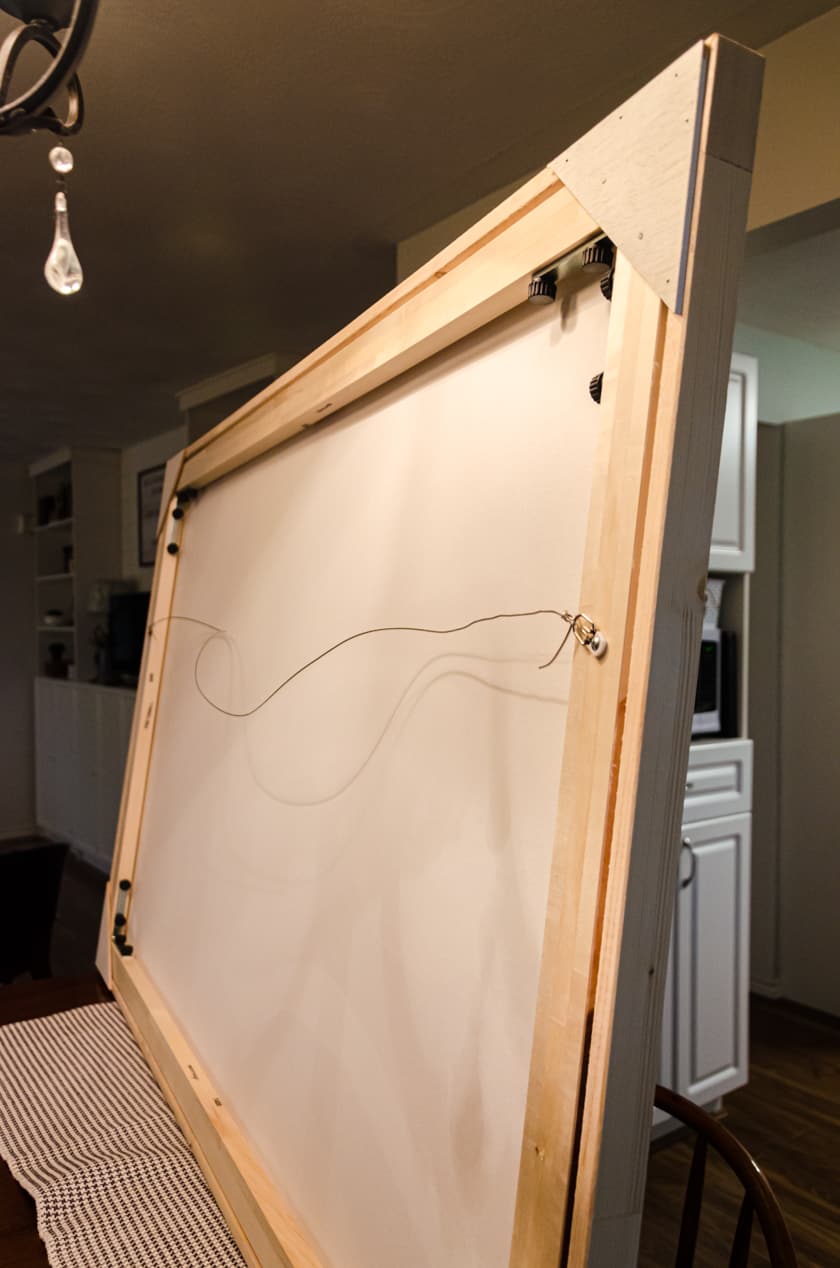
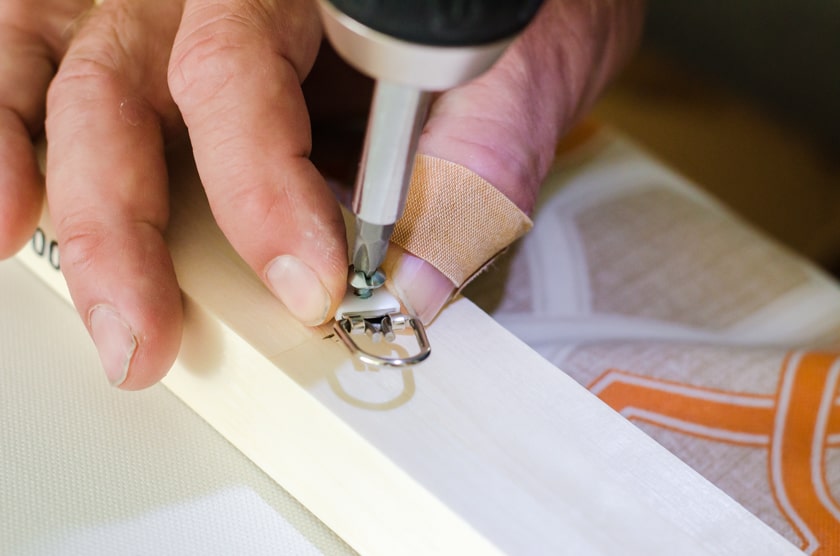
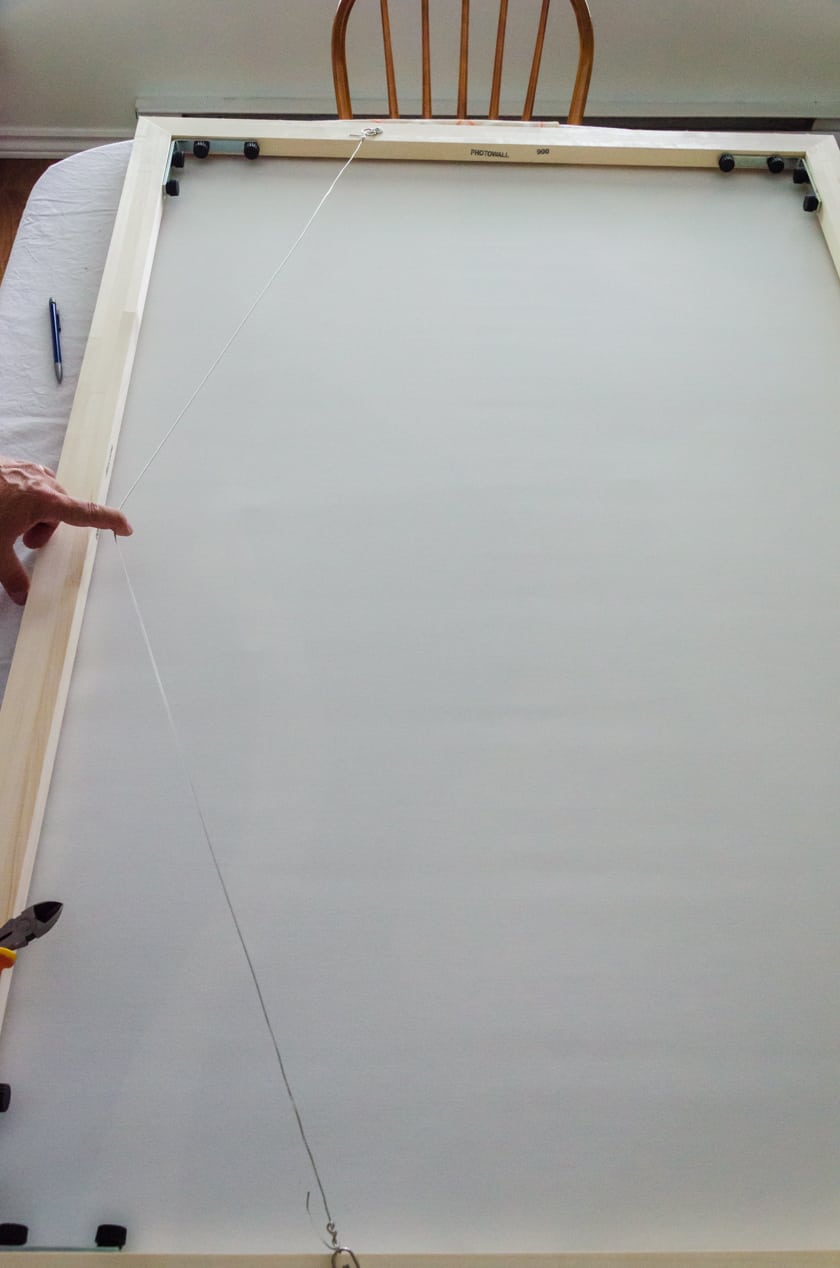
Step 1: Attach the small D-Ring hangers to the canvas frame about 1/3 down each side of the canvas with the provided screw.
Step 2: Pull the wire through each D hook and twist until tight and firm.
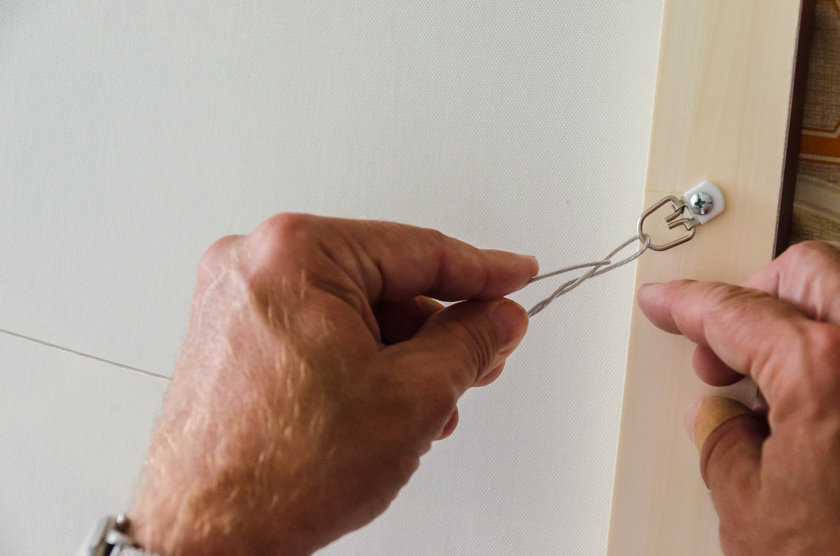
As you are attaching the picture wire, be sure that the overall length will be near the top edge, but not above it.
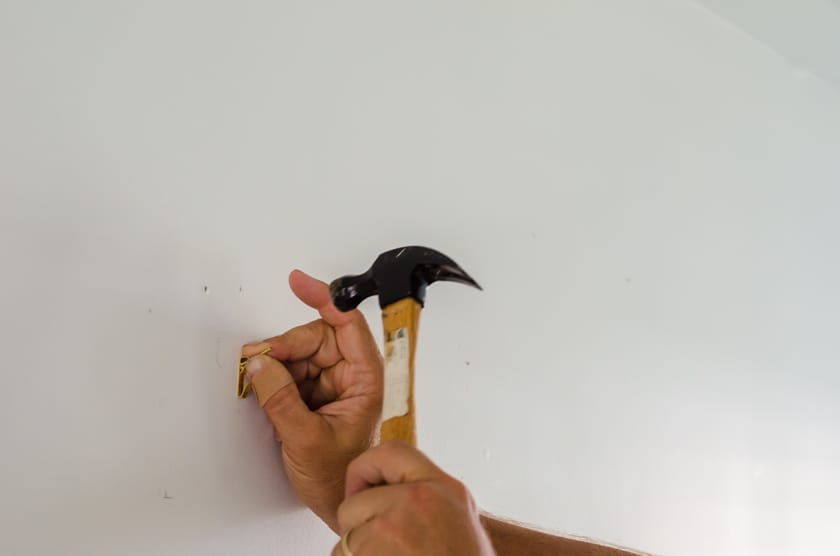
Step 3: Nail in the picture hook with a hammer.
Step 5: Hang up your new art and enjoy!
Other DIY Projects Using Wood
- DIY Floating shelves using wood and dowels
- This floating bedside table is quick, easy, and inexpensive!
- 8 different diy shelves you can make in just a few hours
Want more easy DIY ideas?
Join our newsletter list and get ideas for you and your home delivered right to your inbox! Just click the button below to join today.


You and Mr. HB always have great DIYs! Love this floating frame, and I pinned it, too!