
How to Strip Paint from Wood ~ A Farmhouse Table Makeover
I love furniture with a story. Take this table, for example.

It was sitting abandoned and lonely outside on a deck when I discovered it. Its owners told me I could keep it if I wanted.
I did. In fact, I was in love at first site.
I fell in love with the fact that it had been someone’s Grandma’s.
I loved its natural crackle finish, evidence of long-gone drop leaves, and its petite size with pretty legs.
Over the years, it has been the solution to many a problem in my houses. It has functioned as an entryway table, telephone desk, and even got a custom tablecloth once.
Most recently, it has sat under the windows in our townhouse living room. It’s where I sit daily and work on this little blog business of mine.

It was time to give this pretty lady a little spiff up.
After all the steps were finished, this is how she looks now. (Oh, how I love her…)


It was a process that involved steps for the table top ~ stripping, staining and sealing, along with completely different steps for the apron and legs ~ painting, distressing, glazing, and waxing.

Since I don’t want this blog post to be the length of a novel, today we’ll deal with the table top steps ~ stripping, staining, and sealing. I’ll be back another day to share the how to details for the apron and legs.
(Edited: Find Part 2 “Painting the Farmhouse Table” here)
How to Strip Paint off Wood Tabletop

Supplies Needed for stripping wood:
- Rubber Gloves
- Paint Stripper – I used EZ stripper
- Cheap Chip Brush (that you can throw out when finished)
- Metal scrubbing pags
- Paint scraper tool
- Drop Cloths
- Rags
- An old container to place the stripped paint in
Step by step Instructions for how to strip paint off of wood using a paint stripper solution:
- Using rubber gloves, paint on a thick layer of furniture stripper. Follow the instructions on the bottle and work in a well ventilated area if it directs you to. If possible do this step outside or in a garage with the door wide open.

I purchased EZ Stripper for this step as it was the only one I could find in our local store that claimed to be eco-friendly with water clean-up. It said it was safe to use indoors (a big plus for me!), so I decided to give it a try. However, I still left the doors open wide so there was a lot of fresh air flow!

Unlike the really smelly and caustic strippers I used before, this stripper never indicated the paint lifting (like bubbling up). Per the instructions, I left the stripper on about 1 hour before I started scraping. I knew there were at least 4 layers of paint, so it had a big job to get through all those layers!
- Scrape off paint layers working with the grain of the wood and using a paint scraper tool. Deposit the paint remenants in an old container to throw out.

Once the time was up, I started scraping with my favorite scraping tool (see it in the video below). I developed a way to angle the scraper so that it would best scrape up the most. I’ll admit, though, I had to put a lot of muscle in it.
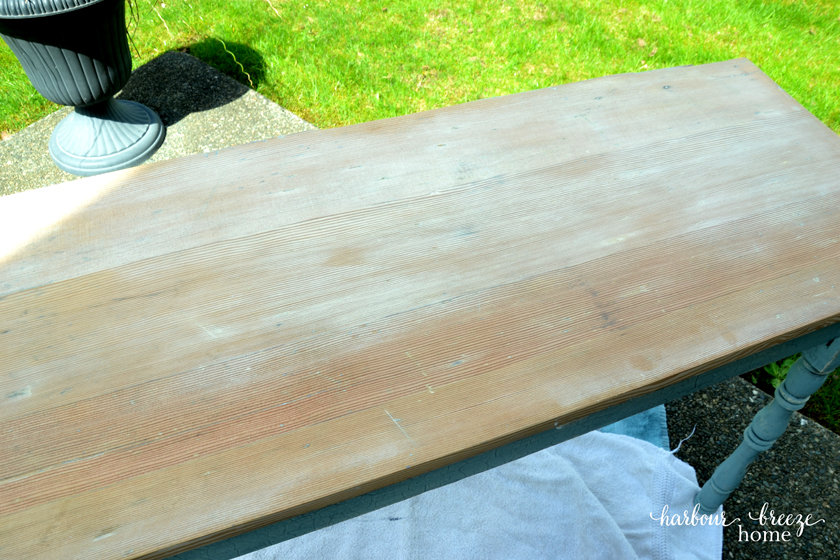
The picture above shows what the table looked like after one coat of stripper. The yellow that you see is the original (lead paint) and the wood is just peaking through.
- Repeat the process of applying the stripper and scraping as many times as needed.
I repeated that process two more times until I could get as much paint as possible off.
- When you have gotten as much paint off as possible with the paint stripper, wipe down the surface with a wet rag and dry it with a dry rag. If it is water solulable paint stripper, wet the rag down with water. If it isn’t water soluable, wipe down the surface with a rag soaked with mineral spirits (or whatever the instructions on the product you’re using recommends). Dry it off with a dry rag.
Video of stripping wood
Here is a short facebook live showing the last stripping I did before moving on to the sanding stage:
Sand the wood down well to finish the paint removal process
When the paint is stripped off with the furniture stripper, clean the table well (this was a water cleanup product), let it dry, and sand it down.

We took the table outside for this step. Using the random orbital sander, we started with 220 grit sandpaper and worked it over the table top and edges. The sanding step takes off even more bits of paint, and worked especially well on the sides and front.
Because this table is so old and dinged up, there was no way that I could get every little drop and ding free of paint. I decided to leave it as it was ~ full of history, character, and lots of imperfections!
Stain the top
Before I could begin the process of staining the table, I first needed to choose a color of stain. I struggled to know which one to choose, so I did up a sample board of stain colors that we already had on hand. Since the table top was fir (my husband told me:), I did the stain samples on a fir board, too.
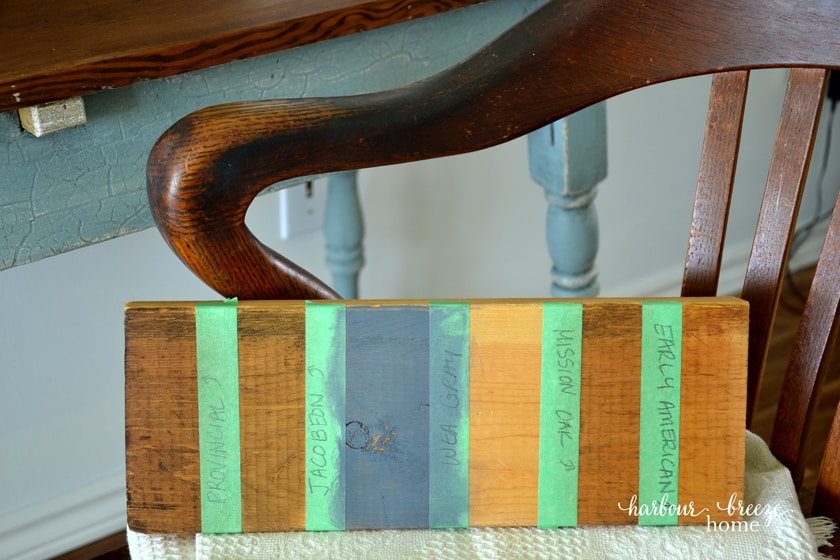
Seeing the stain on the wood itself helped me choose the color direction to go. I wanted to match the office chair as close as possible, so in the end, the decision was Mission Oak.
Apply stain (on the clean, dry surface) with a brush and immediately wipe off with a lint free rag.

I found that I needed to work quickly for this step. I didn’t have time to grab my camera and take pictures as I worked! I didn’t want the color to go too dark, so I wiped it off really quickly after I applied it, rubbing in well so that the wood grain showed through.
If you want the wood stain to be darker, you can let it sit on the surface and soak in a bit, and then wipe it off.

Seal the top
Once all that work has been done, the surface will need to be sealed so that it will be protected from stains and dings.
I chose to use a matte finish (which is not shiny at all). If you want a different sheen option, there is also satin, semi-gloss, and gloss (each getting more and more shiny).

Following the directions on the can, I stirred the product well (don’t shake it and make air bubbles!) and brushed on one coat with a sponge brush. If this table were going to get a lot of heavy duty use, I would have probably done multiple coats of this finish. But, for now, I just went with one ~ and I love it!
I’ll be back later to share the details of how I painted the legs and apron ~ without losing its historical crackle finish.

For more “How to Paint” projects, check out:
- Painted Electric Fireplace
- Painted Ceramic Lamp
- How to Paint a Dresser
- How to Paint Metal Doors with Plastic Trim
- How to Paint a Room


Everything about this is so smart! Using eco-friendly chemicals, testing stain on similar wood, everything. I am going to keep in mind for the future…I have seen many tutorials about painting, but don’t recall seeing any about stripping paint! Thanks 🙂
Wow these are look amazing. I just love your work skill. I have been thinking about painting my old table. Hope so your tips help me a lot. I am going to apply these tips on my table. Can you tell me how long i sanding before strip paint.? and any kind of glue need for it? Thanks in advance for giving me the clarification also for your helpful article.
Since have been seeing more and more pieces with stained tops and painted bodies am really loving the look more and more. To me it gives a piece a custom look that compliments each piece. Love how your table looks now.
When we left KY to move here to CO I was really dumb and left a small drop leaf table behind, kick me please. It had some damage on top from being out on our front porch, duh? Trying to find another one one here is becoming harder all the time, grrrr. Much more expensive and less available. I had bought it at an antique store in MT before we moved to KY.
So happy for you to get your table for free, enjoy your wonderful rehab on it think will enjoy table even more.
Have great week