
DIY Sliding Barn Door
Add style and charm – and save precious floor space – by making a DIY sliding barn door.
I saw recently that sliding barn doors were not “trendy” for this year. Although I like to observe the trends, I think it’s much more important to style our homes so they feel like “home” to us!
This sliding barn that we made years ago for our former home is still one of my favorite projects we’ve ever done.
Regardless of whether they are “trendy” or not, I just love sliding barn doors – and I think lots of you do, too!
Follow along and make your own using the instructions and tips below.
***
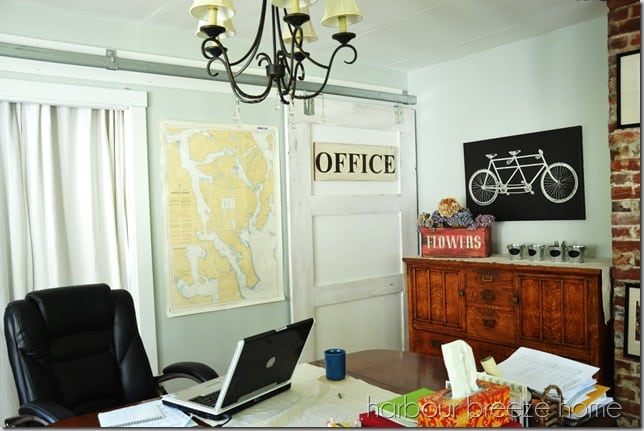
One of the challenges in our Dining Room turned Office makeover was the odd closet with a missing door in the room. As we perused options, we realized the best solution would be a sliding barn door. Not only did it achieve a look we liked, it provided the practical solutions we were after. Here’s how we did it.
DIY Sliding Barn Door:
Our project began by referring to this tutorial on How to Build a Barn door from the Handmade Home.
1.Take measurements for the area you are building a door for.
(Like theirs, our door is very large & heavy – measuring 49 inches x 84 inches .)
2. Purchase building & painting supplies
Disclosure: This post may contain affiliate links for your shopping convenience.
Building Supplies:
- sheet of MDF,
- 1 x 8s (outer edge boards),
- 1 x 6s (middle boards),
- and sliding barn door hardware. (We found our sliding door hardware at our local Home Hardware.) – Here is similar barn door hardware
Painting Supplies:
- Wood stain in color of your choice
- Aqua Lock primer
- Paint color of your choice
3. Once the back of the door is cut to the correct size, glue down the side and top boards and tack them down with a nail gun.

4.Add the center boards by gluing and tacking down with nails.
5. Once the glue has dried thoroughly, stain the outer and center boards by wiping stain on and off.

6. Prime the insets and back of the door with Aqua Lock primer.


7. To achieve a rustic look, once the primer is dry, wipe a bit of Vaseline on random places on the stained portion of the door.
Wherever the Vaseline is, the paint won’t adhere, providing an “old door” patina. Then, paint the door the color of your choice. (This door is painted in White Heron by Benjamin Moore.)

8. Reinforce the area where the door will be hung by first attaching a 2 x 8 x 12 foot board firmly to the studs of the wall.
(The rail we used was 12 feet long.)
9. Hang the rail itself, making sure it will be the right height for the door.

(While we were attaching all that, we propped the door on some boards so it would help hold the weight.)

10. Stand back and admire your handiwork!:)
This DIY sliding barn door covers the odd closet nicely, and then when slid all the way over…

it closes off the room from the rest of the house.
{We really love it!!:)}
For other farmhouse DIY projects, you might want to check out:
- How to make farmhouse shiplap walls the easy way.
- How to add a shiplap accent wall in a bathroom.
- DIY shelves inspired by the Fixer Upper show.
- Ikea billy hack to make bookshelves look built in!


I love the barn door project! I looks beautiful. You are so creative!
I love your posts and projects Rita! Where did you get the hardware for the sliding barn door? I live in Parksville. Thanks!
What a great idea! It looks so good.