
Easy Microwave Vanilla Pudding from Scratch (Better than Boxed Mix!)
This super simple microwave pudding recipe is made from scratch with just a few ingredients—and no box mix! Easily customize it to make vanilla, chocolate, or butterscotch pudding. It’s a fast and comforting dessert that tastes so much better than store-bought.
Have you ever had real homemade pudding—not the boxed kind, but the old-fashioned kind made from scratch? My mom was a pro at whipping this up in no time, and it quickly became one of our family’s go-to comfort desserts.
Now, I find myself turning to this same recipe when I want something warm, simple, and satisfying. With just a handful of ingredients, it comes together quickly in the microwave and tastes so much better than anything you’d find in a box. Best of all, you can switch it up to make vanilla, chocolate, butterscotch, or even peanut butter pudding—whatever you’re craving!
Why You’ll Love This Recipe
- Made from scratch – Only simple, real ingredients—no mix needed.
- Microwave-friendly – Cooks quickly with minimal cleanup.
- Easy to customize – Make it vanilla, chocolate, butterscotch, or even peanut butter.
- Comfort food classic – Just like Grandma used to make.
- Perfect for any occasion – Serve it warm in parfait glasses or chilled with toppings.

Microwave vanilla pudding only takes a few simple ingredients:
See the full printable recipe card below for measurements and instructions.
- Milk (I use 2%)
- White sugar
- All-purpose flour
- Eggs (I buy large eggs, but any will do)
- Vanilla flavoring
- Optional add-ins – chocolate chips, peanut butter, or butterscotch chips

Homemade Microwave Vanilla Pudding
This simple 4 ingredient old fashioned vanilla pudding recipe can be made so quickly and easily in the microwave. It's a 5 minute dessert your family and friends will go wild for! Comfort food dessert at its best.
Ingredients
- 2 cups milk
- 1 cup sugar
- 2 eggs
- 1/3 cup flour
- 1 teaspoon vanilla
Instructions
- Place milk in a microwave safe bowl and heat in microwave for 2 minutes.
- While the milk is heating, mix together the sugar, flour, and eggs in another mixing bowl.
- When the microwave has finished heating the milk for the first 2 minutes, add in the sugar, flour, and egg mixture and whisk until completely combined. Place the bowl back in the microwave and heat in one minute intervals - stirring with the whisk in between.
- Once the pudding reaches the desired consistancy, add in a splash of vanilla and stir to combine.
- Serve hot or cold.
Notes
Variations for this homemade pudding in the microwave recipe.
This recipe is really fun and easy to adapt to a variety of flavours, too:
- To make chocolate pudding, use white sugar and add 1/3 cup cocoa to the mixture. OR, make vanilla pudding and stir in some chocolate chips when it is hot.
- For butterscotch pudding, use brown sugar instead of white sugar and add 1 tsp vanilla flavouring once cooked.
- For layered chocolate and vanilla pudding parfait desserts. Make a batch of vanilla pudding. Once cooked, divide the batch into 2 bowlfuls. In one bowl, add a handful of chocolate chips to the hot pudding. Stir quickly until melted. Then layer in parfaits ~ one layer chocolate, then one layer vanilla, etc… until full. They look very impressive!
- To make peanut butter pudding, (my brother’s favourite) add in a big spoonful of peanut butter to hot vanilla pudding.
Step by Step Instructions for homemade vanilla pudding in the microwave
The following is a brief overview of the process of this recipe. Refer to the printable recipe card for more detailed instructions.


Watch me Make This Recipe
Click the play button below to watch a quick video of how I make this recipe.
How to serve homemade vanilla pudding
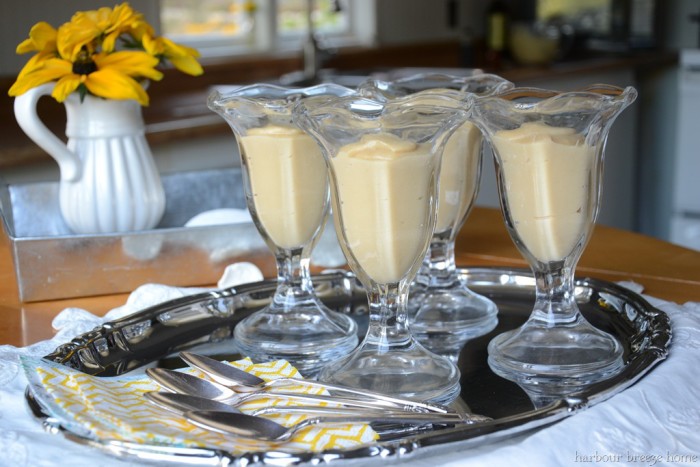
I love to scoop the hot pudding with an ice cream scoop into pretty parfait dishes and serve it hot.
However, it is just as delicious cold. If you want to serve it cold, cover the tops of the scooped out pudding parfaits with plastic wrap that is actually touching the pudding. That will prevent it from getting a “skin” on it.
Then, before serving, remove the plastic wrap and add toppings like whipped cream, chocolate chips, or fresh berries.

Grandma Rita’s Kitchen Tips
This pudding recipe was the first recipe I remember “helping” my mom with. Of course we didn’t have a microwave back then, so we made it on the stovetop. Here’s a key tip: If you do make this on the stovetop, stir constantly! If you let it sit for even a few seconds, it will stick to the bottom of the pan really quickly. My mom had a whisk with a flat bottom, which helped prevent it from sticking, too.

How to make this homemade pudding recipe on a stovetop
If you don’t have a microwave, no worries! I made this for years on the stovetop before my sister-in-law shared this microwave trick with me. Just remember, heat up the milk slightly first, then add in the pudding mixture. Stir constantly to prevent sticking on the bottom of the pot.
How to use homemade pudding in pies
These pudding varieties can also be used for pies. Just pour the pudding into a baked pie crust. Vanilla pudding over sliced bananas makes a divine banana cream pie.
More desserts recipes you may enjoy:
- Avocado chocolate pudding is a healthy option, and trust me – it’s yummy!
- This steamed pudding recipe can be made in a bundt pan!
- Here’s one of those banana cream pie recipes that uses homemade pudding. You can use this recipe for it if you’d like!
- My Grandma Bernice made this easy strawberry pie recipe that everyone LOVED!
- Moist Vanilla Cake Recipe with Fresh Strawberry Icing
- Need something quick? This caramel apple crisp with pie filling is quick and easy and so very yummy!
Pin to remember this later!

Has anyone tried making this recipe gluten free? By using a 1:1 gluten free flour almond flour or oat flour in place of the regular flour? Would love to hear any ideas or thoughts. Thanks!
Also very good if you add a can of pumpkin. Thanks for a great easy recipe!
I like, but needs some “tweaking”. Less sugar, flour, & egg. Also, at last timing, do at 30 seconds. As it sat became “rubbery”, not “creamy”. Otherwise good flavor.
I thank you for this recipe, as you made this pregnant woman’s midnight snack cravings turn from a mere dream to a delicious reality. I offer another blessing to you for advising how to make it a chocolate pudding. Eating this while reading a book in my quiet, darkened kitchen was blissful.