
How to Mount Photos on Foam Board
Learn the simple steps for photo mounting on foam board using spray adhesive.
Have you ever decided to start a project with great confidence…
…and then have things go sideways halfway through the process??
Such was the case when I decided to mount a large photo on a piece of foam board.
It was something I’ve done many times in the past ~ just on a smaller scale.
I decided that it would be fun to do this project on a Facebook live video (Since I felt so confident. Ahem…;)), so you can watch this slight disaster happen in real time. (Lucky you.;))
I’ll put the link to the video here, and then tell you the time stamp of each step on the video if you want to refer to it later. Hopefully my mistakes will help you not to make the same ones…
Mounting Photos using Foam Core Mounting Method
Disclosure: This post contains affiliate links to similar (or exact) products that I used for this project. If you click on one of the links and make a purchase, I will receive a small commission at no extra cost to you.

I confidently gathered all the supplies I needed for mounting photos on foam board:
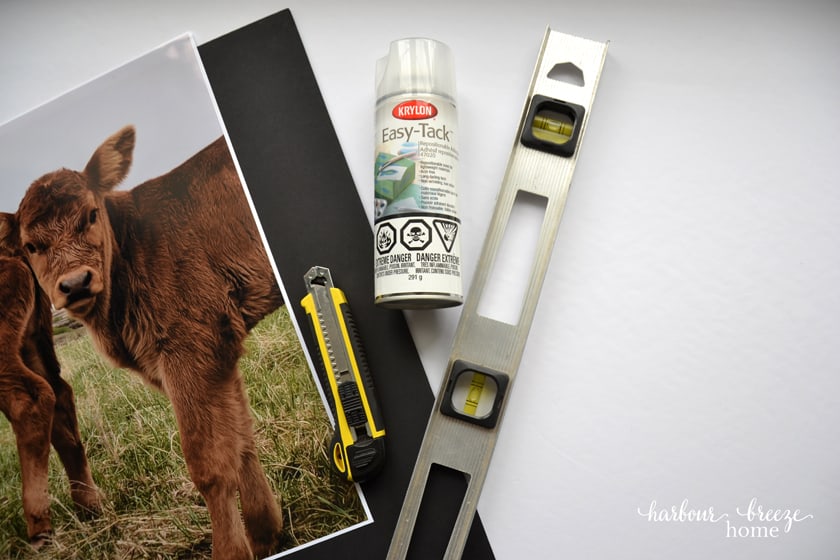
- Photo to be mounted (Mine was a digital print I had done at Staples in the size of 18 X 24 – in glossy finish)
- Black Foam Core board
- Drop clothes or towels to cover the surface you are working on
- Heavy Duty Art Knife
- Long metal ruler
- Paper brayer ~optional
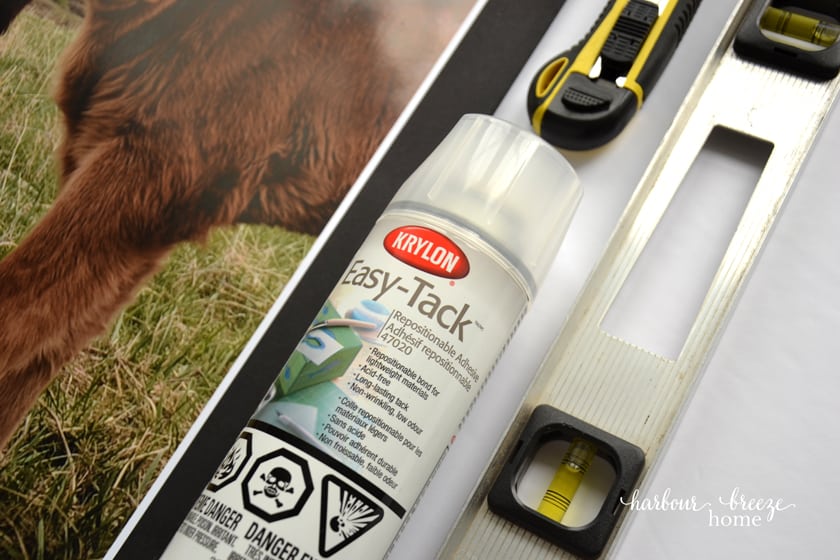
- Krylon Easy Tack Spray Adhesive
- Large Cutting Board
- Sawtooth Foam Hanger
Step by step instructions for mounting on foam board:
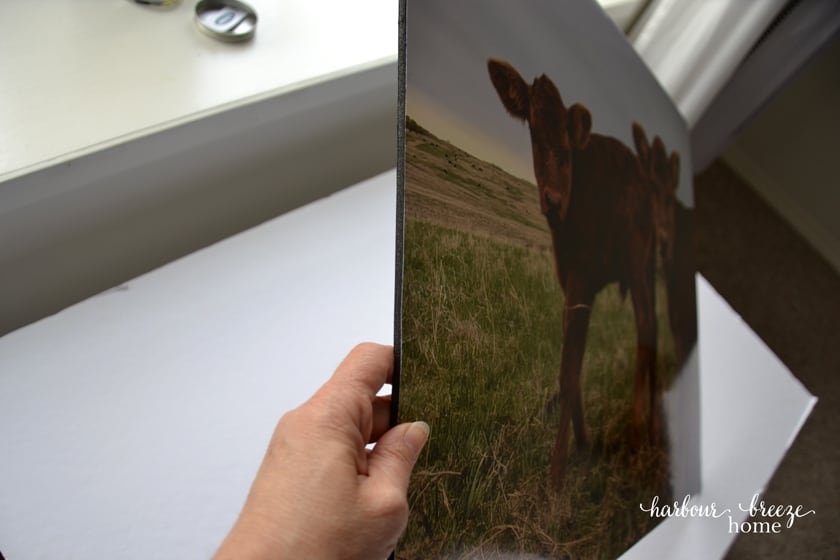
1.Using the straight edge and X-acto knife, I cut off the white edge of the print on the bottom and the left side.
Then, I started the live video. ..
2. After covering our table up with old towels, I sprayed the foam core board with the adhesive, carefully laid down the print, and flattened it out well. (Time stamp: 4:44)
All was going well until it was time to trim the foam board…
3. I held the straight edge down firmly with one hand, and ran the Xacto knife down the foam board to cut off the excess. (Time stamp: 6:35)
This, my friends, is where the project started to go sideways in front of everyone…
My knife was not cutting the board as it should have.
Instead of a nice, neat cut, it seemed to be “tearing” the board apart.
I kept going and finished the project on video, but I learned 3 very important lessons regarding this step:
- Use a long metal ruler that is totally flat. Mine was metal, but it was actually a level, so it sat up off the surface in the middle. It felt as if I didn’t have good control when trying to hold it down. And, it was very hard to keep the knife right up to the edge of it.
- The heavy duty knife MUST be sharp! Although I thought it was, it wasn’t! When I finally broke it off and got a sharp edge, the foam board cut the way it should have.
- As you cut the foam board, press firmly, knowing you probably won’t cut through the full thickness of the board the first time. Keep cutting repeatedly until you are all the way through.
Once I trimmed the foam board with a sharp knife, the edges were smooth and straight.
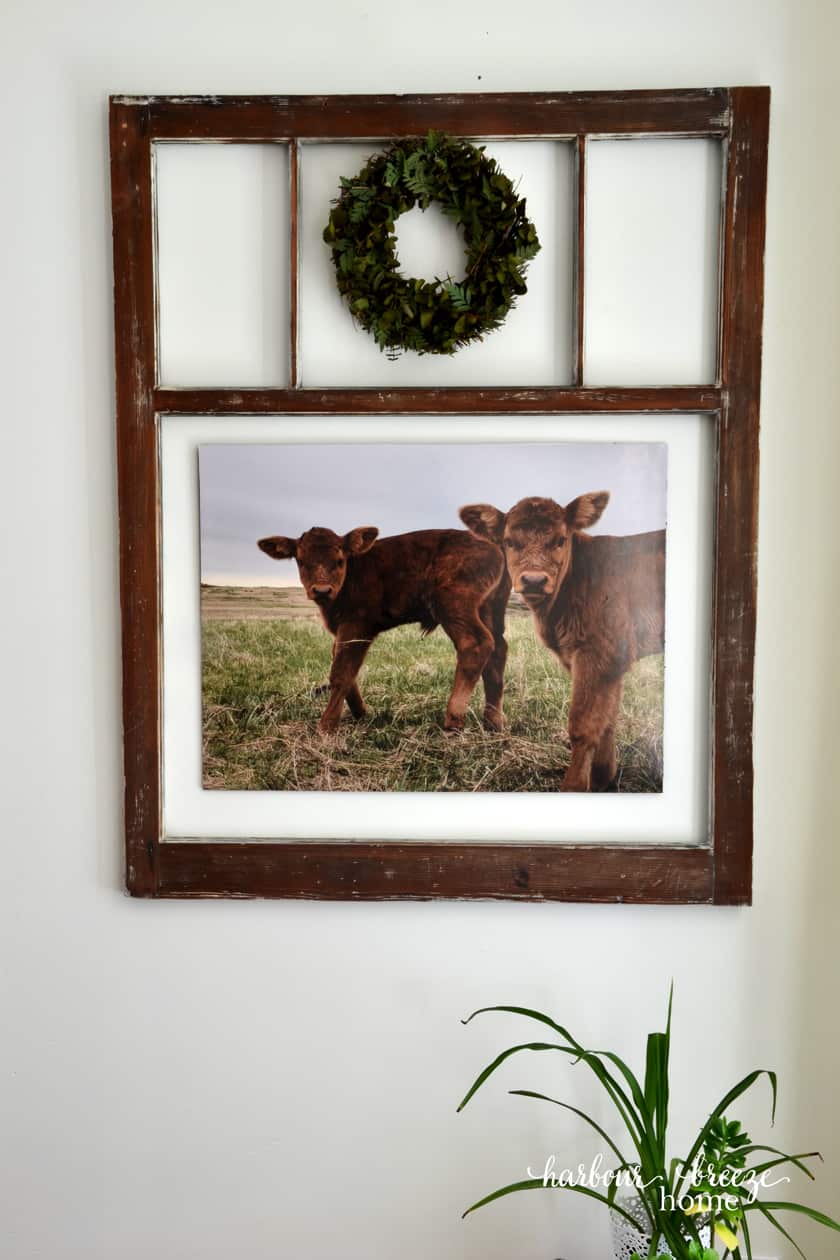
Foam board comes in both black and white. I thought black would make a nice finish for this project, but white works well, too.
How to hang a photo that has been mounted on foam board.
To hang your foam board print on the wall, inset a sawtooth foam hanger (like this) to the back of the board and hang on a nail.
This method of hanging art is a super budget friendly way to fill those big empty wall spaces in your home.
Other ideas:
- Hang a gallery wall of printables ~ like one of these sets of botanical prints
- Use an old antique window as a frame for mounted prints.
- Mount photos on foam board, stick adhesive velcro on the back and attach to fabric display boards for a trade show.
- Use this budget friendly method to hang a poster or art for a college dorm student
For more recipes, crafts & ideas for your home all year round, become a VIP!
Become a VIP newsletter subscriber and get instant access to the library of free printables (including wall art, gift tags, and more!). Click here or the button below to join today.

This is SO smart, and a wonderful tutorial. I saw your IG stories on this, and I laughed out loud! You are so fun to watch!
What a great idea! So simple and I love how it looks on the wall!
This is great! Do you have suggestions on how to protect the photo? I’m thinking of things that don’t involve glass or frames. Maybe some sort of spray to coat the photo that will keep it from damage from dust and whatnot?
Well-done and useful article. Just what I was looking for.
Many thanks.