How to Live with Open Kitchen Cupboards
Soon after I posted the $159 Kitchen Makeover Reveal, I got a sweet message from Cassity at Remodelaholic asking if I would like to do a guest post on her site. “Of course!”, I answered…
She posted it this morning. You can read it here.
***
I’ve received some really good questions about the kitchen makeover. Many revolved around the practical aspects of how I live with open cupboards. I’ve never asked anyone else with open cupboards how they do it…so I’ll just tell you how the process started and how it works for me!
Here we go…
1. Study inspirational photos ~ Years ago I started collecting ideas for my “dream kitchen”. It isn’t in any organized folder or anything (it was before the Pinterest era!). Rather, it’s magazines with dog-ears and post-it notes! When I sat down to analyze what I liked about them, there was a common theme. Every. Single. One. Had open cupboards. I loved the look of them – casual, yet neat and orderly.
2. Whip open your cupboard doors! ~ I opened all the cupboard doors, stood back, and took a loooooonnng look.
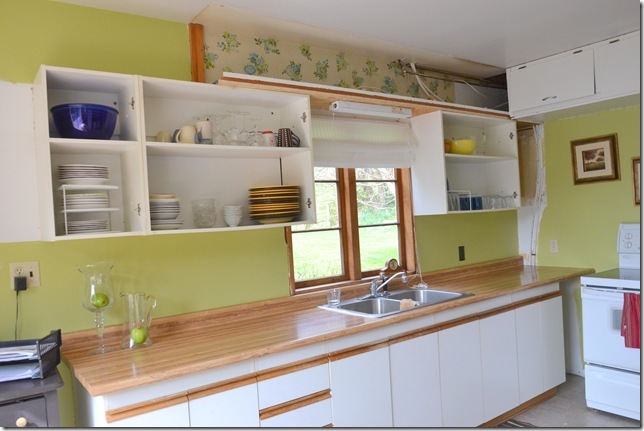
Before I did anything, I planned out where I could put what. Your questions were spot on, ladies! Open cupboards don’t have any canned goods or baking supplies showing (in their from-the-grocery store state…).
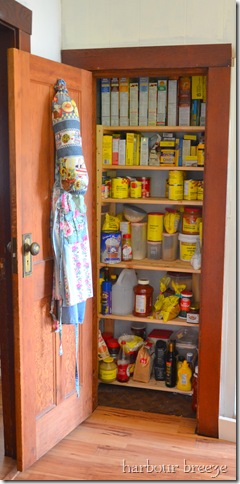
3. Relocate pantry items to a space other than your open cupboards. ~ One of the first things we did when we moved into this house was to convert a closet into a pantry.
Right through that doorway and two steps ahead is this closet converted to a “pantry”. (Pardon the half-painted wall. I’ve just started working on my living room!)
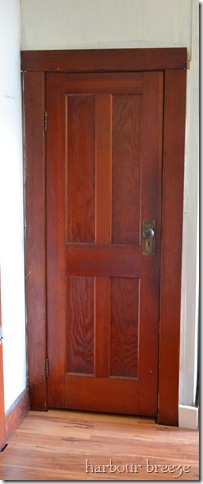
We removed the shelving and put in a cheap storage unit. Although a new house would never have a “pantry” located in the (sort-of) living room area… you have to think outside the box in these old houses! I’ll be honest here. Although in a bit unconventional area, it works fantastic!
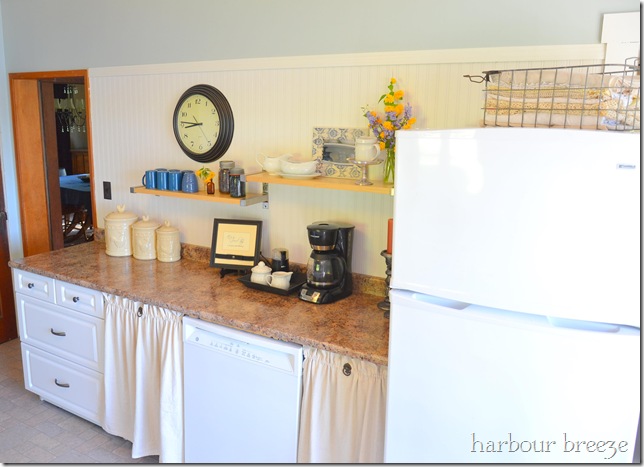
This lower cupboard unit is my “baking prep” area. It holds a lot of my often-used baking supplies.
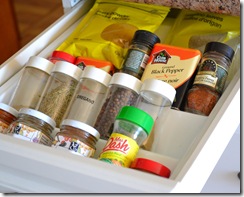
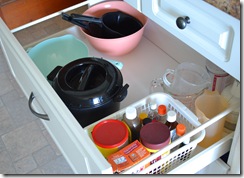
The canisters on top hold flour, sugar, and brown sugar. The Ikea drawer insert is a wonderful spice storage (although I don’t have it all organized in there yet…); the middle “pot drawer” holds measuring cups, cocoa, etc.; the lower pot drawer is my “tupperware” type storage area.
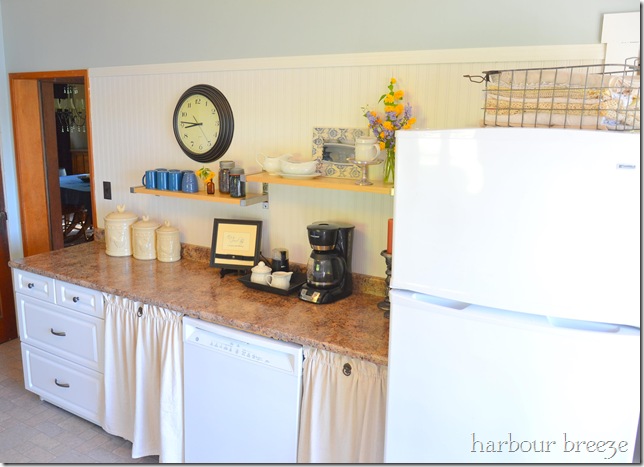
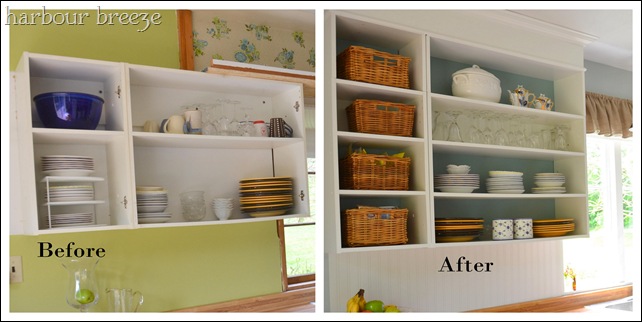
4. Arrange your “pretty” kitchen items in your open shelf space. ~ Our upper cupboard remodel involved lowering the cupboards, adding in an extra shelf, converting the top of the original cupboard into an additional shelf, and making the crown moulding feature go right to the ceiling. However, if you have good looking cupboards already, you might just simply need to remove the doors! Easy Peasy…
The end result meant I had more upper cupboard space than I’ve ever had! I was able to take some items –like my long-stemmed glassware and my Great Grandmother’s tea set – out of my overcrowded dining room buffet, and put it in a more convenient location…and be able to see it and enjoy it more.
4. Coral unsightly, yet practical items in baskets. The fact that those 4 shelves fit Ikea’s square baskets was a complete fluke! (I love it when that happens…) One is filled with spice packages and the other is filled with an assortment of teas. (I confess…two are still empty. But they look great!)
5. Dust the same as you did when you had cupboards with doors. People often worry that having open cupboards will somehow be more dusty. Honestly, I don’t think they get any more dusty than they did with doors. Cupboards with doors need to be cleaned out from time to time, too! The fact is, many of these items are used on a continual, daily basis. They don’t sit around long enough to collect dust…
I hope that helps you if you are considering going the open cupboard route. We love it around here. Even my husband and boys. No, things don’t always end up in exactly the same spot. But that’s o.k. It’s part of the charm!:)
Linking up to: Stories from a to z, The Lettered Cottage, Chic on a Shoestring


I had to stop by when I saw you on Remodelaholic! I wanted to tell you what an awesome job I think you did. Especially in reusing a lot of what you had already.
Open shelving does force you to keep thing organized!
Like Bonnie, I read your guest post on Remodelaholic…BEAUTIFUL kitchen! I'm so inspired with your budget and what all you were able to accomplish. It looks great. I HAVE to get some of that beadboard wallpaper… was that from Lowe's/HomeDepot type store?
Really like what you did!
Tara
I really do love your open cabinets! And oddly enough when I look back at all my "dream" kitchen pictures they all involved both white cabinets and open shelving. So I guess it is time I bit the bullet and start rethinking our kitchen organization. Well once we actually move things into the now FINISHED addition! Thank you for answering all the questions we asked!!
Have a wonderful week! Oh I LOVE the blue in your living room and in the back of your shelves. Very refreshing!
Tara, I bought my beadboard wallpaper (the "Wall Doctor" brand) at Canadian Tire . It is a store similar to Home Depot and Lowe's. Home Depot (here in Canada) carries the Martha Stewart line that my friend highly recommended as well. HOWEVER, it is NOT prepasted! I didn't want to go through all that…:)
I absolutely love your makeover! We have a VERY VERY similar kitchen and I would love to change it. Unfortunately we are renting but maybe if our landlady sees images of your lovely kitchen, she may let us change it 🙂
Oh thank you for getting back to me! I will see what I can find online and at the stores here. If Canadian Tire has a website, maybe I will get it from them.
Again, your kitchen looks wonderful!!!
Tara
Awesome kitchen re-do! I do love the open shelving. What is the name of the blue that's painted on the inside?
Rebecca
Rebecca, the paint inside the cupboards is Benjamin Moore's Blue Stratton (or Stratton Blue!).
Hi. Came across you via Remodelaholic. I actually am interested in what your original pear green paint color was!
Hi Jen…Yes the green color. It is Dill Pickle #2147-40 by Benjamin Moore. I loved it! It is a very happy color. I think it has an unfortunate name, though. I would have called it Granny Smith!:)
Fantastic tips and your kitchen looks amazing!
Thanks so much for responding. I will def have to pick up a swatch of that. Your kitchen looks great, btw.
What a beautiful difference in the before & after photos! Great job.
Warmly, Michelle