
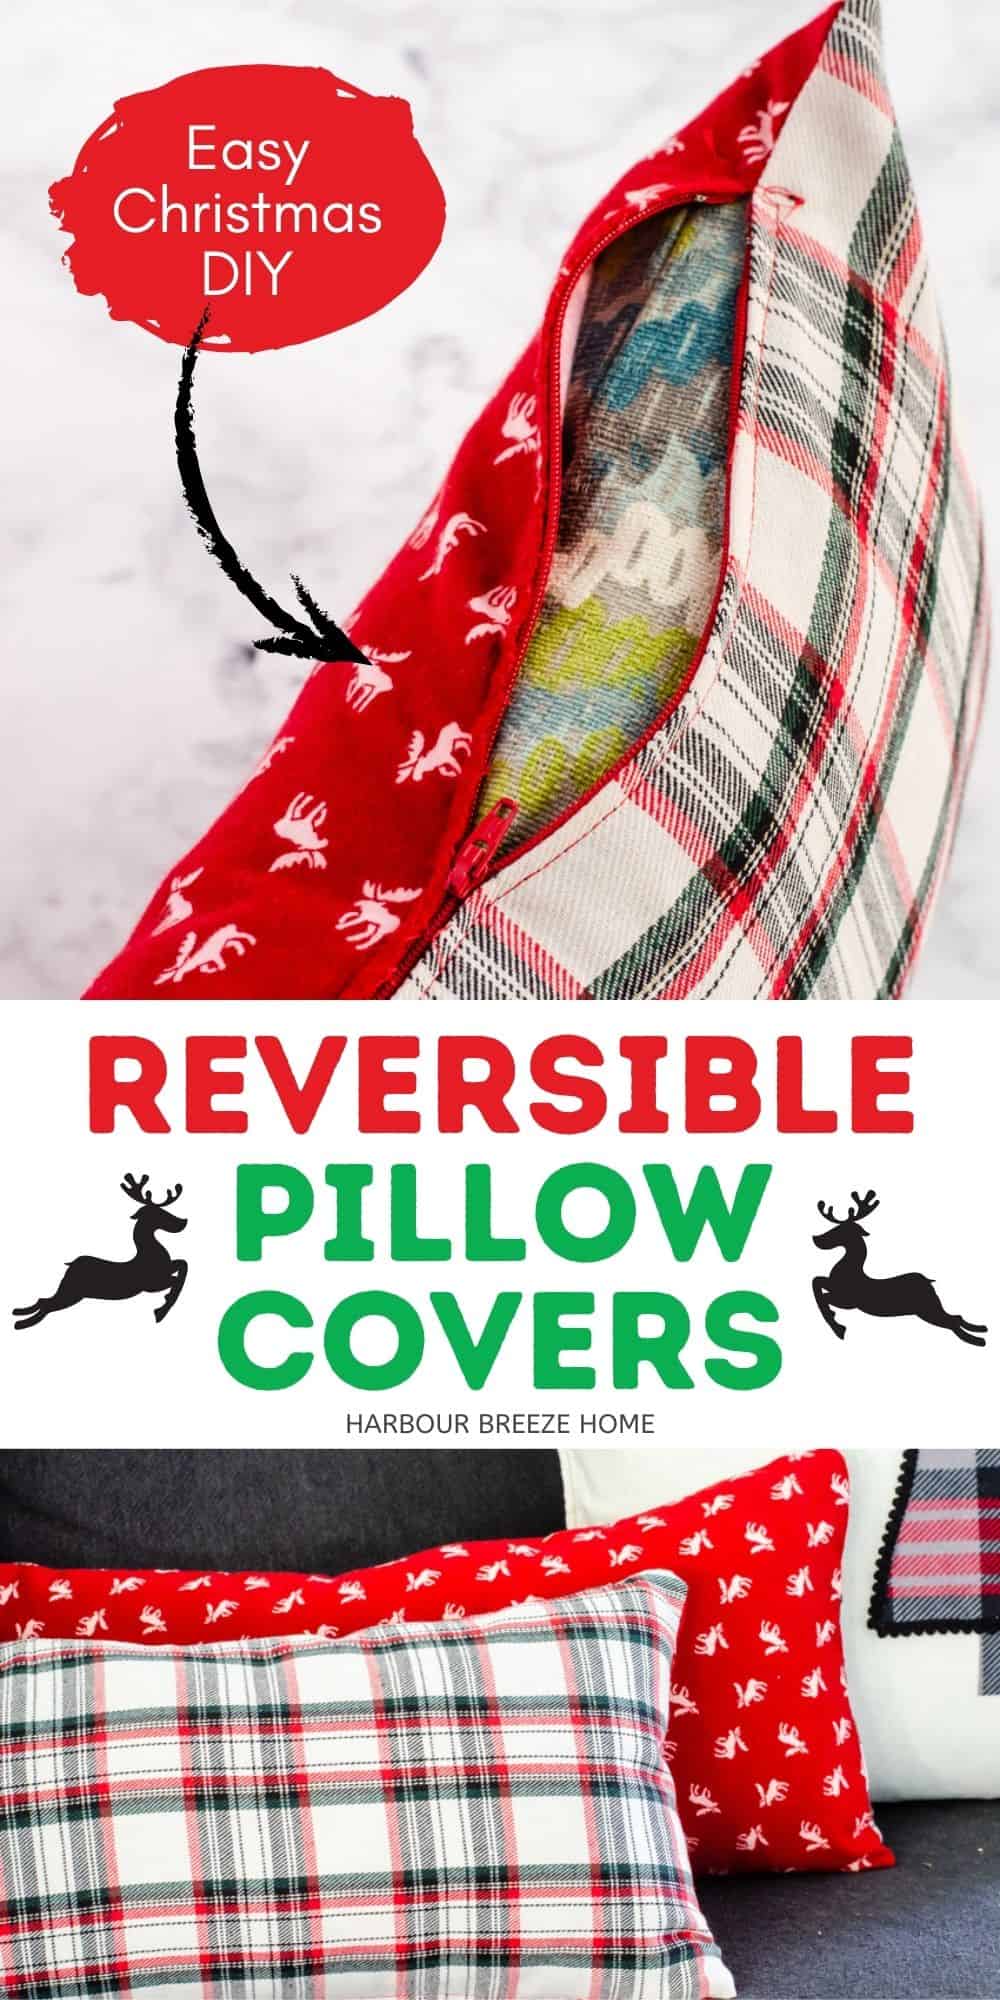
Easy Reversible DIY Accent Pillow Covers Perfect for Christmas
Learn how to make reversible DIY accent pillow covers for Christmas (or any occasion!) with this easy sewing project.
Earlier this year, a local fabric store was going out of business.
As the sale prices got better and better, my car seemed to veer in that direction more and more often!;)
I had Christmas decorating on my mind (even though it was Summer!), and picked up some Christmasy flannel fabrics.
I finally dug them out of the closet the other day.
In no time at all, they became fun reversible DIY accent pillows for our Living Room Christmas decor.
How to Make Reversible Accent Pillow Covers
Disclosure: This post contains affiliate links for your shopping convenience.
Supplies Needed:
- Fabric of your choice (Here is a great selection of cotton plaid fabrics perfect for Christmas! However, check to see if they are the size you’ll need.)
- Zipper a few inches shorter than the finished width of your pillow in a matching color. (Mine was an 18 inch closed end zipper.)
- Sewing machine
- Scissors
- Seam Ripper
- Iron
Cut 2 fabric pieces to fit the pillow you will be covering, in 2 different coordinating fabric designs.
To calculate what size to cut your fabric, measure your pillow form and add 1/2 inch to each side, top and bottom. For instance, if you are working with a 20 inch square pillow form, the fabric would be cut at 21 inches square (figuring in a half inch seam allowance on all seams).
I have found that a self healing cutting mat and rotary cutter speeds up the cutting process and accuracy immensely! If, however, you don’t have one, you can always just use tape measures, rulers, a carpenter’s square – or whatever will help you get even and accurate cut lines.
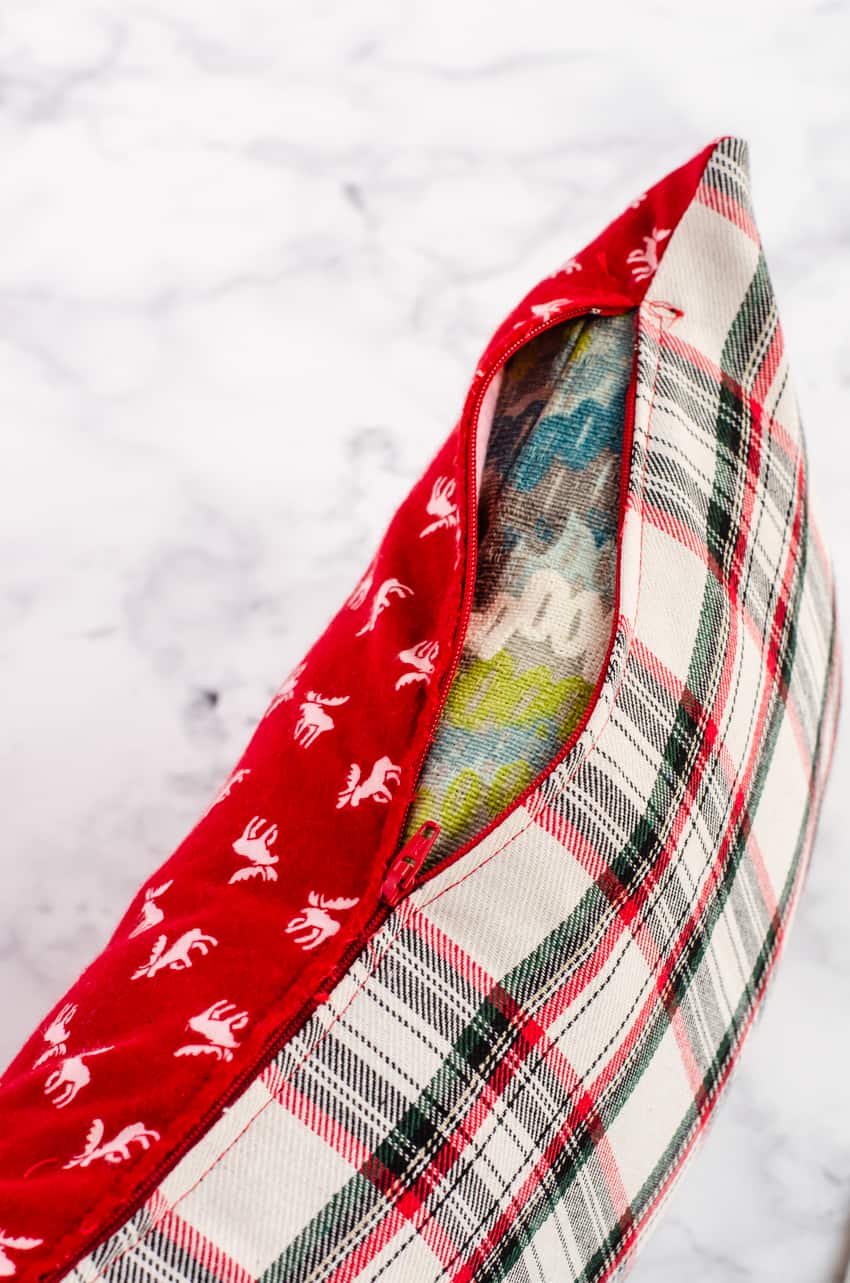
With right sides together, sew a 1/2 inch seam on the bottom of the pillow cover. Press the seam open with an iron.
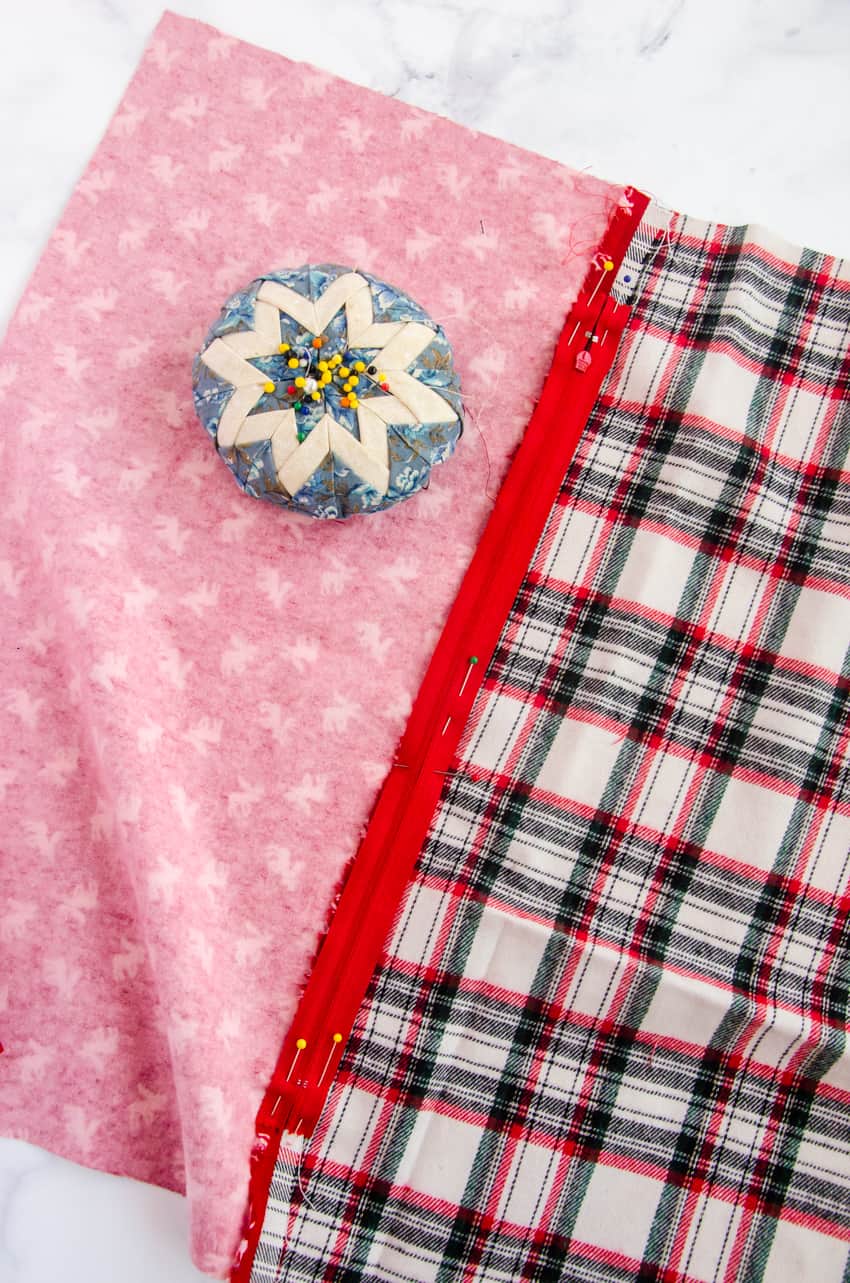
Lay the zipper face down on the seam you just ironed opened and pin in the center of the seam line, so the zipper teeth are directly on top of the seam.
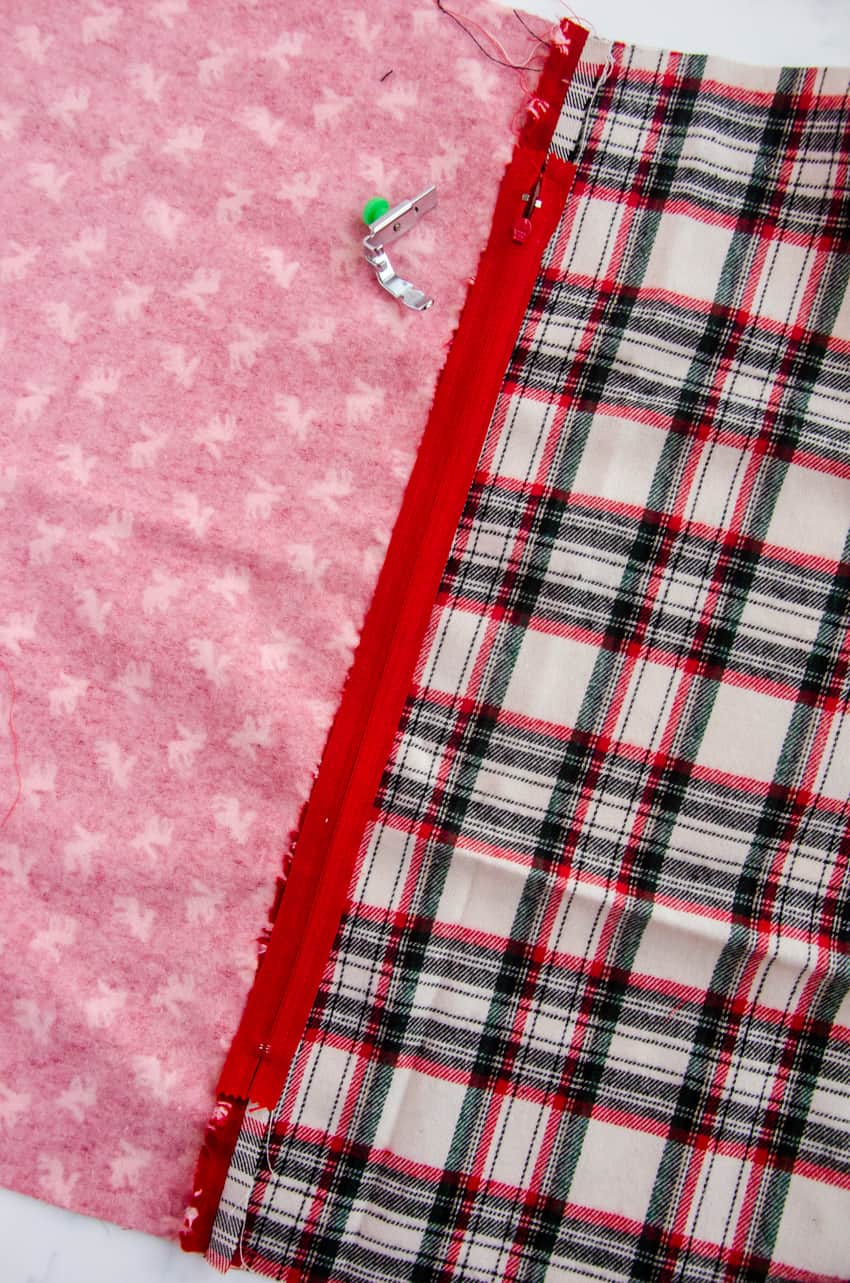
Switch your sewing machine foot to the zipper foot and sew around all edges of the zipper.
(For another illustration of this process, you may want to check out the tutorial I wrote for the faux leather pillow cover.)
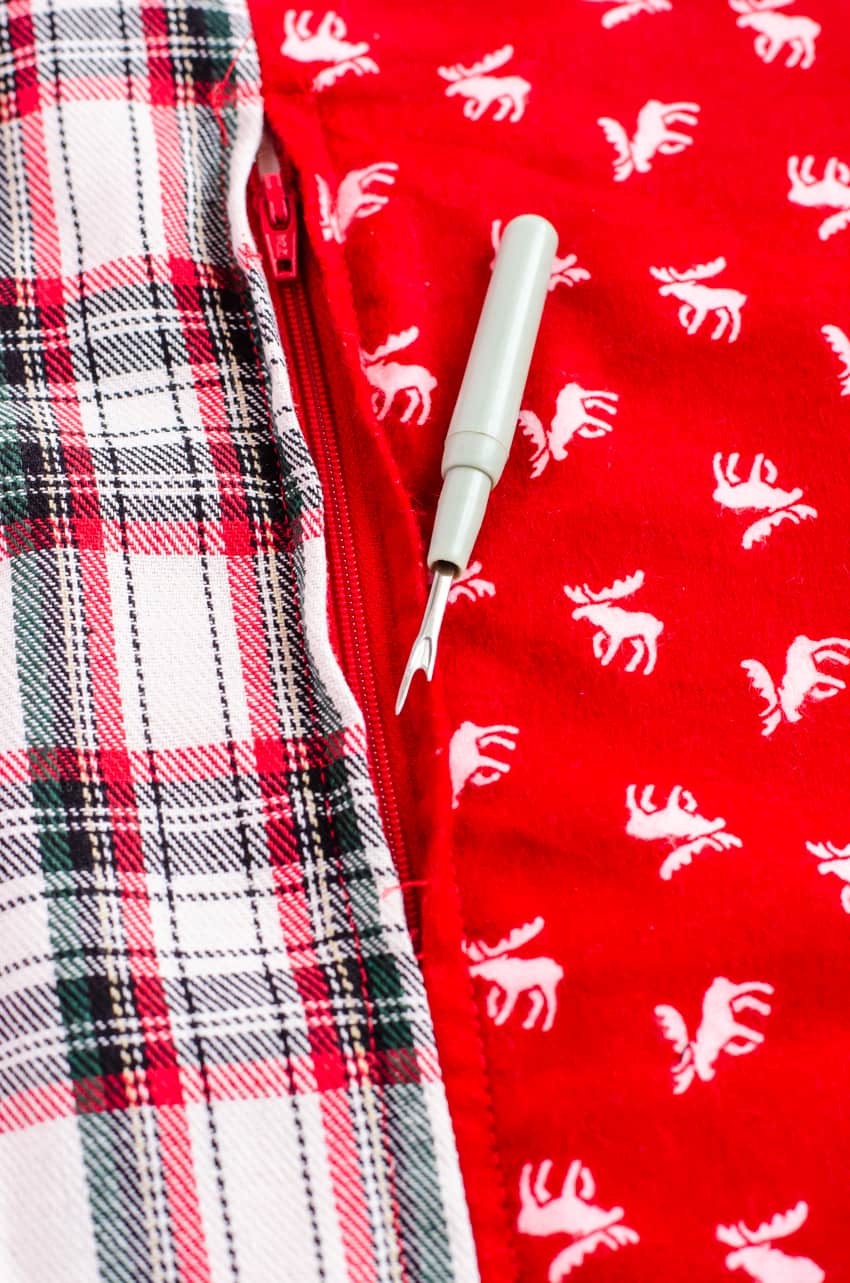
On the right side of the pillow, gently pull apart the seam where the zipper is underneath, and using a seam ripper, pull apart the seam.
This is my favorite part. Right before your very eyes, a beautiful zipper will appear!;)
Open the zipper up, and with right sides together, sew up the remaining 3 sides using a 1/2 inch seam.
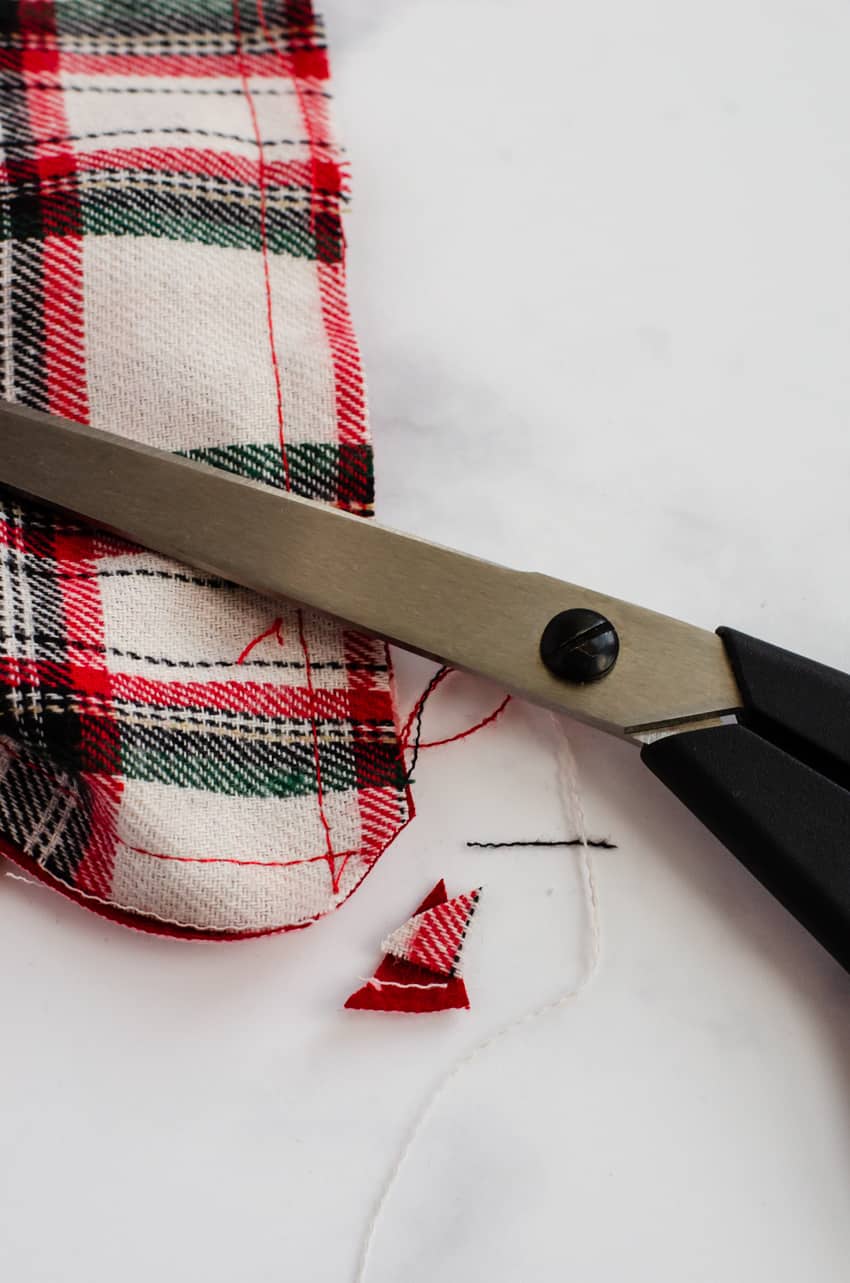
Clip the corners of the pillow (being careful not to cut into the seam), and turn the pillow right side out.
Place the pillow form in the pillow cover and zip shut.
Ta Da! You did it!
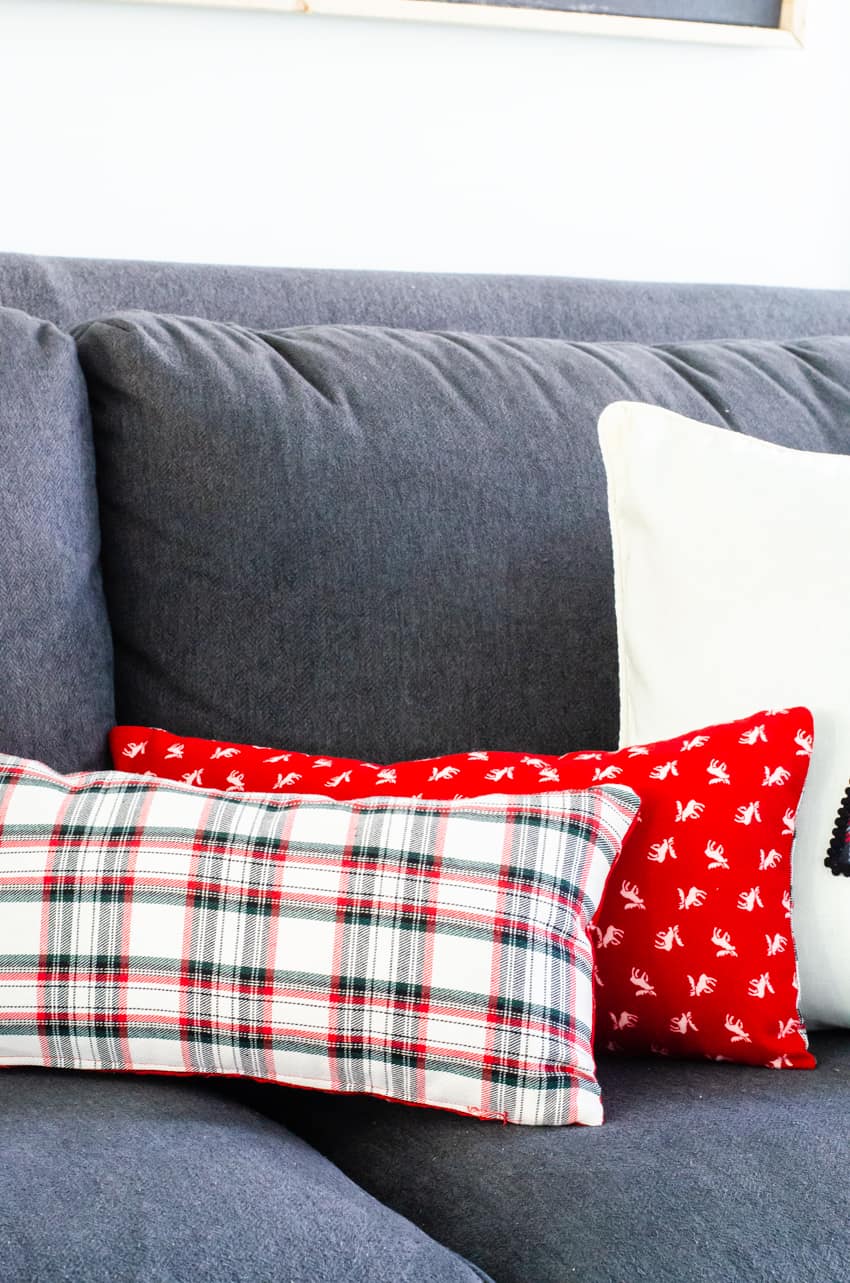
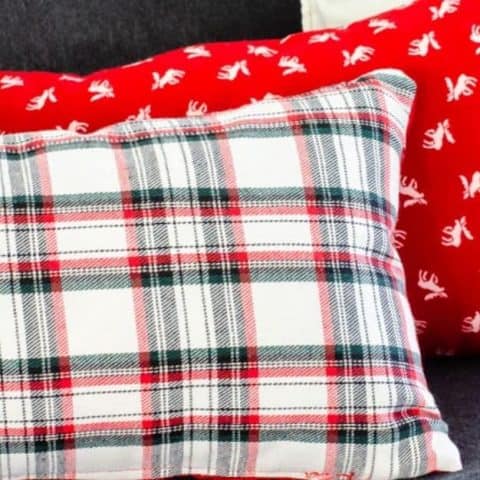
Now you can turn your accent pillows to whichever side you want to show.
I made ours to be a neutral plaid – perfect for all winter long – on one side, and red with moose (for Christmas) on the other side.
For other DIY Accent Pillow projects, you may want to check out:
- 7 DIY Pillows You Can Make for Your Home
- How to Make Spring Throw Pillows in Under 10 Minutes Using Free Printables
- How To Make a DIY Striped Pillow Quick!
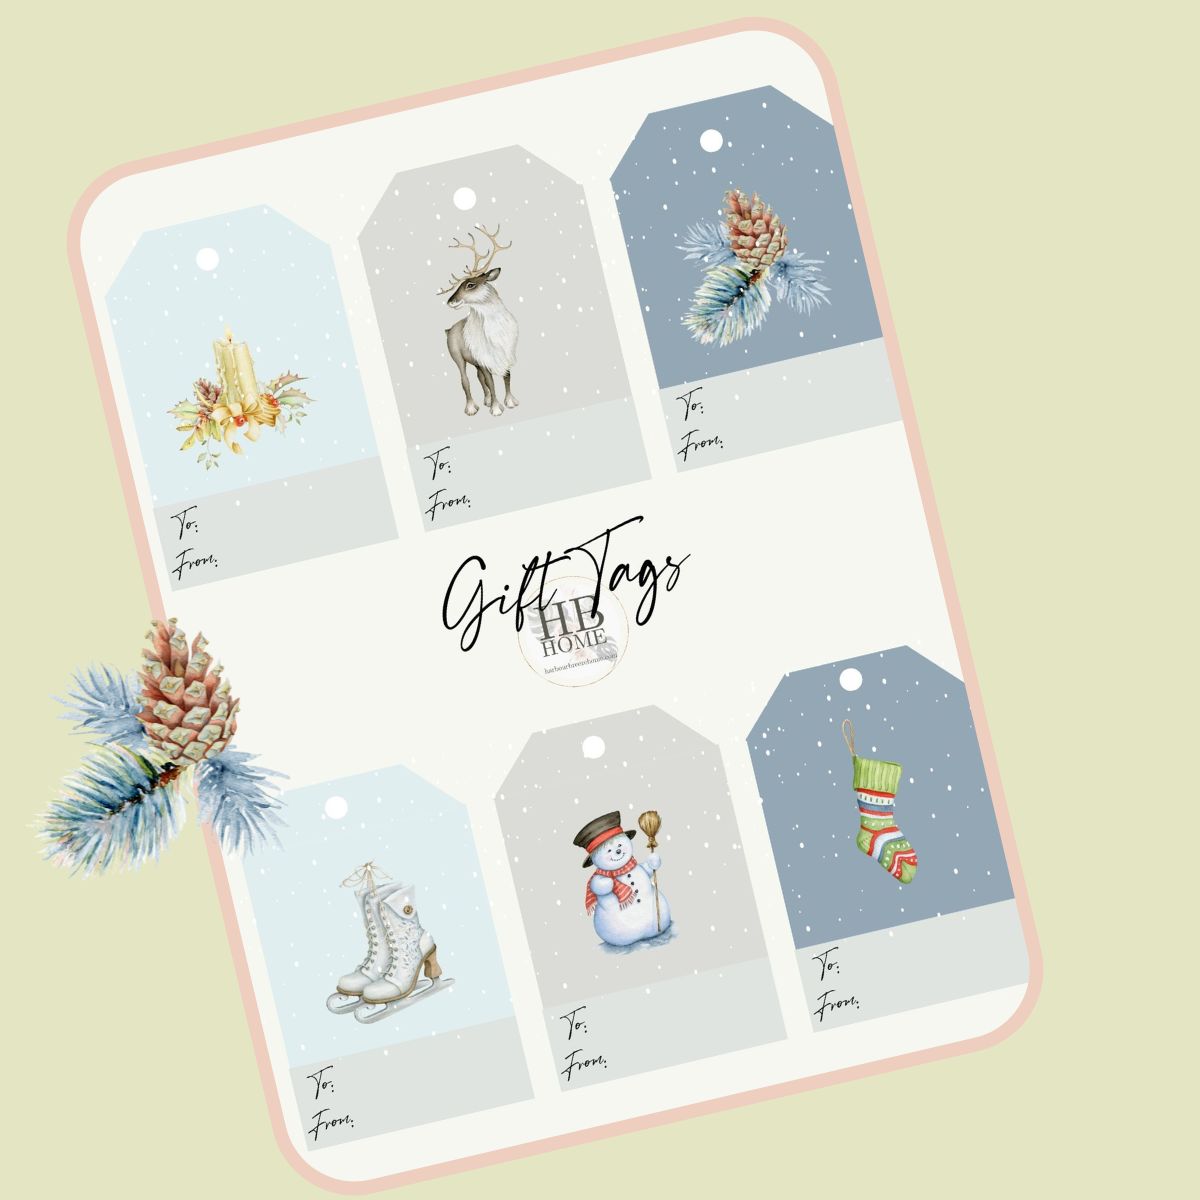
Get some FREE printable Christmas Gift Tags!
Become a VIP newsletter subscriber and get instant access to the entire library of free printables – including these Christmas gift tags. Click the button below to join today.

How to Make Reversible DIY Accent Pillow Covers
Learn how to make reversible DIY accent pillow covers for Christmas (or any occasion!) with this easy sewing project.
Ingredients
- Fabric of your choice
- Zipper a few inches shorter than the finished width of your pillow in a matching color., Mine was an 18 inch closed end zipper.
- Sewing machine
- Scissors
- Seam Ripper
- Iron
Instructions
- Cut 2 fabric pieces to fit the pillow you will be covering, in 2 different co-ordinating fabric designs
- To calculate what size to cut your fabric, measure your pillow form and add 1/2 inch to each side, top and bottom. For instance, if you are working with a 20 inch square pillow form, the fabric would be cut at 21 inches square (figuring in a half inch seam allowance on all seams).
- I have found that a self healing cutting mat and rotary cutter speeds up the cutting process and accuracy immensely! If, however, you don’t have one, you can always just use tape measures, rulers, a carpenter’s square – or whatever will help you get even and accurate cut lines.
With right sides together, sew a 1/2 inch seam on the bottom of the pillow cover. Press the seam open with an iron.Lay the zipper face down on the seam you just ironed opened and pin in the center of the seam line, so the zipper teeth are directly on top of the seam.Switch your sewing machine foot to the zipper foot and sew around all edges of the zipper.On the right side of the pillow, gently pull apart the seam where the zipper is underneath, and using a seam ripper, pull apart the seam.Open the zipper up, and with right sides together, sew up the remaining 3 sides using a 1/2 inch seam.Clip the corners of the pillow (being careful not to cut into the seam), and turn the pillow right side out.Place the pillow form in the pillow cover and zip shut.
Nutrition Information:
Yield: 1 Serving Size: 1 gramsAmount Per Serving: Unsaturated Fat: 0g


Love the step by step tutorial and how nice your finished pillows look! Thank you for sharing. 😊
Thanks for the great instructions. I always need the visuals and you did a super job of making everything clear. Your pillows look so cute! Have a wonderful weekend…God bless you and hubby. 💕