
How to Paint Barker Board
Sometimes barker board (also known as tile board or fake tile in a bathroom) can date the look of the room. Read about the simple steps of how to paint barker board to completely change the look of a space.
I just finished the very first project of our bathroom renovation. (Yippee!!)
The last time I gave you an update, I was diving headfirst into this – painting fake tile board that was above the bathtub.

How to paint Barker Board (or Fake Tile) in a Bathroom
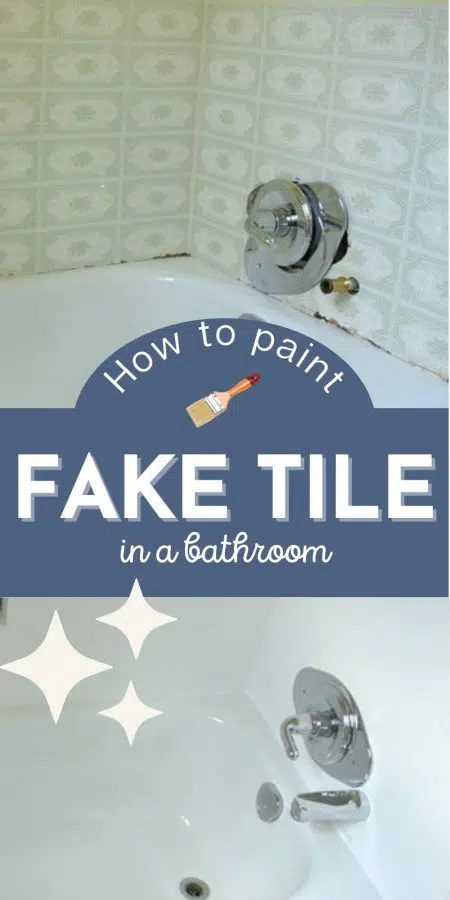
What is barker board (fake tile boards)?
I was on a mission to do something about the look of the “tile” above the tub. Although it appears to be tile (from the 70s’ era?) it is actually a product called barker board. It is sometimes called tile board and can be purchased here in Canada at Lowe’s and Home Depot. In contrast to my lovely harvest gold and green accents, it now it comes in a pretty white color. It’s meant to be used in bathrooms as an alternative to tile and grout and I do think it’s a pretty neat product.
I’ve found that it functions quite well and cleans up really nicely. I was just weary of the dated look. A painter friend of mine once said that anything can be painted if the right paint is used, so I decided to give that theory a try here.
**Important Note: I would NOT recommend painting barker or tile board in a situation such as a bathtub with a shower. I’m not certain the paint would stand up to the constant exposure to a direct stream of water. This application is only on a tub surround with no shower.
What kind of paint do you use to paint fake tile in a bathroom?
I headed to my local General Paint store and inquired about the paint system that was recommended for this {slightly strange} situation. The kind gentleman recommended this:

Zinssser Primer All-Surface Bond Coat (works well on smooth, slick surfaces) and Monamel in pure white. I also purchased a small foam roller for application.
How to paint barker board:
Step 1: To begin the process, I cut out all the old and very thick caulking, and removed/ loosened the fixtures.

I was too scared I wouldn’t be able to figure out how to get that big ol tap thing on correctly if I removed it completely, so I just loosened the very long screws and pulled it away from the wall.
Step 2: To prep the surface, I cleaned it really good, and roughed it up slightly with sandpaper. As with most painting projects, the prep work is very important in order to get good adhesion of the paint. Do not skip this step.
Step 3: I also taped around the edges of the tub with painter’s tape.
Step 4: Apply primer.

The primer painted like a dream and dried very quickly. After the first coat, I painted another coat of primer to see if it would cover a little more of the avocado green. (It didn’t do much more in the coverage department.)
Step 5: Apply top coat paint color in thin layers.

I quickly realized that that 70s’ look wasn’t going to be erased quickly. I also read the can and discovered that at least 24 hours dry time is needed between coats.
Uggh…
But patience paid off in the end.
(Over) 7 days and 7 (thin) coats later, here it is!

I’m thrilled with the fresh, new look it already has.
More Tips on painting fake tile & plastic tile board:

- I really liked the paint I used. Both were water clean-up (which is a huge plus for me!). Note that it is really smelly stuff, though.
- Paint thin coats rather than thick ones to avoid gloppy runs and drips.
- I sanded very lightly between some of the coats of paint.
- If you use painters’ tape around the tub, run an x-acto knife around it before you try to remove it. You don’t want to rip off the paint with the tape!
- The painting process itself goes quite quickly, but drying times make it a multiple day project.
- Get a carpenter friend of yours to come over and caulk it beautifully. It is the perfect finishing touch!

More before and after bathroom renovations:
- You can see this completed bathroom makeover reveal here.
- Beautiful powder room inspirations
- Small bathroom storage ideas for the farmhouse style

Great tips on painting the barker board! I love how you broke down each step clearly. I can’t wait to try it out in my own home. Thanks for sharing your expertise!
Awesome guide on how to paint Barker board! Thanks for sharing such a clear method, I’ll definitely use this for my next project.