
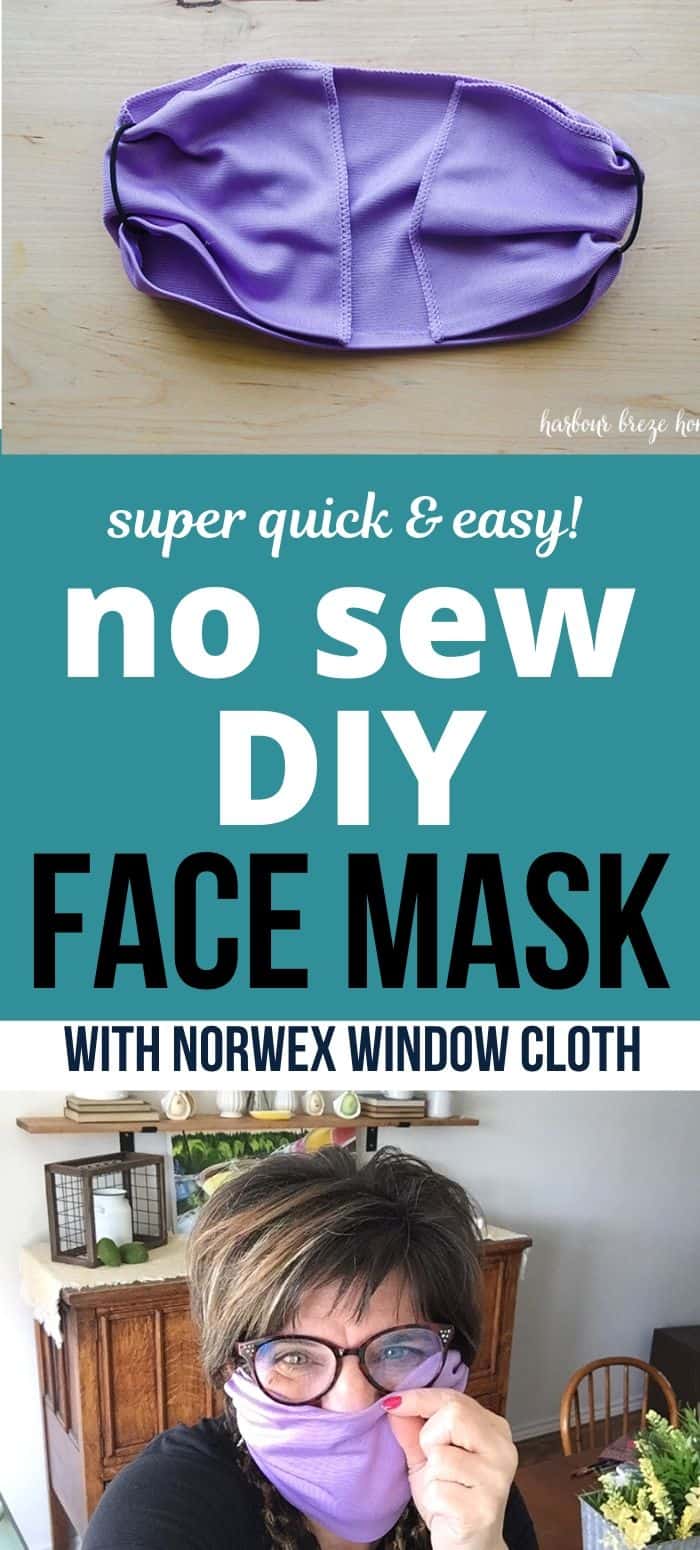
DIY Single Layer No Sew Norwex Face Masks
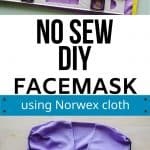
Make 3 or 4 super quick and easy DIY single layer no sew Norwex face masks with the Norwex Window Cloth following these simple steps.
A few days ago I read that the CDC recommends wearing face masks when going to public places. They even give recommendations for homemade cloth face coverings.
I discovered a how to make a DIY Norwex Cloth face mask and wrote a tutorial on it.
The dense fabric window cloth is what Norwex is using as they’ve begun production of personal facemasks. Testing shows that it filters 60% of .4 micron particles or larger.
(**Norwex’s personal use face masks are expected to be ready for purchase in May sometime. Supplies will be very limited. If you would like to be on an email list to be informed of the Norwex facemask availability as soon as news is out, click here.)
Although it’s possible to fold the window cloth to make one mask, the end result is very thick and warm. I’ve since experimented and discovered how to make 3 or 4 single fabric layer face masks out of 1 Norwex window cloth! No sewing necessary…
*Because the window cloth fabric is so dense, it is recommended to use a single layer of fabric for this type of mask.
How to Make DIY Single Layer No Sew Facemasks using a Norwex Window Cloth
Disclosure: I am a Norwex independent consultant. This post also contains affiliate links for your shopping convenience.
Here is a video tutorial of the DIY Norwex Face Masks, or you can read the instructions below.
Previous to step one is to purchase a Norwex window cloth – or use an extra one that you may already have on hand. If you’re Canadian and would like to place an order for a Norwex window cloth, click here.
Currently, these window cloth colors and patterns are available:
- 705011 – Wave pattern
- 1807- Pink
- 1914- Plum
- 1518- Purple
(At this point, I am only allowed to sell to Canadian customers.)
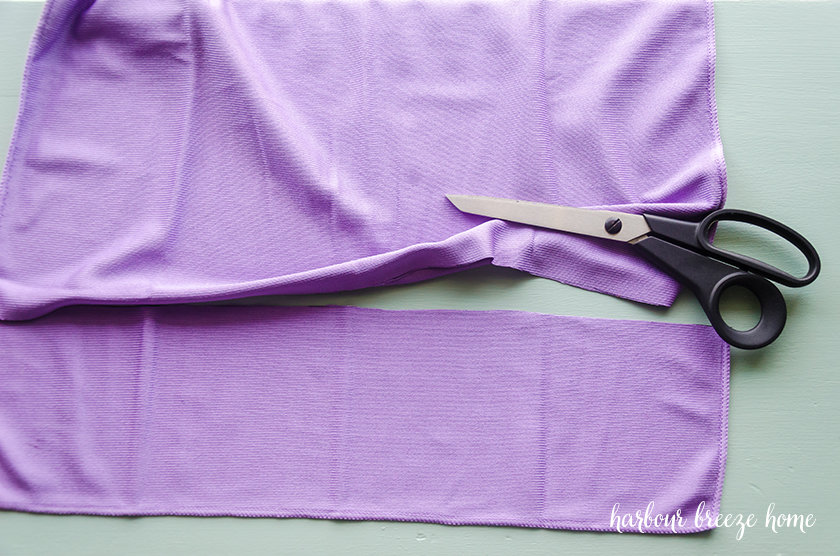
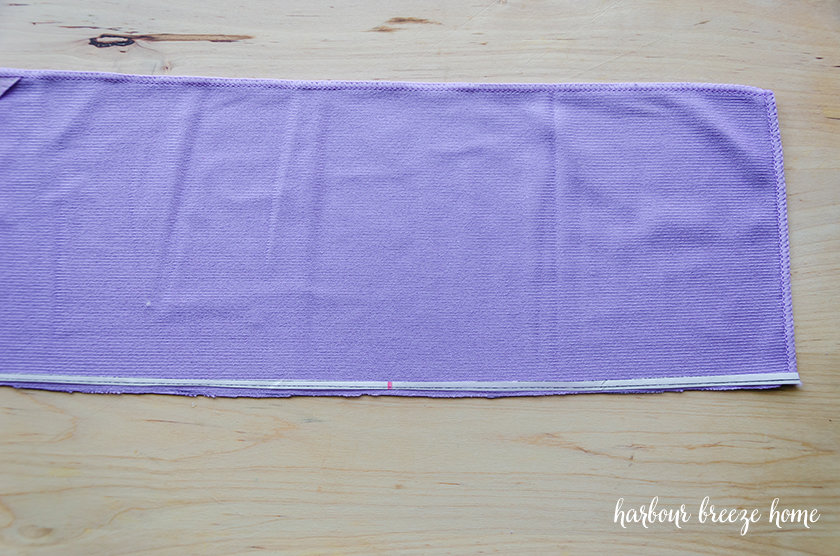
Step one: Cut the window cloth into desired width of strips.
To make 4 face masks, the strips should be 4.5 inches wide. To cut it into 3 face masks, they will be 5.5 inches wide.
Use a straight edge ruler and marker to mark your cut lines and cut with a sharp pair of fabric scissors.
I made one of each – a 4.5 inch one for myself and a 5.5 inch one for my husband. The additional 3rd one is a wider than 5.5 inches.
Step 2: Finish off the cut edge/ edges so the fabric does not fray.
There are a few different no sew methods to hemming fabric to prevent fraying. They include:
- Use adhesive for fabric like Fabric Fusion , Liquid Stitch, or No Sew and folding the edge over to form a hem.
- Using a glue gun. (I tried this method as shown in the video above at minute mark 3:13.) **Note: I have tested the holding properties of the hot glue gun glue by washing and drying the mask 2 times. It has held up well so far, but extensive use hasn’t tested this method over time.
- Applying Heat and Bond and ironing in a hem. My package of Heat n Bond is VERY old! I found some nifty head n bond hem tape they have now online. Here it is! Note: Since heat n Bond is a product specifically intended for these type of applications, I believe it should hold well over the long term.
If you don’t have any of these products on hand, I’ve sourced them out online.
SHOP No Sew Adhesives

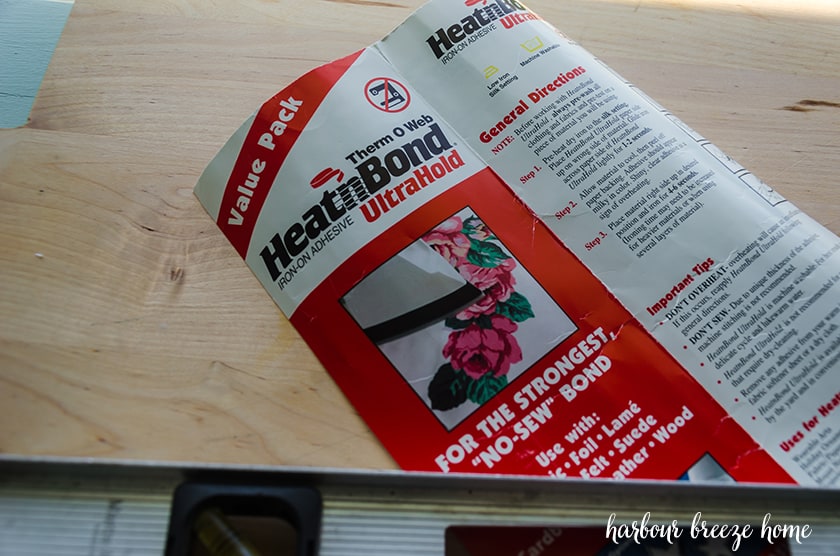
Although I tried the hot glue gun method (you can watch it in the video above at minute mark 3:13) and it seemed to get the job done, my preferred method is definitely the Heat n Bond.
You can find this Heat n Bond process on the video above at minute mark 4:06.
Here’s how I used it:
First I cut a thin strip of it the length of the cloth and ironed it on, bumpy side down.

Then, I peeled off the paper to reveal the adhesive underneath.
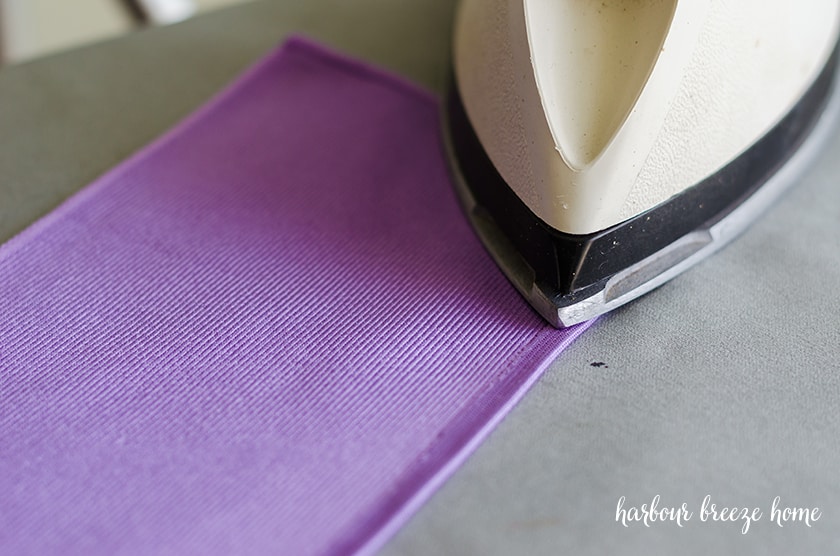
Just as if you are hemming with a sewing machine, you roll the edge over with the adhesive side down, and iron it down.
The end result is a nice neat, flat edge hem.
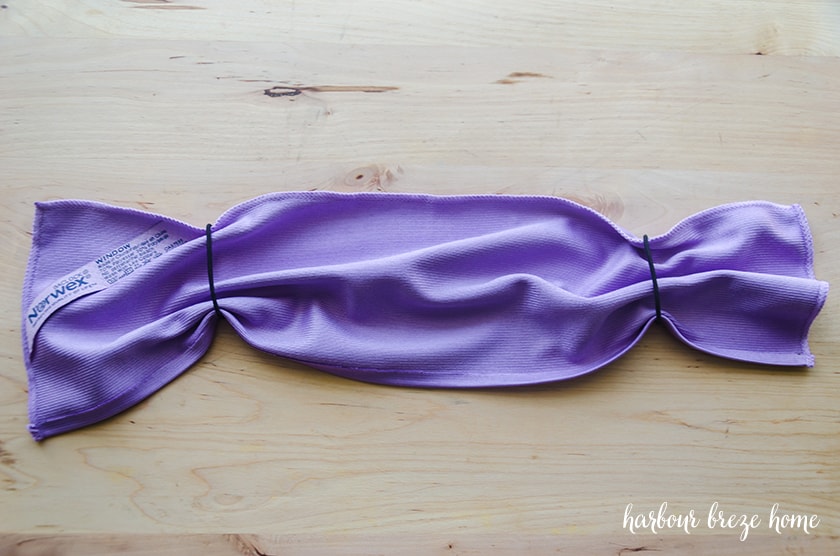
Put 2 hair ties or rubber bands on each end of the cloth, about 1/3 of the way down.
Fold the ends toward the center back.

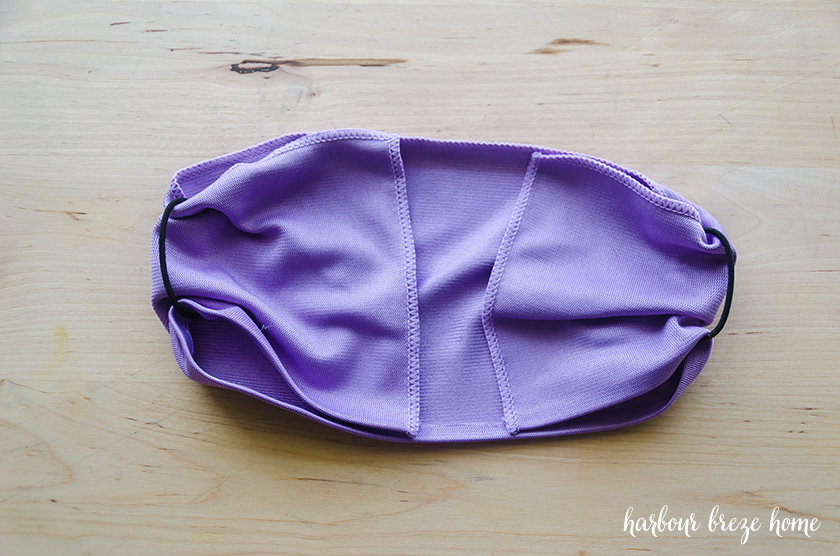
Use the rubber bands to hold the face mask into place with your ears.
After using all face masks, take the recommended precautions.
I’ve read that we must be careful when removing face masks and treat it as if it is contaminated. Here are some tips:
- Grasp it by the rubber bands and let it fall into a sink or your washing machine.
- Launder it after every use.
- Wash hands thoroughly after touching it.
Want to know more about Norwex?
- My Favourite Norwex Products (and why I completely switched my cleaning to Norwex)
- This month’s Norwex customer specials and warehouse sale.
- Click here to shop Norwex
Join my VIPs!
Get all kinds of helpful and practical ideas for your home as part of the VIP newsletter subscriber list. Receive craft ideas, recipes, budget friendly home decor tips, and more PLUS! receive exclusive access to the Free Printable Library filled with printable art, calendars, gift tags, and more. Click the button below and join today!


Such a useful post! I have been using this method to make a mask for myself and it works well. Pinned! Stay safe and well, Rita!
Great tutorial for a no-sew face mask, Rita. I’ve featured you on a round-up I posted this morning on different face mask tips and tricks! Pinned!
Another great tutorial for an easy mask that anyone can make! This post is sure to be very useful to many.
Thank you, Paula. Yes, I don’t think any of us expected to be crafting face masks for our family!!
Great idea! Thanks for the tutorial. Pinning!
Thanks for stopping by, Lauren. I hope this face mask tutorial was helpful!