
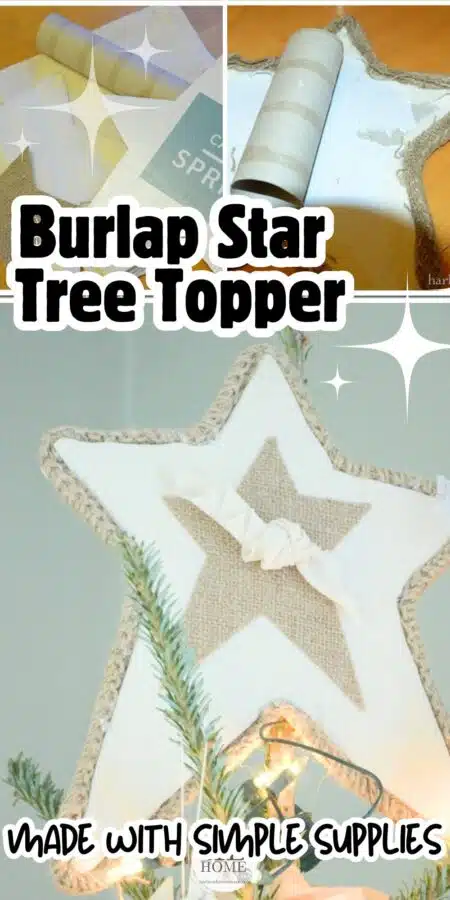
DIY Burlap Star Tree Topper (Rustic & Homemade!)
Bring a touch of rustic charm to your Christmas tree with this DIY Burlap Star Tree Topper. Made from simple, inexpensive materials, this star is the perfect “homespun” accent for a cozy farmhouse-style holiday.

Sometimes I’ve loved to flip through magazines or wander store aisles, looking for inspiration and dreaming of recreating the looks I see — but for less. Crafting something at home not only saves money, it adds that personal, handmade charm you just can’t buy.
Such was the case with this Burlap Star Tree Topper. I wanted one for my own Christmas tree but couldn’t find exactly what I had in mind, so I decided to spend an afternoon crafting it myself. It turned out to be the perfect “homespun” touch for the old-fashioned Christmas style I was going for that year.
If you’d like to make one too, I highly recommend turning on a Hallmark Christmas movie (or your favorite festive playlist!) while you craft. You’ll be surprised at how fun it is to create a little Christmas magic with your own two hands. 😉
Why You’ll Love This Burlap Star Tree Topper
- Rustic charm – perfect for farmhouse or nostalgic Christmas decor.
- Budget-friendly – made from simple craft supplies you may already have.
- Customizable – add ribbon, fabric scraps, or trim to make it your own.
- Homemade heirloom – feels nostalgic, cozy, and handmade with love.

Supplies You’ll Need
- Cardboard star shape
- Warm & Natural batting (or any thin batting)
- Flour sack dish towel (or similar lightweight fabric)
- Burlap fabric (from coffee sack or from the fabric store)
- Paper towel tube (cut to size for tree topper base)
- Spray adhesive
- Heat & Bond (fusible web for the burlap star)
- Hot glue gun + glue sticks
- Scissors and iron
Step-by-Step Instructions

Step 1: Cover the Star Base & Add the Fabric Layer.
Spray adhesive onto the cardboard star and press the batting onto the front. This adds soft texture and helps the fabric adhere smoothly. Then, lightly spray the batting with adhesive, then lay the flour sack dish towel over the top. Trim around the star, leaving about 1 inch of fabric around the edges. Clip the corners and hot glue the fabric neatly to the back.
Step 2: Add the Burlap Accent Star & Trim
Cut a smaller star shape from burlap and back it with Heat & Bond for stability. Iron it onto the center of your covered star. Glue burlap trim around the edges of the star for a finished look. Attach the cut paper towel tube to the back with hot glue—this will act as the holder to slide onto your tree.

Step 3: Add the Trim & Base
Glue burlap trim (or jute) around the edges of the star for a finished look. Attach the cut paper towel tube to the back with hot glue—this will act as the holder to slide onto your tree. Cover the exposed back with extra flour sack or burlap to tidy it up. (Don’t worry if it’s not perfect—no one will see the back once it’s on your tree!)

Step 4: Add a Decorative Center
For a final touch, knot a strip of flour sack towel into a small “flower” and hot glue it to the center of the star.
Now your rustic Burlap Star Tree Topper is ready to perch on your Christmas tree and bring cozy farmhouse charm to your holiday decor!

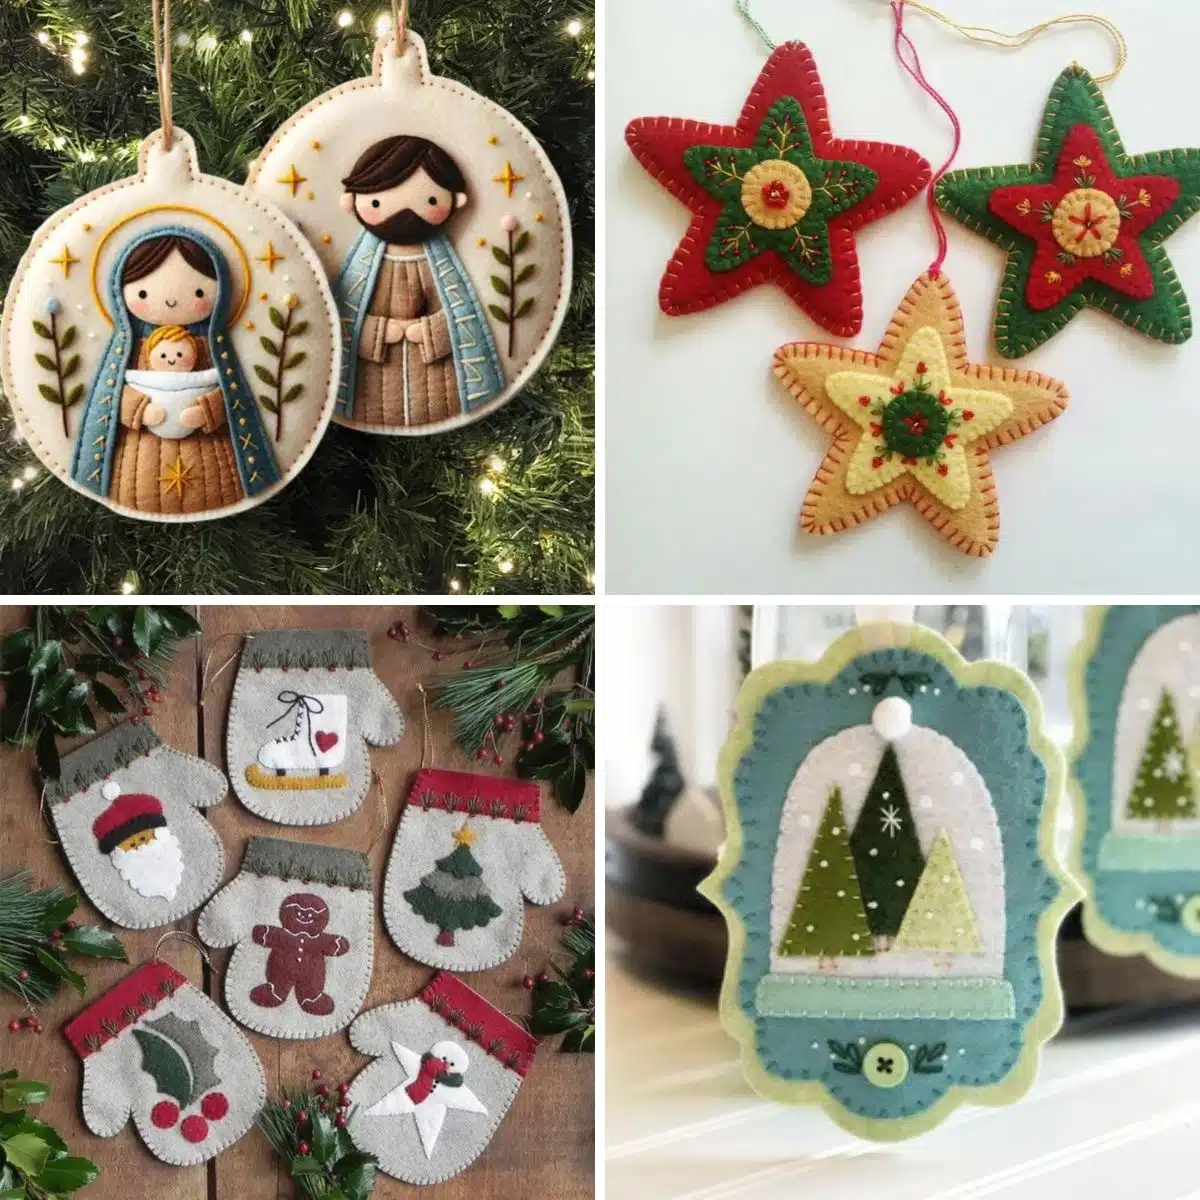
For More DIY Christmas Tree Ornaments:
- Easy fabric christmas ornaments shaped like Christmas trees!
- These christmas felt decorations are the cutest ornaments that would make great gifts, too.
- In the mood to do some paper crafts for Christmas? This book page ornaments diy is easy and fun, too.
- Fabric bird ornaments can be made with fabric scraps.
Pin this to find it later!

DIY Burlap Star Tree Topper
Create a rustic farmhouse-style tree topper with simple supplies.
Materials
- Cardboard star, batting, flour sack towel, burlap, trim, paper towel tube, spray adhesive, Heat & Bond, hot glue gun
Instructions
- Adhere batting to the star with spray adhesive.
- Cover with flour sack towel, trim edges, and glue to back.
- Iron a smaller burlap star (with Heat & Bond) onto the front.
- Glue burlap trim around edges and attach paper towel tube for tree base.
- Cover the back with extra fabric or burlap (optional).
- Add a knotted fabric “flower” to the center for decoration.
- ✨ Place on your tree and enjoy your rustic homemade Christmas star!

Oh my goodness.. Beautiful!!! Just love it.. Now a picture of the whold tree please..